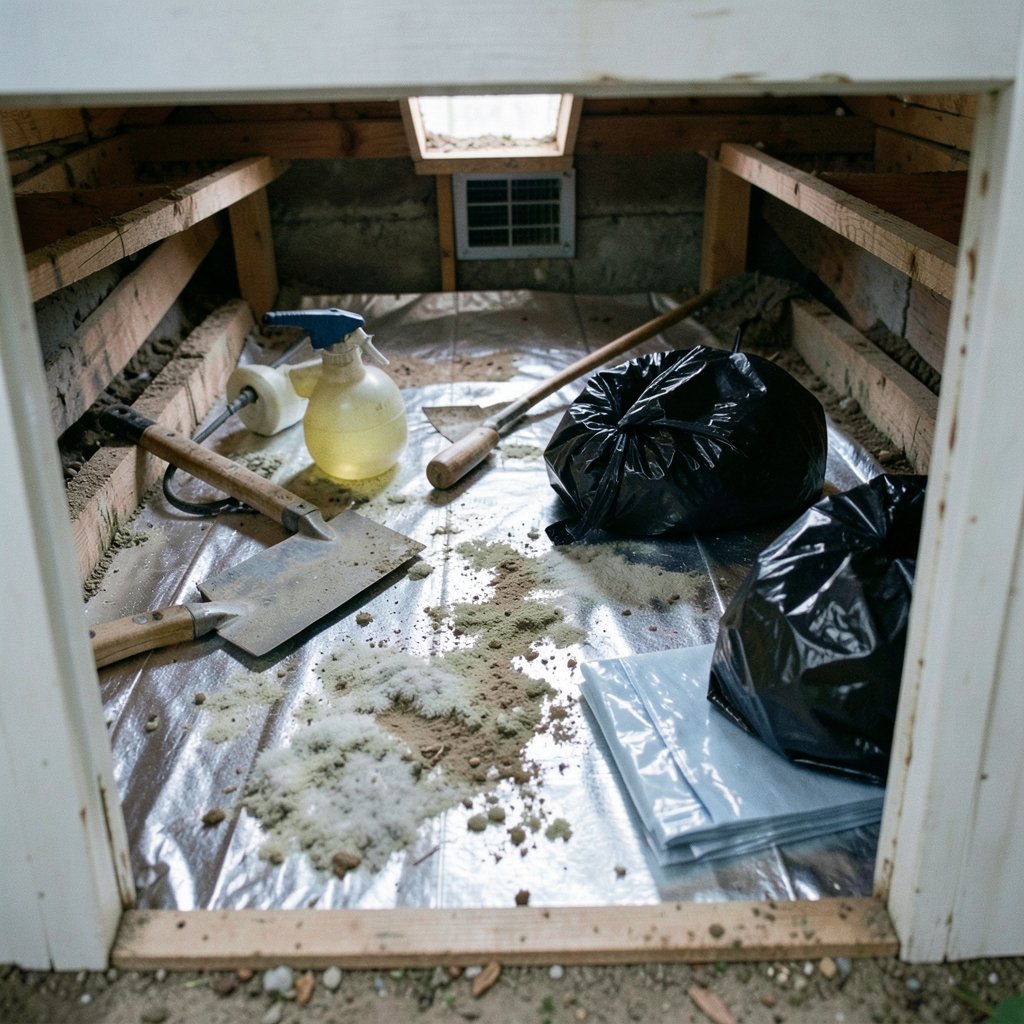
What is that musty smell drifting up through your floorboards, and why does it get worse every time it rains? If you have crawled under your house and found fuzzy patches on the joists, that happens often. Crawl space mold is one of the most common home problems in humid climates, and it is also one of the most misunderstood. Homeowners often get quoted thousands of dollars for remedies they do not need, or they spray bleach on the surface and call it done, only to watch the mold return within a season.
This guide cuts through the noise. It covers why mold grows down there, how to tell a real problem from a cosmetic one, which removal methods hold up over time, and the mistakes that turn a weekend project into a recurring expense.
Why Crawl Spaces Grow Mold So Easily
A crawl space sits in a perfect storm of conditions. It is dark, it is often poorly ventilated, and it is usually the coolest part of the house. Cool surfaces plus humid air equals condensation, and condensation plus organic material like wood joists equals mold.
The ground itself is a major source of moisture. Bare soil releases water vapor into the crawl space around the clock. In many homes, the soil stays damp year-round because downspouts dump water near the foundation or because the grading slopes toward the house instead of away from it. Add a dryer vent or a leaky duct, and you have a steady moisture supply feeding the problem.
Temperature matters too. When warm, humid air from outside enters a cooler crawl space, its relative humidity climbs. At the dew point, moisture condenses on joists, insulation, and pipes. That is why mold often appears on the underside of floors in summer, even in houses that seem dry everywhere else.
Signs of a Mold Problem Beyond a Damp Basement

Not every musty smell means mold, and not every white patch is mold. Here is how to read the signals.
- Smell: A persistent earthy, musty odor that gets stronger in humid weather is the most reliable early warning.
- Visible growth: Fuzzy or powdery patches on joists, subfloor, insulation facing, or stored boxes. Colors range from white and gray to green, brown, and black.
- Staining: Dark streaks or water rings on wood, even without visible fuzz, suggest past or active moisture.
- Peeling or discolored insulation: Insulation that sags, darkens, or looks damp is a red flag.
- Allergy-like symptoms indoors: Sneezing, coughing, or irritated eyes that ease when you leave the house are worth investigating, though they are not proof of mold on their own.
One important caution: “toxic black mold” is a media phrase, not a scientific category. Stachybotrys chartarum is one species among thousands, and the evidence on its health effects is genuinely mixed. Treat every mold finding as a moisture problem first and a species question second.
Test First or Skip the Test?
Testing is one of the most contested steps in crawl space mold removal. Here is the honest breakdown.
| Approach | What it tells you | When it makes sense |
|---|---|---|
| Do-it-yourself test kit | Presence of mold spores, limited species info | Rarely useful; results are hard to interpret |
| Professional air and surface sampling | Spore types and concentrations, comparison to outdoor baseline | When occupants have health concerns or a dispute is involved |
| No testing, visual inspection only | Whether visible growth and moisture exist | Most typical homes with obvious growth |
For most homeowners, a thorough visual inspection plus a moisture meter reading tells you what you need to know. Mold needs moisture, so the real question is never “is there mold?” but “where is the water coming from?” Testing becomes worthwhile when you need documentation, for example after a water loss claim or when a family member has a diagnosed respiratory condition.
The Removal Process, Step by Step
Professional remediation generally follows a defined sequence. Understanding it helps you evaluate quotes and spot shortcuts.
- Fix the moisture source. Repair leaks, redirect downspouts, correct grading, and fix plumbing drips. Removal without this step is temporary.
- Set up containment. Plastic sheeting and negative air pressure keep spores from drifting into the living space above.
- Protect the workers. At minimum, an N95 respirator, goggles, and gloves. Heavy contamination calls for higher-level respiratory protection.
- Remove porous materials that cannot be saved. Wet insulation, cardboard, and badly degraded wood usually go.
- Clean structural surfaces. Wire brushing, HEPA vacuuming, and an appropriate antimicrobial or detergent wash, followed by thorough drying.
- Dry the space. Dehumidifiers and air movers bring wood moisture content back to a normal range.
- Verify. Post-remediation verification, including moisture readings and sometimes clearance sampling, confirms the job worked.
The industry reference for this sequence is the IICRC S520 standard. It is a consensus standard, not law, but a reputable contractor should be able to explain how their process maps to it.
DIY Removal: When It Is Reasonable and When It Is Not
Small patches on accessible joists, roughly under ten square feet, are often manageable as a DIY job if the wood is structurally sound and you have fixed the water source. The practical approach:
- Wear a fitted N95 or better, eye protection, and gloves.
- Lay plastic on the soil to catch debris and make cleanup easier.
- Mist surfaces lightly to keep dust down, then scrub with a detergent solution.
- HEPA vacuum the area when dry.
- Run a dehumidifier for several days and confirm moisture readings drop.
What does not work well: bleach. Bleach kills surface mold on non-porous materials but does not penetrate wood, and it leaves behind water and dead spores that can still irritate. It also does nothing about the moisture that caused the growth.
Call a professional when growth covers large areas, when the wood is soft or crumbling, when the crawl space is inaccessible, or when anyone in the home has serious respiratory issues. The same logic applies to keeping the whole space dry afterward, which is where equipment choices start to matter. If you are weighing hardware, this guide on how to choose dehumidifier crawl spaces that actually works covers sizing and placement without the sales pitch.
Vapor Barriers, Encapsulation, and Ventilation
Once the mold is gone, the space needs to stay dry. Three strategies dominate the conversation, and they are not interchangeable.
Vapor barriers are sheets of heavy plastic laid over the soil. They block ground moisture from evaporating into the crawl space. A basic barrier is inexpensive and effective at reducing humidity, though it does not seal the walls or vents.
Encapsulation goes further. It covers the ground and lines the walls, seals the vents, and often includes a dedicated dehumidifier. It creates a conditioned, dry space. Encapsulation is the more thorough option, but be clear on one point: sealing surfaces does not remove existing contamination. Mold has to be addressed before or during encapsulation, not hidden under plastic.
Ventilation was the traditional advice, and it still has defenders. The trouble is that in humid climates, open vents bring in moist air that condenses on cool surfaces. Many building scientists now argue that sealed and conditioned beats vented in most of the country. Local code requirements vary by jurisdiction and code edition, so check what your area actually requires before committing.
A practical note from real projects: the order of operations matters more than the product brand. Moisture source first, mold removal second, drying third, and only then encapsulation or barrier installation. Skipping ahead is the single most common reason mold returns.
Common Mistakes That Cost Homeowners Money
A few patterns show up again and again in crawl space work.
- Spraying and walking away. Surface treatment without moisture control guarantees a repeat visit.
- Ignoring the exterior. Clogged gutters and downspouts that discharge next to the foundation undo every interior fix. This is free to correct and often the highest-value step.
- Sealing a wet space. Encapsulating over active moisture traps problems and can rot wood faster.
- Skipping the moisture meter. Judging dryness by touch is unreliable. Wood moisture content above roughly 20 percent supports mold growth; aim well below that.
- Choosing the cheapest quote without scope. A quote that omits containment, drying, or verification is not comparable to one that includes them.
The same principle of matching equipment to the actual job applies elsewhere in the home. Just as a dehumidifier must be sized to the space, a workspace only improves when the gear earns its footprint, a theme that runs through advice on the best desk accessories productivity actually earns its space. Buying more stuff is rarely the answer; buying the right thing once is.
What It Costs and How to Vet a Contractor
Costs vary widely by region, access, and severity, so treat any single number with suspicion. What you can control is the vetting process.
Ask every contractor the same four questions: What is the moisture source, and how will you fix it? What does containment look like? How will you verify the work is done? And what is excluded from the quote? A good answer names specifics. A vague answer about “industry-approved treatment” is a warning sign.
Get the scope in writing, including the number of dehumidifiers and air movers, whether insulation is replaced, and whether clearance testing is included. Some states license mold assessors and remediators, and in those places, verify the license before signing. In others, there is no licensing at all, which makes references and photos of past jobs more important.
Preventing the Problem From Coming Back
Prevention is mostly boring maintenance, and it works.
Keep gutters clear. Extend downspouts several feet from the foundation. Make sure the ground slopes away from the house. Fix plumbing drips the moment you notice them. Run a dehumidifier in the crawl space during humid months and check its drain line. Inspect the space twice a year, ideally in spring and fall, with a flashlight and a moisture meter.
If you are also tightening up the rest of the house, small space improvements tend to pay off in comfort and air quality. The same thinking behind space saving furniture ideas that actually work small rooms applies underground: use the space deliberately, keep it dry and clear, and avoid clutter that traps moisture and hides problems.
Conclusion
Crawl space mold removal is not really a mold problem. It is a water problem wearing a disguise. The homeowners who win are the ones who find the moisture source, remove the growth properly with containment and drying, verify the result with a moisture meter, and then keep the space dry with a barrier or encapsulation and a dehumidifier sized for the job. The ones who lose are the ones who spray bleach, seal the vents, and hope. Fix the water, clean the wood, dry it thoroughly, and the musty smell does not come back.
Frequently Asked Questions
Can I remove crawl space mold myself?
Yes, for small areas on sound wood, roughly under ten square feet, if you have fixed the moisture source. Wear an N95 respirator, goggles, and gloves, mist surfaces to limit dust, scrub with detergent, HEPA vacuum, and dry the space with a dehumidifier. Call a professional for large areas, soft or crumbling wood, or if anyone in the home has respiratory issues.
Does bleach kill crawl space mold?
Bleach kills mold on the surface of non-porous materials but does not penetrate wood, so roots and spores deeper in the grain survive. It also leaves behind moisture and dead spores that can still irritate. Detergent cleaning plus thorough drying is more effective, and neither works without fixing the water source.
How much does crawl space mold removal cost?
Costs vary widely by region, access, and severity, so no single figure is reliable. Quotes should be compared by scope, not price alone. A quote that omits containment, drying equipment, or post-remediation verification is not equivalent to one that includes them, even if the number looks lower.
Is encapsulation better than a vapor barrier?
They solve different problems. A vapor barrier blocks ground moisture and is cheaper. Encapsulation seals the ground and walls, closes the vents, and often adds a dehumidifier, creating a conditioned space. Encapsulation is more thorough but does not remove existing mold, so contamination must be addressed first. Local code requirements vary.
How do I know the mold removal actually worked?
Two checks matter: moisture readings and a visual inspection. Wood moisture content should be well below 20 percent after drying, and cleaned surfaces should show no visible growth or staining. Post-remediation verification, sometimes including clearance sampling, is standard practice on larger jobs and is worth requesting in writing.
Will mold come back after removal?
It will if the moisture source remains. Mold needs water to grow, so clogged gutters, downspouts discharging near the foundation, poor grading, and plumbing leaks all guarantee a repeat. Fix those, keep the crawl space dry with a barrier or encapsulation plus a dehumidifier, and inspect twice a year with a moisture meter.