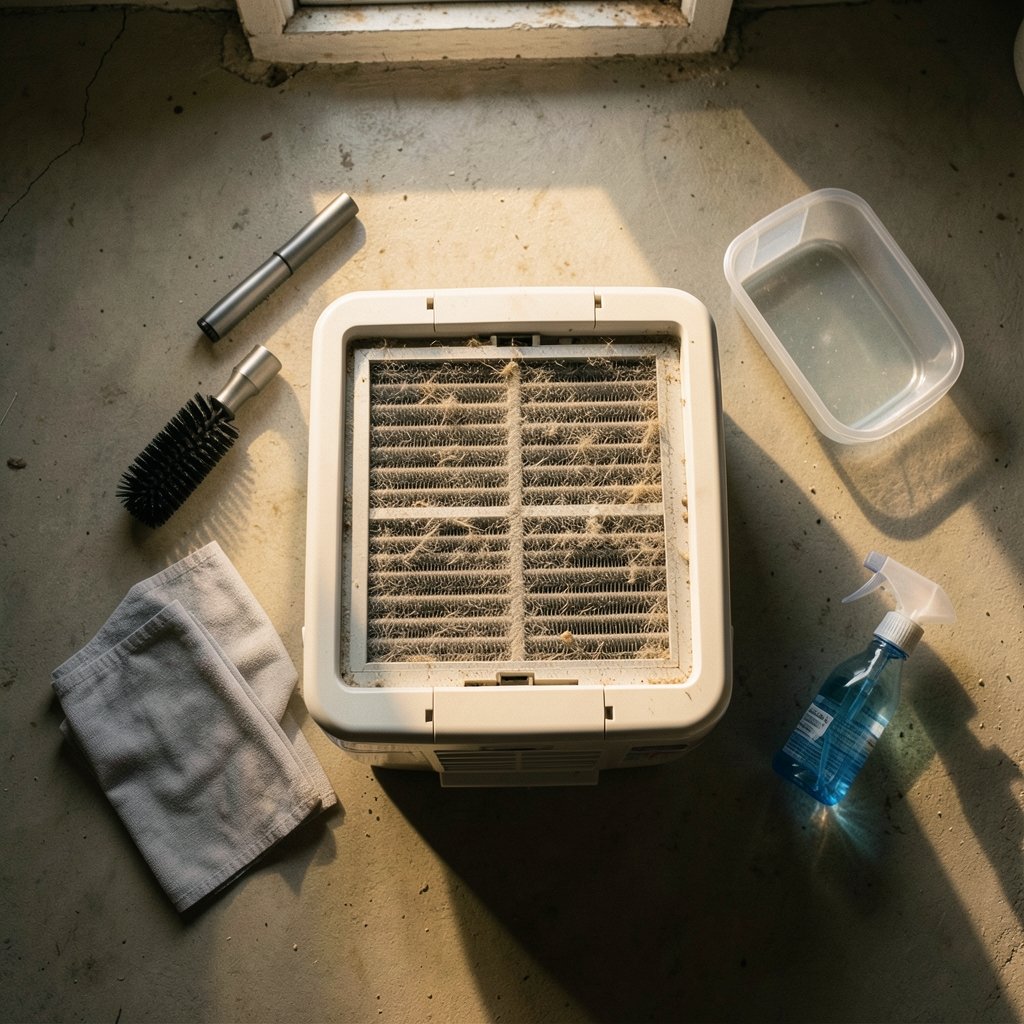
When did you last look behind your dehumidifier’s filter? If the answer is “never,” that is a common answer. Most people rinse the filter, hear the fan spin, and assume everything is fine. Meanwhile, a fuzzy blanket of dust, lint, and pet hair is quietly smothering the coils inside, forcing the machine to work harder for less moisture removal. (Dehumidifier)
Cleaning those coils is a straightforward job. It takes about 30 to 60 minutes, needs no special training, and can restore the drying power your unit had when it was new. This guide walks through the tools, the steps, the mistakes that cause damage, and how often to repeat the whole routine.
Why Coils Matter More Than Almost Any Other Part
A dehumidifier pulls damp air across two sets of coils. The cold evaporator coil chills the air so moisture condenses into water. The warm condenser coil then reheats that air before it leaves the unit. Both sets are made of thin aluminum fins packed tightly together, which is exactly why they collect debris so fast.
When those fins clog, three things happen at once. Airflow drops, so less moisture gets captured. The compressor runs longer to hit the set humidity, which raises electricity use. And the coil surface stays damp longer, which creates a friendly home for mold and mildew. (Mold Cleanup Guide)
According to the U.S. Department of Energy, moisture control and appliance efficiency go hand in hand, and a well-maintained unit simply performs closer to its rated capacity. A dirty coil quietly erodes that capacity month after month.
There is a comfort angle too. The U.S. Environmental Protection Agency notes that keeping indoor humidity in check is central to controlling mold growth indoors. A dehumidifier that cannot keep up because of clogged coils leaves your basement or crawl space damper than you think.
Tools You Actually Need

Gather everything before you start so you are not hunting for a brush with the cabinet half open.
| Tool | Purpose | Notes |
|---|---|---|
| Soft-bristle brush | Loosening dry dust from fins | A clean paintbrush or coil brush works |
| Vacuum with brush attachment | Pulling debris out of the coil | Low suction setting preferred |
| Fin comb | Straightening bent aluminum fins | Sold as a “fin straightener” |
| Coil cleaner spray | Dissolving sticky grime | Choose one labeled for the coil type |
| Mild dish soap and water | Light general cleaning | A few drops is plenty |
| Spray bottle | Rinsing or misting | Keep spray away from electronics |
| Towels and a shallow pan | Catching drips | Coils hold surprising amounts of water |
| Screwdriver set | Removing grilles or panels | Match the heads on your model |
| Nitrile gloves and eye protection | Safety | Cleaners can irritate skin and eyes |
One note on cleaners: read the label before buying. Some products are no-rinse evaporator cleaners, while others require a thorough rinse. Mixing up the two can leave residue that attracts new dust or, worse, push foam into electrical parts.
Step 1: Shut It Down and Unplug It
This is not a formality. Coils sit close to the fan motor, the control board, and wiring. Unplug the unit from the wall and let it sit for a few minutes.
Then move it somewhere you can work comfortably, ideally outdoors, a garage, or a utility sink area. Dehumidifiers are heavy when the tank is full, so empty the bucket first and lift with your legs. If the machine is too bulky to move, lay towels and a shallow pan under the coil area and work in place.
Step 2: Remove the Filter and Front Panel
Slide out the washable filter first. Most units have a filter behind the front grille that pulls straight out. Rinse it in warm water and set it aside to dry completely.
Next, look for the access panel. On many portable models, the coils sit directly behind the filter housing, and you can reach them with a brush without removing anything else. On others, you will need to take off the front grille, and occasionally the outer cabinet shell, by removing a handful of screws. Keep the screws in a cup so they do not vanish into the carpet.
If your manual shows a specific disassembly order, follow it. Owner’s manuals are the most reliable source for your exact model, and manufacturers like Frigidaire, GE, Midea, and hOmeLabs all publish them online.
Step 3: Dry-Clean First, Always
Here is the rule that prevents most messes: get the loose debris out before any liquid touches the coil.
Use the soft brush to sweep along the fins, not across them. Fins bend easily, and a bent fin blocks airflow just like dust does. Work top to bottom so loosened dust falls away rather than settling back in.
Then switch to the vacuum with the brush attachment. Run it gently over the coil face, letting suction do the work. A vacuum alone often removes the majority of surface dust, and it is far safer than blasting the coil with water.
Straightening Bent Fins
Hold the coil up to a light. If you see crushed or folded fins, a fin comb can restore them. Find the comb spacing that matches your fin count per inch, then draw it slowly through the damaged section in one direction. This is fiddly, patient work. Rushing it just bends more fins.
Step 4: Apply Coil Cleaner the Right Way
Now for the sticky layer that brushing cannot reach. Coil cleaner sprays break down the film of dust, oils, and biological growth that clings to the fins.
Follow the product’s directions precisely, but the general approach looks like this:
- Shake the can or bottle as directed.
- Spray evenly across the coil face from about 6 to 8 inches away.
- Let it dwell for the time stated on the label, usually a few minutes.
- Wipe or rinse according to the product type.
- Repeat on the second coil if your unit exposes both.
Two cautions matter here. First, keep spray and rinse water away from the fan motor and any electrical connections. Second, skip the garden hose on high pressure. A hard jet folds fins flat and drives water into places that will not dry.
If you prefer a gentler route, a spray bottle with a few drops of mild dish soap in warm water handles light grime well. Mist the coil, let it sit briefly, then rinse carefully with a low-flow spray.
Step 5: Rinse, Dry, and Reassemble
Rinse thoroughly if your cleaner calls for it. Residual cleaner becomes a dust magnet, and you will be back where you started in a month.
Then let everything dry completely before reassembly. Coils hold water in the fin gaps, so give them time. A dry coil also means the unit will not start up with moisture sitting against electrical components.
Reinstall the panel and screws, slide the dry filter back in, and refill or reinstall the bucket. Plug the unit in and run it for a few minutes. Listen for the fan and compressor, and check that airflow from the vent feels strong.
Common Mistakes That Cause Damage
A few errors show up again and again among first-time coil cleaners.
Skipping the unplug step. It takes five seconds and prevents the worst outcomes.
Bending fins with a stiff brush. Use soft bristles and light pressure. Fin damage is permanent.
Soaking the electronics. Water and control boards do not mix. Aim your spray at the coil, not the cabinet interior.
Using the wrong cleaner. Some sprays are designed for air conditioner coils and may not suit your dehumidifier’s materials. Read the label.
Forgetting the second coil. Many people clean the front evaporator and never look at the condenser behind it. Both collect debris.
Reassembling while wet. Moisture trapped inside encourages mold, the very thing you are fighting.
Ignoring the drain path. While you are in there, check the drip tray and drain hose for slime and blockages. A clean coil with a clogged drain still overflows.
How Often Should You Clean the Coils?
The honest answer depends on your environment. A dehumidifier running in a dusty basement with pets and carpet traffic will need attention far more often than one in a clean, sealed room.
| Situation | Suggested coil cleaning |
|---|---|
| Heavy use, dusty or pet-filled space | Every 1 to 2 months |
| Average home basement, moderate use | Every 3 months |
| Seasonal use only | Before and after each season |
| Visible dust mat or weak airflow | Immediately, regardless of schedule |
Filter care is separate and more frequent. Rinse the washable filter every two to four weeks, or more often in dusty conditions. A clean filter is your coil’s first line of defense, and it costs nothing to maintain.
Watch for signals that coils need attention sooner: the unit runs constantly without hitting the target humidity, the coil frosts over, airflow from the vent feels weak, or you notice a musty smell when it runs. Any of these point to restricted airflow.
Safety Notes Worth Repeating
Coil cleaners can irritate skin, eyes, and lungs. Wear gloves and eye protection, and ventilate the area. Never mix cleaning products. Keep children and pets out of the workspace while panels are off.
If your unit is under warranty, check the terms before disassembling anything beyond the filter. Some warranties require professional service for internal cleaning, and a DIY panel removal could complicate a claim. The Consumer Product Safety Commission also maintains recall information worth a quick search by model number, especially on older units.
Finally, if you spot scorched wiring, a cracked coil, or heavy corrosion, stop. Those are repair issues, not cleaning issues.
When Cleaning Is Not Enough
Sometimes clean coils still will not fix the problem. If the compressor short-cycles, the unit ices up repeatedly, or moisture removal stays weak after a thorough cleaning, the issue may be refrigerant, a failing sensor, or a blocked drain system.
Professionals can pressure-test and recharge sealed systems, which is not a DIY job. For a machine that is many years old, compare the repair quote against replacement cost. Modern units are considerably more efficient than models from a decade ago, so a new machine can pay back part of its price in lower running costs.
For routine maintenance questions, product guides, and help choosing the right unit for a damp space, OCCCY is a useful place to start.
Conclusion
Cleaning dehumidifier coils is one of those chores that feels intimidating until you do it once. Unplug the machine, clear the dry debris with a soft brush and vacuum, straighten any bent fins, apply the right cleaner, rinse carefully, dry completely, and reassemble. The whole job fits into an afternoon, and the payoff shows up in stronger airflow, faster moisture removal, and a lower electric bill.
Set a reminder for every three months, rinse the filter far more often, and watch for the warning signs of weak airflow. Your dehumidifier will quietly reward the effort with years of dependable service.
Frequently Asked Questions
How do I know if my dehumidifier coils need cleaning?
Look for weak airflow from the vent, a unit that runs nonstop without reaching the set humidity, frost on the coil, or a musty odor. Shine a light through the fins. If you cannot see through them, they are clogged.
Can I clean dehumidifier coils without taking the unit apart?
Often, yes. On many portable models the coils sit right behind the filter housing, so a soft brush and a vacuum brush attachment can reach them through the filter slot. If the coil is buried deeper, follow your owner’s manual for panel removal.
What is the best cleaner for dehumidifier coils?
A coil cleaner labeled for the coil type is the safest choice. No-rinse evaporator cleaners and foaming sprays are both common. For light dust, warm water with a few drops of mild dish soap works well. Always read the label for dwell time and rinsing requirements.
Can I use a pressure washer on the coils?
No. High-pressure water flattens the thin aluminum fins and forces moisture into electrical components and the fan motor. Use low-flow rinsing from a spray bottle or a gentle hose stream instead.
How often should dehumidifier coils be cleaned?
In a dusty basement with pets, clean every one to two months. For average household use, every three months is reasonable. Seasonal units should be cleaned before and after each period of use, plus any time airflow drops noticeably.
Is it safe to run the dehumidifier right after cleaning?
Only once everything is fully dry and reassembled. Trapped moisture near wiring is a hazard, and a damp coil encourages mold. Let the fins air dry completely, reinstall the filter and panels, then plug the unit back in and test it.