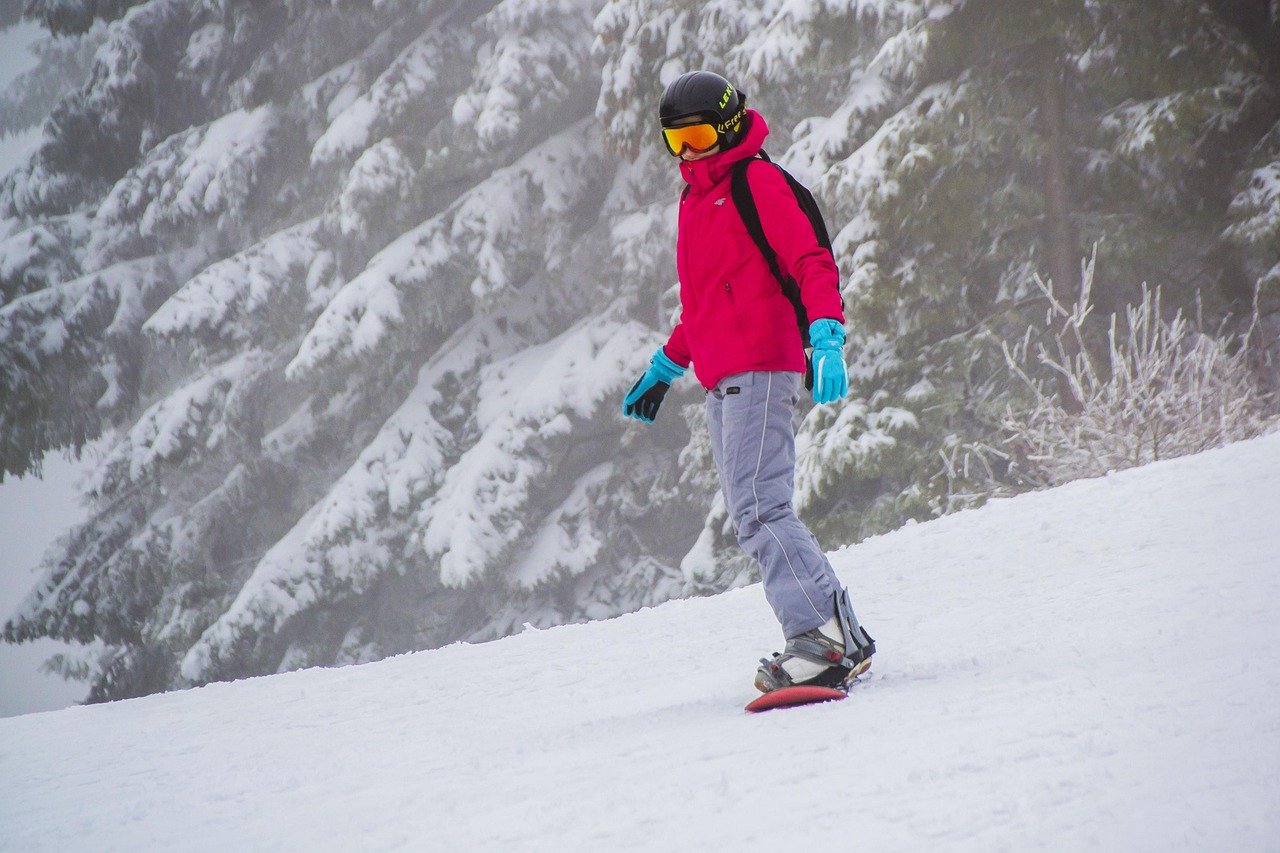
What if the hardest part of learning to snowboard isn’t balance or bravery, but knowing what to practice first? Most beginners strap in, point downhill, and hope for the best. That approach usually ends with sore wrists and a bruised ego. A better path exists, and it follows a clear sequence: pick a stance, learn to move on flat ground, slide sideways on gentle terrain, then link your first turns. This guide walks through that sequence step by step, with the practical details that actually make a difference on snow.
Before You Touch the Snow
Preparation happens before the lift ticket. Renting gear for the first few days is smarter than buying, because you don’t yet know what you like. Ask the rental shop for a board that reaches roughly between your chin and your nose when stood on end, and boots that feel snug but not painful. Loose boots are the single most common beginner equipment mistake: if your heel lifts when you flex your knees, the board will feel twitchy and unpredictable all day.
Dress in layers, not one giant coat. Snowboarding swings between sweaty effort and freezing chairlift rides, so a moisture-wicking base layer, an insulating mid layer, and a waterproof shell let you adjust. Waterproof pants matter more than a waterproof jacket, since beginners spend a lot of time sitting and kneeling in snow.
Safety gear deserves a serious look. A helmet is the baseline for most riders, and wrist guards are worth considering because wrist injuries are frequently cited as one of the most common snowboarding injuries, particularly among beginners who fall backward and reach out with an open hand. Learn to fall with closed fists and forearms rather than an outstretched palm.
Finally, book at least one lesson. Certified instructors teach a progression that has been refined over decades, and two hours with one can save weeks of self-taught frustration. Instructor certification bodies in the United States and the United Kingdom publish the teaching progressions their members follow, and resort schools build their beginner lessons around that same framework.
Find Your Stance: Regular or Goofy

Every snowboarder rides with one foot forward. Regular means the left foot leads; goofy means the right foot leads. Neither is better, and roughly speaking, the split across the population is fairly even.
A common informal test is to stand relaxed and have a friend give you a gentle push from behind. Whichever foot you instinctively step forward with is often your lead foot. Another trick: think about which foot you’d slide across a smooth floor in socks. The foot you put forward is usually the natural choice.
Treat these tests as hints, not verdicts. If you’ve skated, surfed, or ridden a skateboard, your stance there is a strong signal. And if you guess wrong, it isn’t a disaster. Many riders switch stance comfortably within a season, and some deliberately practice both directions to build well-rounded skills.
Learn to Move Before You Learn to Slide
Here’s the step most beginners skip, and it costs them. Before riding any slope, spend twenty or thirty minutes on flat snow with only your front foot strapped in. This is called skating, and it teaches you how the board behaves.
- Strap your front foot into the binding. Leave the back foot free.
- Push gently with your back foot, like a skateboard, and glide short distances.
- Practice steering the board with small movements of your front foot and knee.
- Ride the board with your free foot resting on the board’s stomp pad, keeping weight centered.
Skating builds the exact movement patterns you’ll need on lift ramps and flat runouts, where you cannot afford to fall. It also teaches you that the board responds to tiny inputs, not big dramatic ones. Once gliding feels calm, you’re ready for a gentle slope.
The First Skill on a Slope: The Falling Leaf
Find a wide, very gentle slope, ideally a designated beginner area. Strap both feet in and sit down facing downhill. From here, learn the falling leaf, the drill that teaches edge control without any turning.
- Stand up by rolling onto your toe edge, pushing with your hands, and rising smoothly. Keep your weight over the board.
- Point the board slightly across the slope and release the edge just enough to slide sideways.
- Travel across the hill on your heel edge (toes lifted), letting the board drift in one direction.
- Stop by increasing the edge angle and leaning gently into the hill.
- Repeat in the other direction, then practice the same pattern on your toe edge (heels lifted).
The falling leaf looks simple, but it teaches edge awareness, weight distribution, and the confidence to stop whenever you choose. Riders who learn it well often pick up turns faster because they already trust their edges.
Your First Real Turn
Turns combine three ingredients: edge angle, pressure, and a small amount of rotation. Beginners learn skidded turns first, where the board slides through the arc rather than carving a clean line. That’s normal and correct. Carved turns come much later.
The classic first turn, sometimes taught as a “garland” or “clock” drill, works like this:
- Start across the slope on your heel edge, in a comfortable traverse.
- Look in the direction you want to go, turning your head and leading shoulder first.
- Gently release the heel edge by softening your front knee and shifting weight toward the front foot.
- Let the board rotate downhill until it points straight down the fall line.
- Continue the rotation until you’re on your toe edge, then ride out the traverse and stop.
The most common beginner mistake is leaning back, away from the direction of travel. Leaning back feels safe but makes the board shoot out from under you. Instead, keep your weight slightly forward and your knees soft. Think about pressing your shin into the front of your boot rather than sitting back on your heels.
Expect the first few turns to be ugly. That’s fine. What matters is repetition on gentle terrain, not speed or style. Ten controlled turns on a bunny slope teach more than one terrifying run from the top.
Reading the Mountain and Riding Safely
Once you can link a few turns, you’ll start sharing space with far more people, and that’s where mountain etiquette matters. Most resorts in North America post a slope conduct code, often called the Your Responsibility Code, which sets out basics like yielding to the person downhill, stopping only where you’re visible, and looking uphill before starting. Read it once, and you’ll understand why some riders get annoyed at others.
A few practical habits keep you safer:
- Ride within control, meaning you can stop or avoid obstacles at any moment.
- Give people ahead of you plenty of room; they can’t see behind them.
- Stop on the side of a run, never in the middle or just over a crest.
- Wear a helmet and consider wrist guards, especially in your first season.
- Check the day’s snow report and respect closed terrain signs.
Fatigue is an underrated risk. Most injuries happen late in the day, when legs are tired and reactions slow. Calling it quits an hour earlier than planned is a genuinely smart move.
Practice Drills That Speed Up Progress
Improvement comes from deliberate practice, not from adding more runs alone. These drills work well for beginners and intermediates:
| Drill | What it trains | How to do it |
|---|---|---|
| Falling leaf | Edge control | Slide sideways on heel then toe edge, no turns |
| Garlands | Edge release | Make partial turns across the slope and back |
| One-footed gliding | Balance and board feel | Skate and glide with the back foot free |
| Traverse with hand drag | Body position | Ride across the slope and lightly touch the snow |
| Slow-speed linked turns | Control | Count three seconds per turn on gentle terrain |
Board sports and balance skills transfer surprisingly well, and cross-training pays off. Riders who also enjoy balance-based games often pick up body awareness faster; even something as simple as a family game night with a balance challenge can sharpen the coordination snowboarding demands. If you want ideas for off-slope activities that build similar skills, a look at the best board games for families offers a lighthearted way to stay sharp between trips.
Common Mistakes and How to Fix Them
Leaning back. The board accelerates away, and you fall. Fix: press your front shin into the boot and keep your chest over the front foot.
Straight legs. Stiff legs transmit every bump. Fix: stay flexed, like a spring, and let the terrain move under you.
Looking at your feet. Your body follows your eyes. Fix: look where you want to go, not down at the board.
Skipping lessons to save money. A single lesson often costs less than a day of lift tickets and replaces weeks of guessing.
Riding beyond your level. Terrain that’s too steep builds fear, not skill. Stay on gentle slopes until turns feel automatic.
Ignoring rest. Snowboarding is physically demanding. Take breaks before your legs turn to jelly.
When to Move Up Terrain
There’s no universal timeline, but a few markers suggest you’re ready for steeper, longer runs. You can link turns in both directions without stopping. You can control your speed on demand. You can ride a full run without falling more than once or twice. And you feel comfortable sharing a busy slope.
From there, progression usually means longer runs, then blue terrain, then your first powder day or park visit. Each step adds a new variable, so change one thing at a time. A rider who jumps from beginner slope to steep moguls in one day learns nothing except fear.
If you enjoy structured challenges as part of your learning, a playful approach helps. Some riders set small goals each session, the way a horse racing board game rewards steady progress and small wins. Others treat each run as a puzzle to solve. Either way, keeping sessions focused beats mindless laps.
Gear Progression After the First Season
Once you’ve ridden a handful of times and know you’ll stick with it, buying makes sense. Prioritize boots first, then bindings, then the board. Boots that fit well matter more than any board technology. A stiffer board suits aggressive riders; a softer, rockered board suits beginners and playful riders. (Trello alternatives beginners compare board tools choose one)
Don’t overlook maintenance. A waxed base glides better and protects the board. Edges need sharpening occasionally, especially if you ride icy terrain. Learning basic tuning saves money and teaches you how the board actually works.
Conclusion
Learning to snowboard follows a sequence, and following it makes the whole experience calmer. Pick a stance, practice skating on flat snow, learn the falling leaf on gentle terrain, then link your first skidded turns. Add safety gear, respect the slope code, and take a lesson early. Progress comes from controlled repetition, not from surviving one wild run. Give yourself permission to be a beginner, and the mountain becomes a lot more fun.
Frequently Asked Questions
How long does it take to learn to snowboard?
Most beginners can link a few turns on gentle terrain within two to three days of riding, especially with a lesson. Feeling genuinely comfortable on blue runs usually takes a full season of regular visits. Progress varies widely with fitness, prior board-sport experience, and how much time you spend practicing deliberately rather than just riding.
Is snowboarding harder than skiing?
They’re hard in different ways. Skiing separates your feet, which feels natural for walking, but requires coordinating two independent edges. Snowboarding keeps both feet on one board, which feels awkward at first but simplifies edge control once it clicks. Many people find the first day of skiing easier and the second day of snowboarding easier. (Snowboarding)
Do I need a lesson, or can I teach myself?
You can teach yourself, but lessons usually pay for themselves. Instructors correct body position in real time, which prevents habits that take months to unlearn. A single group lesson is a low-cost way to start with sound fundamentals, and many resorts bundle lessons with rentals and lift access.
Which foot should be forward on a snowboard?
Left foot forward is called regular, right foot forward is goofy. Try the push test, or think about which foot you’d slide on in socks. If you skateboard, surf, or skate, use that stance. Guessing wrong isn’t a problem; you can switch, and practicing both directions builds better overall control.
What safety gear should a beginner wear?
A helmet is the standard starting point. Wrist guards are worth considering because wrist injuries are commonly reported among beginner snowboarders who fall onto an outstretched hand. Waterproof pants and gloves matter for comfort, and impact shorts help during the learning phase when falling is frequent.
How do I stop on a snowboard?
Stop by turning the board across the slope and increasing your edge angle. On your heel edge, lift your toes and lean slightly into the hill. On your toe edge, lift your heels and press your shins forward. Practice both on gentle terrain with the falling leaf drill until stopping feels automatic.