Which way should the fan blow? It sounds like a beginner question, but even experienced builders get it wrong. Every year, people finish a build, boot it up, and watch their CPU temperatures climb because one fan is pushing hot air back into the case. The good news is that fan airflow direction is one of the simplest things to get right once you know what to look for. This guide covers the arrows on the frame, the intake-versus-exhaust rules, push-pull radiator setups, and the mistakes that quietly wreck thermal performance. (Intel support: fan and airflow guidance)
Why Airflow Direction Matters More Than Fan Count
A case full of fans does not automatically run cool. Air has to move through the chassis in a deliberate path: cool air in from the front or bottom, hot air out the back or top. If two fans fight each other, you get turbulence and trapped heat. Adding a third or fourth fan in the wrong orientation can actually make things worse by disrupting a working flow pattern.
There is also the dust question. A case with more intake than exhaust runs at positive pressure, which means air is pushed out through the seams and gaps rather than pulled in. That tends to reduce dust buildup, especially when the intake fans sit behind filters. A case with more exhaust than intake runs at negative pressure, and unfiltered gaps become dust straws. Neither setup is catastrophic, but positive pressure is generally easier to live with.
Fan direction is set by two things: the shape of the blades and the orientation of the frame. It is not set by the connector type, the cable, or the brand. A PWM fan and a DC fan blow the same way. That distinction only affects how the fan’s speed is controlled. (Computer fan)
The Arrows on the Fan Frame Are Your Cheat Sheet
Almost every case fan has two small arrows molded into the plastic frame, usually on one of the sides near the screw holes. One arrow shows the direction the blades spin. The other shows the direction the air moves. The airflow arrow is the one that matters for mounting.
If the arrows are missing or too faint to read, there is a reliable fallback: look at the blades. The concave, scoop-shaped side faces the direction air enters, and the air exits on the side with the motor hub and the support struts. Put another way, the side with the sticker and the frame struts is the exhaust side.
A quick practical test that works every time: hold the fan in front of you, plug it in, and feel the air with your hand before you commit to screws. Ten seconds of testing beats disassembling a finished build because the rear fan is blowing inward.
Common mistake number one: trusting the label. The brand sticker often faces outward on a rear exhaust fan, which leads people to assume the labeled side is the “front.” It is not. The label side is the exhaust side on the vast majority of fans.
The Standard Intake and Exhaust Layout
The convention that works in nearly every mainstream case is simple. Front and bottom fans bring air in. Rear and top fans push air out. This follows the natural rise of hot air and matches how most chassis are built, with dust filters on the front and bottom and mesh or open grilles at the rear and top.
| Case Position | Direction | Why |
|---|---|---|
| Front | Intake | Pulls cool room air through the front filter |
| Bottom | Intake | Feeds cool air to the GPU |
| Rear | Exhaust | Vents hot air from the CPU tower |
| Top | Exhaust | Lets rising heat escape |
| Side (on some cases) | Intake | Directs air at the GPU or VRM area |
Two practical tips make this layout work better. First, keep intake and exhaust roughly balanced, or lean slightly toward intake for positive pressure. Second, do not put an exhaust fan directly in front of an intake fan with nothing between them. That is a short circuit, and the air never reaches your components.
If you are building around a compact or unusual chassis, the same logic still applies, just compressed. Small-form-factor builds often rely on a single intake and a single exhaust, which makes getting each one right even more important. The same principle of deliberate airflow applies to handheld and console cooling discussions, which is why coverage of hardware like the rumored Nintendo Switch 2 Lite and its Samsung 8LPU Plus chip tends to focus on thermal design rather than raw specs.
Push, Pull, and Push-Pull on Radiators
Radiator mounting confuses people because the words “push” and “pull” describe the fan’s relationship to the radiator, not the case. A push configuration places the fan on the intake side, blowing air through the fins. A pull configuration places the fan on the exhaust side, drawing air through the fins. Push-pull uses fans on both sides.
| Configuration | Fan Placement | Trade-off |
|---|---|---|
| Push | Intake side of radiator | Easier to clean, good static pressure |
| Pull | Exhaust side of radiator | Easier to route cables, slightly less efficient |
| Push-pull | Both sides | Best performance, more noise and cost |
For most builders, a single set of fans in push is enough. Push-pull earns its keep on thick radiators or in high-heat builds, but the gains are modest and the noise adds up. What matters far more is that the radiator gets fresh air. A top-mounted radiator set to exhaust pulls warm case air through the fins, which is workable but not ideal. A front-mounted radiator set to intake feeds the fins with cool room air, at the cost of warming the case interior slightly.
One more detail worth knowing: flipping a fan to reverse its airflow technically works, but many blade designs are optimized for one direction. Reversed operation can be noisier and less efficient. That is why reverse-blade fans exist. They are built to spin the “wrong” way while still moving air in the intended direction, which lets a builder keep the visually clean side of the fan facing outward. These are popular in showcase builds and some liquid-cooling setups.
Reading Real-World Builds and Buying Decisions
Airflow direction is only one variable in a cooling plan. Fan quality, case mesh, and component TDP all matter. That is why buying advice for prebuilts and laptops often focuses on thermal headroom rather than fan counts, the same way roundups of the best phones in 2026 weigh sustained performance and heat management instead of peak benchmark numbers.
The same logic shows up in gaming hardware. Handheld PCs live or die by their cooling, which is part of why interest in Steam Deck alternatives when stock runs dry centers on how each device handles sustained heat. And for anyone building a gaming rig on a budget, timing purchases around sales events matters as much as fan orientation, which is why guides to Black Friday car deals and pricing strategy follow the same seasonal logic that PC part buyers use.
A Practical Checklist Before You Screw Anything In
- Identify the airflow arrow on each fan frame, or use the strut-side rule.
- Decide the case’s intake and exhaust positions before mounting anything.
- Test each fan’s direction by hand or with a tissue before final assembly.
- Keep front and bottom as intake, rear and top as exhaust.
- Aim for slightly more intake than exhaust to stay dust-positive.
- Check that no intake blows directly into an exhaust with nothing between them.
- Re-check radiator fans separately, since push and pull describe the radiator, not the case.
Common mistake number two: mounting the rear fan as intake because it “looks better” with the label facing out. It does not look better once the CPU is throttling. Common mistake number three: assuming a fan with a higher CFM rating will fix a bad layout. It will not. A 70 CFM fan pointed the wrong way is still pointed the wrong way.
Common mistake number four, and the most expensive: buying a full set of fans before planning the layout. Sketch the airflow path first, then buy. Most builds need two or three case fans, not six.
For readers thinking about the software side of a build, the same planning discipline applies to game engines, as comparisons of Roblox Studio, Unity, and Godot make clear. Pick the tool that fits the job rather than the one with the biggest feature list.
What Actually Changes in 2026
The fundamentals of fan direction have not moved. Arrows still mark the frame, front and bottom still bring air in, and push-pull still describes radiator mounting. What has shifted is the surrounding hardware: denser GPU coolers, taller CPU tower coolers, and cases with more mesh and fewer drive cages. Those changes make airflow planning more important, not less, because modern components dump more heat into a smaller volume.
Reverse-blade fans have also become more common as a product category, giving builders a way to keep a clean visual orientation without sacrificing airflow direction. If a build calls for a fan that looks like it is blowing inward but actually exhausts, that is the part to look for.
One thing that has not changed and probably never will: the hand test. Before you close the side panel, power on the system and feel the air at each vent. Intake vents should feel like cool air entering. Exhaust vents should feel warm. If a vent feels wrong, flip the fan. It takes five minutes and saves an hour.
Conclusion
PC fan airflow direction comes down to a few durable rules. Read the arrows on the frame, or use the strut side as the exhaust side. Run front and bottom as intake, rear and top as exhaust. Keep pressure slightly positive to limit dust. Treat push and pull as radiator terms, not case terms. And always test with your hand before final assembly.
The parts change every year. The physics do not. Get the direction right, and every other cooling upgrade you make will actually pay off.
FAQ
Which way should my case fans blow?
Front and bottom fans should blow air into the case as intake. Rear and top fans should blow air out as exhaust. This follows natural heat rise and matches how most cases are built with filters at the front and bottom.
How do I tell which way a fan blows?
Look for the small arrows molded on the fan frame. One shows blade rotation, the other shows airflow direction. If the arrows are faint, the side with the motor hub and support struts is the exhaust side.
Does the fan connector affect airflow direction?
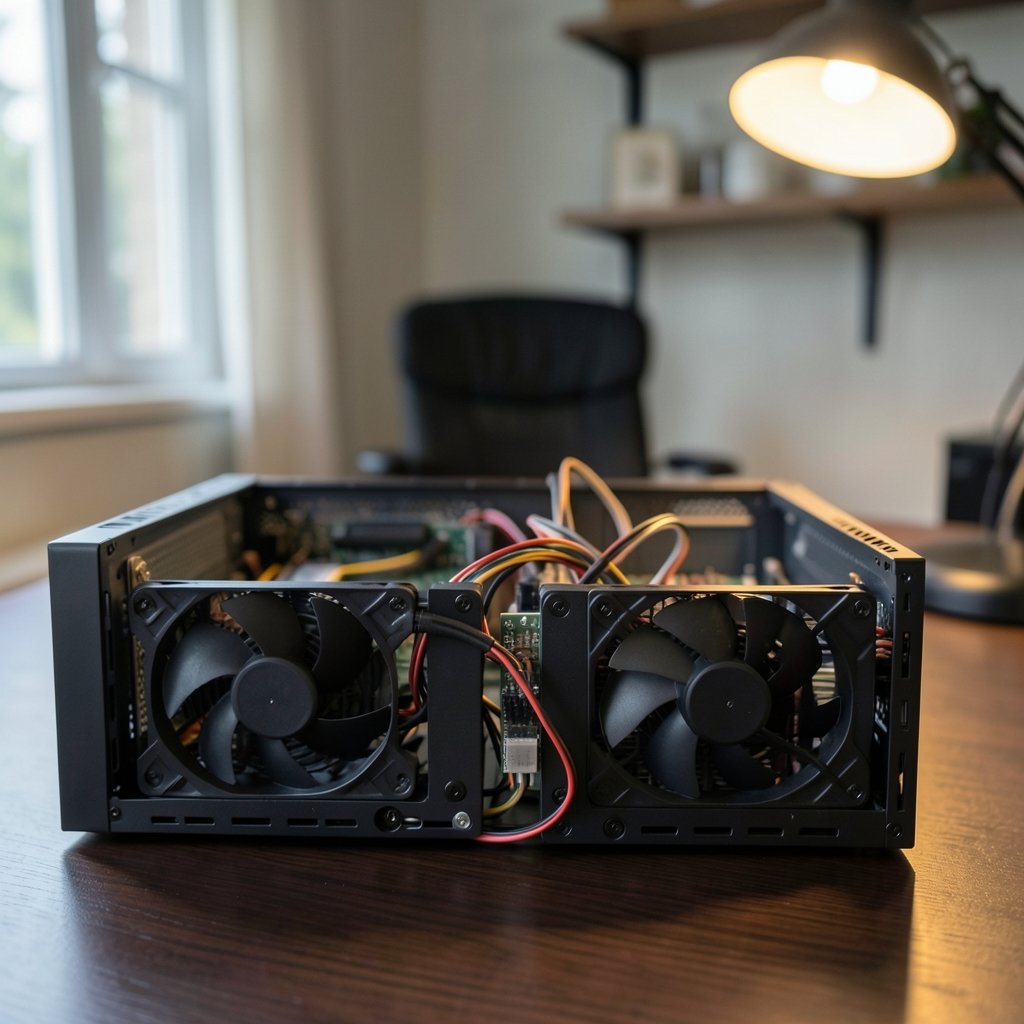
No. PWM and DC connectors only control how the fan’s speed is managed. Airflow direction is determined entirely by blade geometry and how the fan is mounted.
What is the difference between push and pull?
Push and pull describe how a fan is mounted on a radiator. Push places the fan on the intake side blowing through the fins. Pull places it on the exhaust side drawing air through. Push-pull uses fans on both sides.
Should I use more intake or more exhaust fans?
Slightly more intake is usually the better choice. Positive pressure pushes air out through seams and gaps, which limits dust ingress. Negative pressure tends to pull dust in through unfiltered openings.
Can I just flip a fan to reverse its airflow?
You can, and it will move air the other way, but many blade designs are optimized for one direction. Reversed operation can be noisier and less efficient. If you need a reversed look, a reverse-blade fan is the better option.