
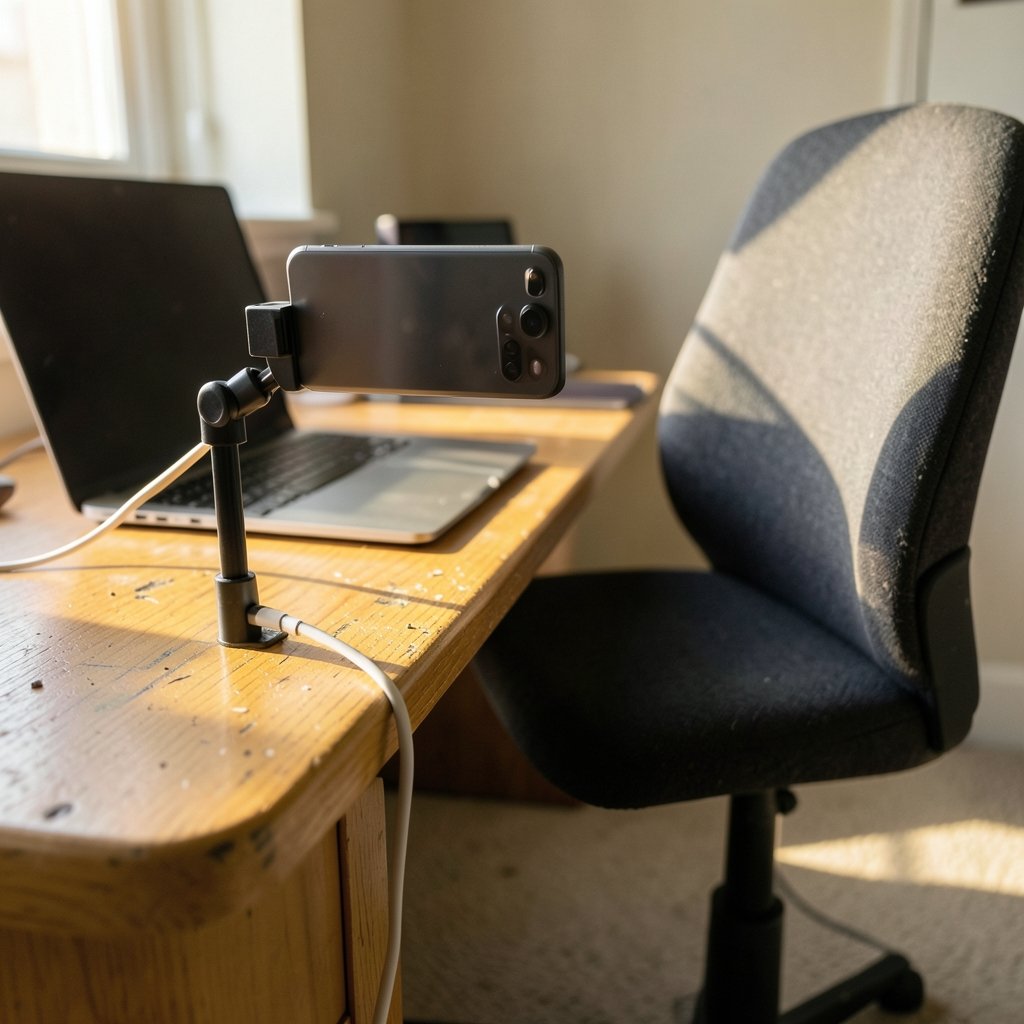
Webcams are one of the strangest bottlenecks in modern tech. Laptop makers still ship 720p cameras in machines that cost four figures, and standalone webcams regularly sell out or cost more than a decent used phone. Meanwhile, millions of Android phones sit in drawers with cameras that beat most dedicated webcams on paper. According to statcounter’s mobile operating system data, Android runs on roughly seven out of every ten smartphones worldwide, which means there is an enormous supply of unused camera hardware waiting to be repurposed.
The good news: turning an Android phone into a webcam is no longer a hack. Depending on your phone and OS version, it can be as simple as plugging in a cable. The less good news: results vary wildly by device, and a few common mistakes can turn a five-minute setup into an hour of frustration. This guide walks through what actually works, what to avoid, and how to get a picture that looks professional rather than improvised.
Why Use an Android Phone as a Webcam at All?
The case is stronger than most people expect. A mid-range Android phone from the last few years typically has a better sensor, wider aperture, and smarter image processing than a budget webcam. Phones also handle low light better, and many support 4K video capture that no $50 webcam can match.
There are practical reasons too:
- Cost: If you already own the phone, the setup is free or close to it.
- Portability: A phone on a small tripod beats a clamped webcam for travel and hot-desking.
- Flexibility: You can position the phone anywhere, angle it downward for document sharing, or use the rear camera for a sharper image.
- Backup value: An old phone with a cracked screen but a working camera becomes useful again.
The trade-offs are real, though. Phones get hot during long calls, batteries degrade with constant charging, and not every conferencing app plays nicely with virtual camera sources. Knowing those limits up front saves disappointment.
The Native Route: USB Webcam Mode on Modern Android

The cleanest method arrived with Android 14, which added a built-in USB webcam feature. Plug the phone into a computer with a USB cable, and the phone can present itself as a standard UVC (USB Video Class) webcam, the same category of device as any plug-and-play camera. No third-party app, no driver installation, no companion software on the desktop.
The catch is that this feature depends on the phone maker enabling it. Google’s own Android Developers blog documents the capability, and Pixel devices generally support it, but support across other manufacturers has been inconsistent. Some brands shipped it quickly; others have been slower or silent.
How to Enable USB Webcam Mode
- Connect the phone to your computer with a data-capable USB cable. Charge-only cables will not work, and this trips up more people than any other step.
- Open Settings and look for USB preferences or a notification about the current USB connection.
- Choose Webcam from the list of USB use options. If you only see file transfer, charging, and tethering, your device does not support the feature natively.
- On the computer, open your video app’s camera settings and select the phone from the list of available cameras.
A quick way to test: open the camera app on Windows or QuickTime on macOS. If the phone appears as an input source there, it will work in Zoom, Teams, Meet, and most other apps.
What to Do If Your Phone Lacks the Feature
If the webcam option is missing, you have three choices: wait for a software update, use a third-party app instead, or check whether your device model is simply not supported. Before buying anything new, it is worth checking whether a newer handset in your budget supports the feature out of the box; a roundup of the best android phone 2026 options will usually note webcam support where it exists. (Webcam)
Third-Party Apps: The Universal Fallback
Third-party webcam apps have filled this gap for years, and they remain the most reliable option for older phones and unsupported brands. The three names that come up most often are DroidCam, Iriun Webcam, and Camo. All three work on a similar principle: an app on the phone captures video, a small driver or client on the computer receives it, and the operating system treats the result as a camera.
| App | Connection | Typical Strength | Watch Out For |
|---|---|---|---|
| DroidCam | USB or Wi-Fi | Broad device support, mature setup | Free tier limits resolution and adds a watermark |
| Iriun Webcam | USB or Wi-Fi | Simple, lightweight | Fewer image controls |
| Camo | USB | Strong image quality and manual controls | Best features sit behind a subscription |
Feature sets and pricing change frequently, so check each vendor’s current terms before committing. The general pattern holds: free tiers are fine for casual calls, paid tiers matter for streaming and professional work.
Setting Up a Third-Party App
- Install the phone app from Google Play and the matching desktop client from the vendor’s site.
- Connect the phone by USB for the most stable connection, or join both devices to the same Wi-Fi network.
- Grant camera and microphone permissions when prompted.
- Launch the desktop client and confirm the video feed appears.
- In your conferencing app, select the virtual camera as the video source.
One practical tip from experience: USB beats Wi-Fi almost every time. Wi-Fi is convenient, but latency, dropped frames, and compression artifacts show up the moment your network gets busy. If the call matters, use a cable.
Choosing the Right Camera and Getting the Picture Right
Most people default to the front camera because it faces them. That is usually the wrong choice. Rear cameras on Android phones are consistently better: larger sensors, better optics, and higher resolution. The awkward part is framing, since you cannot see the screen while the rear camera faces you.
The fix is simple. Use a phone tripod or a small clamp mount, position the phone so the rear camera points at your face, and check the framing in the desktop preview window before joining a call. Once it is set, leave it set.
Lighting and Framing Basics
- Face a window. Natural light from the front flatters everyone; backlighting turns you into a silhouette.
- Raise the camera to eye level. A phone propped on a desk looks up your nose. A stack of books works fine.
- Keep the background simple. A plain wall or a shelf reads better than a cluttered room.
- Lock exposure and focus in the app if the option exists, so the image does not hunt when you move.
Resolution and Frame Rate Trade-offs
Higher resolution is not automatically better. A 1080p feed at 30 frames per second looks smoother and more professional than a 4K feed that stutters. If your computer or connection struggles, drop to 720p and keep the frame rate steady. Most video calls compress heavily anyway, so the difference between 1080p and 4K rarely survives the trip to the other end.
Common Mistakes That Wreck the Setup
A few recurring problems account for most failed attempts. Avoiding them saves a lot of time.
Using a charge-only cable. This is the single most common cause of “it just doesn’t work.” The cable that came with a cheap power bank often carries no data. Swap in a known data cable first.
Leaving the phone on Wi-Fi while charging. Wireless connections plus constant charging means heat, and heat means the phone throttles, dims the screen, and sometimes drops frames. USB connection solves both problems at once.
Forgetting about the battery. Running a phone as a webcam for hours drains and recharges the battery constantly. Over months, that is hard on the cell. If the phone is a permanent desk fixture, consider capping charge at around 80 percent if your device supports a battery protection setting.
Ignoring the microphone. Phone mics are decent but pick up room echo and keyboard noise. A cheap USB microphone usually beats phone audio, and using separate audio and video sources is normal in most apps.
Not testing before the meeting. Join a test call five minutes early. Every platform has a settings preview, and it takes thirty seconds to confirm the camera shows up. Discovering the problem after the call starts is avoidable.
Security and Privacy Considerations
A phone acting as a webcam is still a phone with a camera pointed at your room. Two habits matter.
First, review app permissions. Third-party webcam apps need camera access, and some request far more than that. Check what each app asks for and whether the desktop client installs background services you did not expect. Second, disconnect or cover the lens when the setup is not in use. It sounds paranoid until you realize how often “camera on by default” settings surprise people. If you want a broader picture of how the two major mobile platforms handle these questions, a comparison of android vs iphone security key differences is a useful starting point.
There is also the network angle. Wi-Fi-based webcam apps stream video across your local network. On a trusted home network that is fine. On shared or public Wi-Fi, USB is the safer choice.
Making the Setup Comfortable for Daily Use
If the phone is going to live on your desk, treat it like proper equipment. A small tripod with a flexible mount costs very little and removes the daily juggling act. A right-angle USB cable keeps the setup tidy and reduces strain on the port, which is a genuine weak point on phones that get plugged in constantly.
For sound, a basic USB microphone or a headset beats the phone’s built-in mic every time. For power, a powered USB hub keeps the phone charged while passing data to the computer. And if you are setting up a workspace for someone less technical, a simpler dedicated device may be the better answer; the guidance on the best cell phone for seniors covers the trade-offs between simplicity and capability.
One more practical note: keep the phone’s screen off or dimmed during calls. A bright screen next to your face adds glare and distracts you. Most webcam apps have a setting to blank the display while streaming.
When a Dedicated Webcam Is the Better Choice
The phone-as-webcam approach has real limits. If you spend four or more hours a day on video, a dedicated webcam is usually the more comfortable and durable answer. It does not need charging, it does not overheat, and it is always in the same position.
The phone wins in specific situations: occasional calls, travel, a temporary remote setup, or when image quality matters more than convenience and you already own a good handset. It is also the better option when you need to point a camera at a whiteboard, a document, or a desk surface, since a phone on a flexible mount is far more adaptable than a fixed webcam.
The honest verdict is that the phone is an excellent stopgap and a genuinely good permanent solution for light users, but heavy users eventually buy a webcam and stop thinking about it.
Conclusion
Using an Android phone as a webcam is one of the highest-value tech tricks available, largely because the hardware is already sitting there. On newer devices, the built-in USB webcam mode makes it a plug-and-play affair with no software at all. On older or unsupported phones, a third-party app bridges the gap in minutes.
The details that separate a usable setup from a frustrating one are unglamorous: a data cable, a stable mount, decent light, and a quick test before the call starts. Get those right and the phone will outperform most budget webcams without any fuss. Get them wrong and you will spend the first ten minutes of every meeting troubleshooting instead of talking. Choose the native route if your phone supports it, fall back to an app if it does not, and keep a cable within reach.
Frequently Asked Questions
Can I use my Android phone as a webcam without installing an app?
Yes, if your phone supports the native USB webcam feature introduced with Android 14. Connect the phone by USB, select the webcam option in the USB preferences, and the computer will detect it as a standard camera. Support varies by manufacturer, so check your device’s settings before assuming it works.
Why doesn’t my computer detect my phone as a webcam?
The most common cause is a charge-only USB cable that carries no data. Try a different cable first. If that fails, confirm the phone actually supports webcam mode, check that you selected the right USB option on the phone, and make sure the camera is not being used by another app.
Is USB or Wi-Fi better for a phone webcam?
USB is more reliable. It delivers a steadier frame rate, avoids network congestion, and keeps the phone charged during long calls. Wi-Fi is convenient for quick setups but shows latency and compression artifacts as soon as the network gets busy.
Will using my phone as a webcam damage the battery?
Constant charging and discharging does accelerate battery wear over time. The phone will also run warmer during long sessions. If the setup is permanent, enable any battery protection or charge-limiting feature your device offers, and keep the phone ventilated rather than buried under papers.
Which camera should I use, front or rear?
The rear camera almost always produces a better image thanks to larger sensors and better optics. The trade-off is that you cannot see the screen while it faces you, so use a tripod or mount and check the framing in the desktop preview before joining a call.
Can I use an old Android phone with a cracked screen as a webcam?
Often yes. If the camera works and the phone can connect by USB, a third-party app can stream video without you needing to interact with the screen much. Set the app to launch automatically and control everything from the computer.
