

How long should a resin print sit in the wash station before you hit the cure button? Ask ten makers and you’ll get ten answers, usually delivered with total confidence and no supporting evidence. The truth is that wash and cure times are not fixed numbers. They depend on the resin, the part’s geometry, the strength of your alcohol, and even the temperature of your workspace. Get them roughly right and prints come out crisp and strong. Get them wrong and you either get sticky, undercured parts that fail in a week or brittle, chalky ones that crack if you look at them funny.
This guide walks through the practical ranges that work for most desktop printers, the mistakes that quietly ruin prints, and how to dial in your own numbers instead of copying a stranger’s settings from a forum post.
Why Wash and Cure Times Are Ranges, Not Rules
Every photopolymer resin has its own chemistry. A standard gray resin behaves differently from a tough, flexible, or water-washable formula. Layer height matters too, because thicker layers trap more uncured resin between them. So does part geometry: a hollow model with internal cavities holds far more liquid resin than a solid miniature, and it needs more washing to flush those cavities clean.
Then there’s your equipment. A magnetic stirrer wash station agitates the alcohol far more aggressively than a simple dunk-and-swish container. A high-wattage UV cure chamber delivers more energy per minute than a weaker unit, which means the same five-minute cure can over-cure on one machine and barely set the surface on another.
The practical takeaway: treat any published number as a starting point, then verify with your own eyes and fingers. A properly washed and cured print has a dry, slightly matte surface with no tackiness and no visible liquid sheen in the details.
The Standard Wash and Cure Ranges Most Makers Use
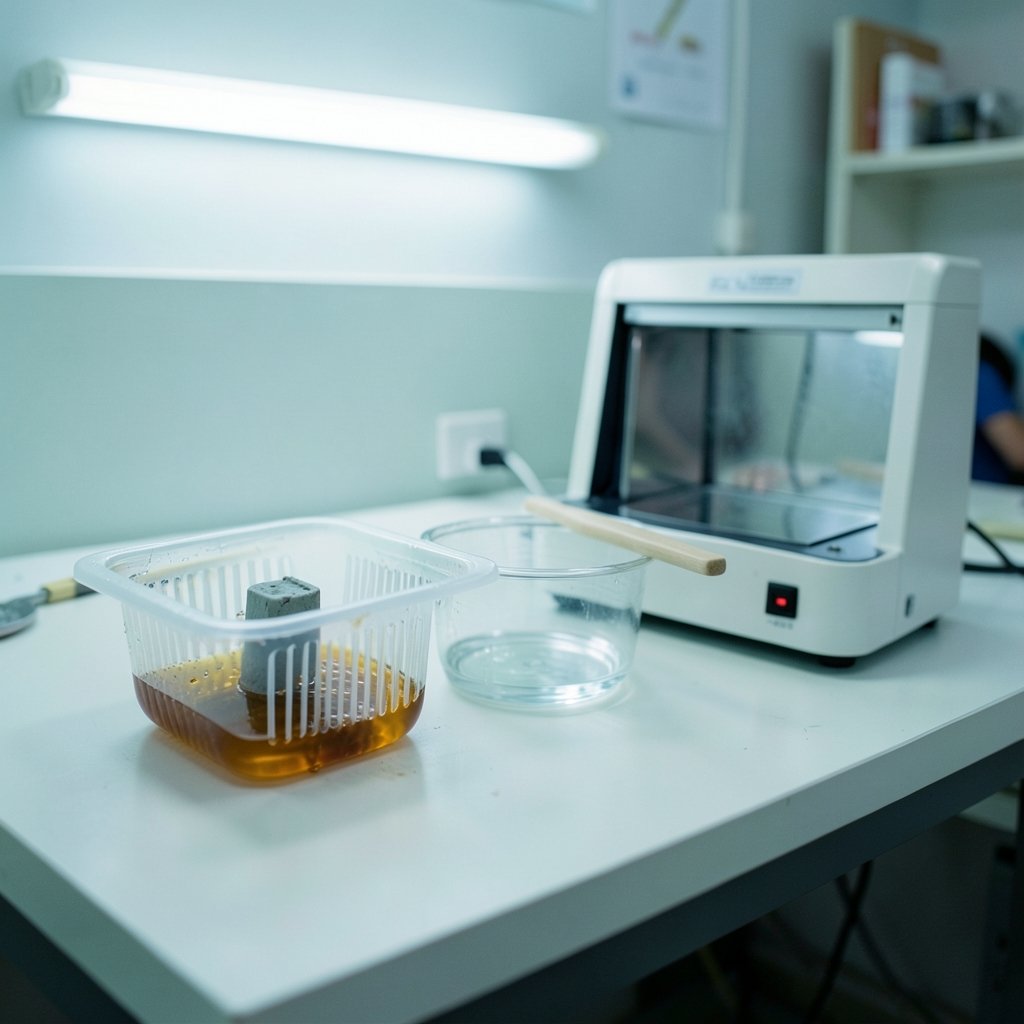
For typical desktop SLA and DLP printing with standard resins, the working ranges below cover the majority of situations. Manufacturers publish their own recommendations in technical data sheets and safety data sheets, and those should always override generic advice. (OSHA Chemical Data)
| Stage | Typical Range | What It Depends On |
|---|---|---|
| First wash (dirty IPA) | 2 to 3 minutes | Part size, resin type |
| Second wash (clean IPA) | 1 to 2 minutes | How dirty the first bath is |
| Drip dry | 5 to 15 minutes | Ventilation, part complexity |
| Post-cure under UV | 2 to 6 minutes | UV wattage, resin spec |
| Post-cure in water | 4 to 10 minutes | Resin spec, part thickness |
A two-bath wash is one of the highest-value habits in resin printing. The first container does the heavy lifting and gets progressively dirtier. The second container stays relatively clean and rinses away the residue the first bath loosened. If you only own one wash container, you’ll be replacing alcohol constantly and your parts will never come out quite as clean.
Water-washable resins skip the alcohol entirely. They still need washing, usually in plain tap water with a soft brush, but the same timing logic applies. Don’t let a water-washable print sit in water for extended periods, since some formulas absorb moisture and soften.
What Happens If You Wash Too Long
More washing is not automatically better. Alcohol is a solvent, and prolonged immersion can soften the surface of some resins, cause fine details to craze or whiten, and even leach plasticizers out of the polymer matrix. A print left in IPA for twenty minutes while you answer emails often comes out looking slightly chalky and feeling weaker than it should.
The practical fix is simple: set a timer and walk away from the temptation to “give it a bit more.” If a print still feels slick after the recommended wash, the problem is usually that your alcohol is saturated with dissolved resin, not that the wash was too short. Swap the bath and run a shorter cycle.
There’s also a safety dimension. Uncured resin and isopropyl alcohol are both hazardous materials, and skin contact or inhalation of vapors should be minimized. Gloves and decent ventilation are non-negotiable, and the safety data sheet for your specific resin is the document to read, not a Reddit thread. (Stereolithography)
What Happens If You Cure Too Long
Over-curing is the more common mistake, partly because it happens invisibly. A part that looks fine after ten minutes under UV may have become noticeably more brittle than the same part cured for three. Excess UV exposure can also cause yellowing in clear and light-colored resins and can introduce slight dimensional changes that matter on precision parts.
The tell is usually mechanical. If thin features snap instead of flexing, or if a part that should have slight give feels like glass, you’ve almost certainly over-cured. The fix is to cut your cure time and check the result, rather than assuming longer equals stronger.
How to Dial In Your Own Numbers
Rather than guessing, run a small calibration routine. It takes an afternoon and pays off on every print afterward.
- Print a small test piece with thin walls, fine text, and a hollow section.
- Wash it for the minimum of your range, dry it, and cure for two minutes.
- Note the surface feel. Tacky means undercured; chalky or overly rigid means overcured.
- Repeat with fresh test pieces at increasing cure intervals until you find the shortest time that gives a dry, non-tacky surface.
- Record the winning numbers on a note taped to your cure station.
This is the same principle behind any calibration workflow. If you’ve ever tuned something as different as a game difficulty curve or compared versions of a classic title to see which one holds up, you already know the method: change one variable, observe, repeat. The best PS2 games of all time list is a good reminder that “best” is always context-dependent, and cure times work the same way. (Best time to visit hawaii)
Common Mistakes That Quietly Ruin Prints
A few errors show up again and again in workshop settings.
Skipping the drip dry. Moving a wet print straight from alcohol into the cure chamber traps solvent on the surface and can leave a sticky film. Let it air dry until the surface looks uniformly dull.
Curing with supports still attached. Supports create shadowed areas that block UV light, so the surface underneath stays undercured. Remove supports first, then cure.
Using cold alcohol. IPA at 15°C dissolves resin far more slowly than IPA at 22°C. In a cold garage, add a minute or two to your wash cycle.
Ignoring hollow cavities. A hollow print needs drain holes and a longer wash, or uncured resin stays trapped inside and slowly leaks out weeks later, softening the part from within. This single mistake accounts for a surprising share of “mystery failures.”
Reusing saturated alcohol indefinitely. Once the bath looks cloudy and dark, it’s no longer cleaning, it’s coating. Replace it.
Matching Wash and Cure to Your Resin Type
Different resin families want different treatment, and the differences are big enough to matter.
| Resin Type | Wash Medium | Wash Time | Cure Time |
|---|---|---|---|
| Standard opaque | IPA 90%+ | 3 to 5 min total | 2 to 4 min |
| Tough or ABS-like | IPA 90%+ | 3 to 6 min total | 4 to 6 min |
| Flexible | IPA 90%+ | 2 to 4 min | 5 to 10 min |
| Water-washable | Water | 2 to 5 min | 2 to 5 min |
| Castable | IPA 99% | 2 to 3 min | 2 to 4 min |
Flexible resins often need longer cure times to reach their rated properties, but they also tolerate over-cure better than rigid ones. Castable resins are the opposite: they burn out cleanly only if you avoid over-curing, so err on the shorter side.
Some resins also specify a warm post-cure, sometimes submerged in water, to improve surface hardness and reduce oxygen inhibition. That’s worth checking on the technical data sheet, because the difference in final part quality can be noticeable.
Equipment Choices That Change Your Timing
The wash and cure station you own shapes your numbers more than most people realize.
Magnetic stirrer stations agitate the alcohol and clean parts faster, so you can often shave a minute off a manual wash. Ultrasonic cleaners are faster still but can be aggressive on delicate details, and they’re generally overkill for standard miniatures.
On the cure side, a turntable chamber with reflective walls delivers more even exposure than a static box, which means you can cure for less time without leaving shadowed spots. A weak UV lamp, by contrast, may need double the time to reach the same surface hardness, and even then the coverage may be uneven.
Temperature is the quiet variable. Resin cures faster in a warm room and slower in a cold one. If your workshop swings between seasons, your cure times should swing with it.
When to Trust the Data Sheet Over the Internet
Manufacturer documentation exists for a reason. Technical data sheets list recommended wash and cure parameters for that specific formula, and safety data sheets cover handling, ventilation, and disposal. Those documents are updated when formulations change, which forum advice never is.
If your resin came with no documentation, the manufacturer’s website usually hosts both documents as PDFs. Ten minutes of reading beats a month of trial and error.
There’s a broader lesson here about trusting labels. The same skepticism that helps you spot exaggerated claims in other areas, like learning what is ai washing and why marketing language deserves scrutiny, applies to resin specs. A bottle claiming “cures in 60 seconds” is telling you about ideal conditions, not your conditions.
Practical Workflow for a Typical Print
Here’s a sequence that works reliably for most standard resins on a desktop setup.
- Remove the build plate and let excess resin drip back into the vat for a few minutes.
- Detach the print with a scraper and remove supports while the part is still soft.
- Wash in the dirty bath for 2 to 3 minutes, agitating gently.
- Transfer to the clean bath for 1 to 2 minutes.
- Air dry until the surface is uniformly dull, typically 5 to 15 minutes.
- Inspect for glossy patches, which indicate trapped resin, and re-wash if needed.
- Cure for 2 to 4 minutes, rotating the part if your chamber lacks a turntable.
- Check surface feel and rigidity, then record the result.
Once you’ve run this a few times, the whole cycle becomes muscle memory, and you’ll start noticing that your prints fail far less often.
Conclusion
Wash and cure times are not secrets to be memorized but variables to be tuned. The ranges in this guide, roughly 2 to 6 minutes of washing and 2 to 6 minutes of curing for standard resins, will get most makers into the right neighborhood. From there, the shortest time that produces a dry, non-tacky, appropriately rigid surface is almost always the right answer.
The makers who get consistently excellent results aren’t using exotic equipment. They’re using two wash baths, setting timers, keeping notes, and reading the data sheet that came with the bottle. That’s the whole trick.
FAQ
How long should I wash a resin print in IPA?
Most standard resins need 2 to 5 minutes total in isopropyl alcohol, ideally split across two baths. A dirty first bath does the bulk of the work and a clean second bath rinses off the residue. Larger parts and hollow models need the longer end of that range.
How long should I cure a resin print?
Two to six minutes under a typical 405 nm cure station covers most standard resins. Start at the low end, check whether the surface feels dry and non-tacky, and increase only if it doesn’t. Over-curing makes parts brittle, so longer is not safer.
Can you over-cure a resin print?
Yes. Excessive UV exposure makes prints more brittle, can cause yellowing in clear and light-colored resins, and may slightly alter dimensions. If thin features snap instead of flexing, reduce your cure time.
Do water-washable resins need different times?
They use water instead of alcohol, but the timing logic is similar: roughly 2 to 5 minutes of washing followed by a short cure. Avoid leaving water-washable prints submerged for long periods, since some formulas absorb moisture and soften.
Why does my print still feel sticky after curing?
Sticky surfaces usually mean the part wasn’t fully washed before curing, or the cure time was too short. Trapped resin on the surface blocks proper curing. Re-wash the part in clean alcohol, dry it fully, and cure again.
Does the temperature of my workspace affect wash and cure times?
Yes, noticeably. Cold alcohol dissolves resin more slowly, and resin cures more slowly in a cold room. In a chilly workshop, add a minute or two to both stages and check the result rather than assuming your summer settings still apply.



