Have you ever picked up a favorite shirt, only to find the button dangling by a single sad thread? Or worse, discovered the button missing entirely, right before you needed to be somewhere? It is a tiny problem that feels weirdly stressful, yet it is one of the easiest repairs a person can learn. The good news is that sewing a button back on takes about five minutes, a needle, some thread, and no special talent. This guide walks through the whole job, from threading the needle to tying a knot that survives the washing machine, plus the small details that separate a fix that lasts from one that pops off again next week.
What You Need Before You Start
Gather a few basic supplies first, because hunting for a needle halfway through is how most people lose momentum. You will need:
- A hand-sewing needle with an eye big enough for your thread. A sharp needle works well on woven fabric; a slightly blunt one is fine for knits.
- Thread that matches the button or the garment. Polyester or polyester-cotton thread is the usual recommendation because it resists breaking and fading better than pure cotton.
- Scissors for snipping thread.
- A thimble if you plan to push through thick fabric, though it is optional.
- A toothpick, matchstick, or pin if you want to build a shank, which is explained below.
One practical tip: keep a small “button kit” in a drawer with a needle, a couple of thread colors, and scissors. The next time a button gives up, you will not need to search for anything.
The Basic Method: Sewing a Button in Six Steps

The core technique is the same whether you are replacing a button or reinforcing a loose one. Follow these steps in order.
- Thread the needle and knot the end. Cut about 18 inches of thread, pass it through the eye, and tie a small knot at the tail. Doubling the thread makes the attachment stronger, which matters on garments that get pulled.
- Mark the spot. If the button is missing, find the empty spot on the fabric and, if possible, line it up with the buttonhole on the opposite side of the garment. A pin pushed through the hole marks the exact position.
- Bring the needle up from the back. Push the needle through the fabric at the button’s position so it comes out on the front, right where the button will sit.
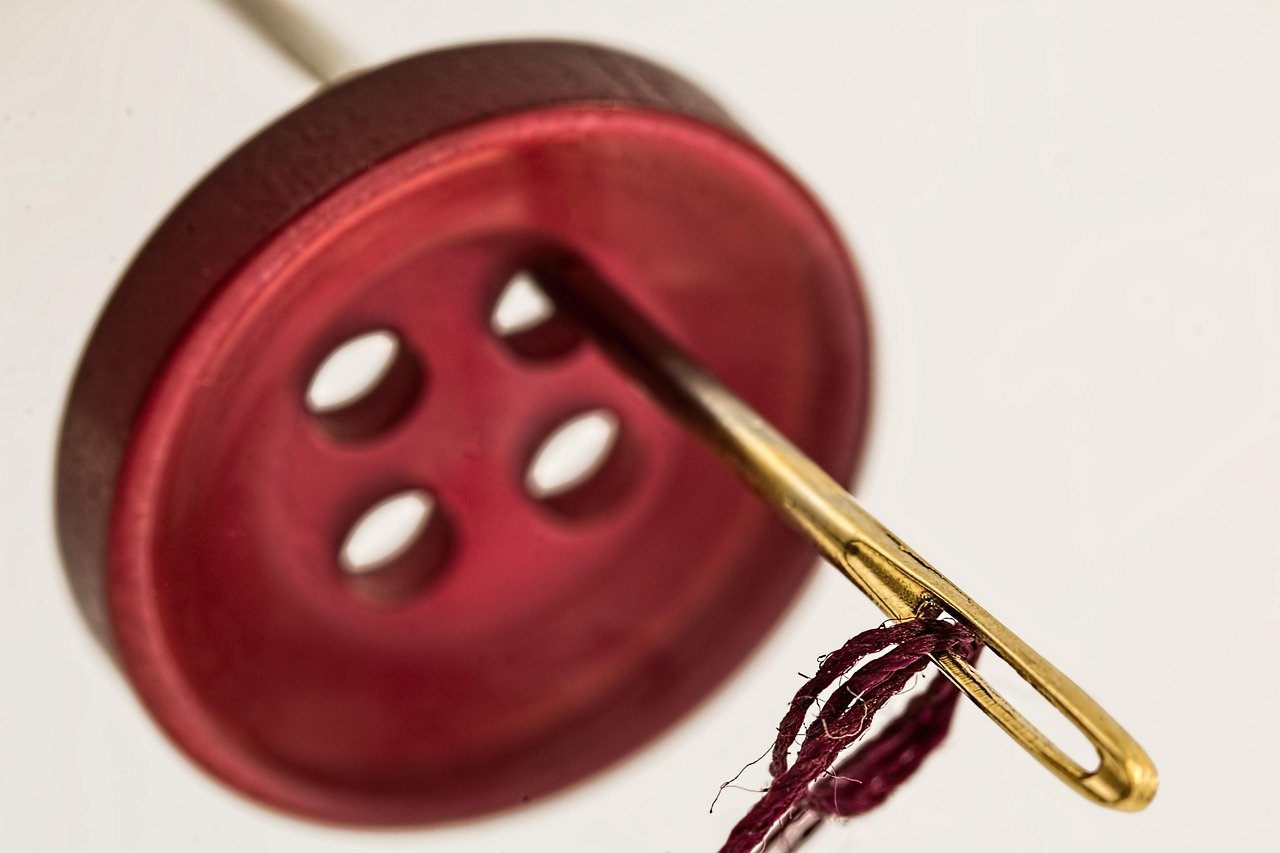
- Pass through the first hole. Thread the needle through one hole of the button, then down through a second hole and back into the fabric. That first pass secures the button in place.
- Repeat several times. Make four to six passes through the same holes. Each pass adds strength. Do not pull the thread so tight that the button cannot move; a button that sits flat against the fabric is harder to fasten.
- Finish and knot. Bring the needle to the underside of the fabric, make a few small stitches through the existing thread to lock it, and trim the excess. This is a cleaner finish than a bulky knot that shows.
That is the whole job. The rest of this guide is about doing it well, because the details are where buttons fail.
Two-Hole vs. Four-Hole Buttons
The number of holes changes the stitching pattern, not the basic idea. A two-hole button is the simplest: the thread goes back and forth through the two holes, creating a small bar of stitches. A four-hole button gives you options. You can sew two parallel bars, pairing the top two holes and the bottom two, or you can sew an X by crossing diagonally from corner to corner.
| Button type | Stitch pattern | Best for |
|---|---|---|
| Two-hole | Back-and-forth bar between the two holes | Shirts, light fabrics, quick repairs |
| Four-hole, parallel | Two separate bars, top pair and bottom pair | Most shirts and blouses; a tidy look |
| Four-hole, crossed | Diagonal X between opposite corners | Heavier fabric, decorative buttons |
| Shank button | Thread through the loop on the back only | Coats, jackets, thick fabrics |
The parallel pattern is the most common on shirts because it looks neat and holds firmly. The crossed pattern is slightly stronger on heavy fabric because the threads support each other. Neither is wrong; pick the one that suits the garment.
How to Make a Thread Shank (and Why It Matters)
Here is the detail most beginners skip, and it is the reason buttons on thick fabrics feel tight or pop off. A shank is a small gap of thread between the button and the fabric. It lets the button sit above the fabric surface so it can pass through a buttonhole on a thick layer, like a coat or a denim jacket, without straining the stitches.
To make one, sew the button on as usual but lay a toothpick, matchstick, or pin across the top of the button between the holes. Sew over the spacer as you make your passes. When the button is secure, remove the spacer and lift the button away from the fabric. Wrap the thread around the bundle of stitches underneath the button a few times to form a firm neck, then knot off on the underside. The result is a button that stands slightly proud of the fabric and fastens easily. (Button)
Some buttons come with a shank already built in, a small loop or post on the back. These are attached differently: you stitch through the loop rather than across the face of the button, and you do not need a spacer. This style is common on coats because the button needs room to sit over thick material.
Choosing Thread and Matching the Button
Thread choice affects how long the repair lasts. Polyester thread is strong and holds color well, which is why it is the default for most repairs. Cotton thread is fine for lightweight or vintage fabrics but breaks more easily. Match the thread to the button when you can; a close match hides small mistakes, and a contrasting color is a deliberate style choice some people like.
If you are replacing a lost button, check the garment for a spare. Many shirts and jackets come with a tiny packet of extra buttons sewn inside a hem or attached to a care label. Using the original button keeps the look consistent. If there is no spare, measure the button’s diameter and hole spacing before buying a replacement, because a button that is slightly too large will not pass through its buttonhole.
Common Mistakes That Make Buttons Fall Off Again
Most failed repairs share a few causes. Watch for these.
- Sewing too tight. Pulling the button flat against the fabric removes the room it needs to fasten. Leave a little breathing space, especially on thick fabrics.
- Too few passes. Two or three passes may hold for a week. Four to six is a better target.
- A weak finish. A single knot on the surface works loose. Finish underneath the fabric with a few locking stitches.
- The wrong needle. A needle too thick for the fabric leaves a visible hole; one too thin bends or breaks.
- Skipping the shank on heavy garments. This is the most common reason coat buttons fail.
The same care applies to other small hardware repairs. If you have ever fumbled with a phone trying to capture a quick photo, you know how fiddly small buttons and presses can be; the same principle of deliberate, repeated action applies. For a parallel example of getting small mechanical actions right, these screenshot iphone button combos shortcuts fixes that work show how precise button presses solve problems, and the same patience pays off at the sewing table. (Screenshot android button combos gestures fixes that work)
Repairing a Loose Button vs. Replacing a Missing One
A loose button is usually still attached by a thread or two. Instead of tugging it off, slip the needle under the existing stitches and reinforce them with a few new passes, then finish with a knot underneath. This takes less time than a full replacement and preserves the original attachment.
A missing button needs the full method above. The one extra step is finding the right position. Button the garment and look for the empty spot opposite the buttonhole; a pin through the hole marks it precisely. If the fabric is stretched or the buttonhole is worn, the button may need to sit a millimeter or two off the original mark to fasten comfortably.
Buttons on Children’s Clothing: A Safety Note
On children’s clothes, a secure button matters for safety and neatness. Small buttons are a choking hazard for young children, so attachment matters more than usual. Sew with extra passes, finish firmly, and check buttons regularly for looseness. If a button is damaged or the fabric around it is torn, replace or reinforce it rather than waiting. The same attention applies to any small part that could come loose, including snaps and decorative pieces.
Practice Makes It Quick
The first button you sew may take ten minutes. The fifth will take three. The skill transfers directly: once you can handle a two-hole shirt button, a four-hole coat button with a shank is a small variation, not a new challenge. Keep the supplies together, use enough passes, and finish underneath. That is the whole secret.
The same logic of learning a small mechanical skill by repetition shows up everywhere. If you have ever compared an e-reader’s physical buttons to a touchscreen, you know the trade-off between tactile control and convenience; the article on e reader page turn button vs touchscreen: which to buy explores that choice in detail. Sewing rewards the tactile approach: your fingers learn the tension and rhythm faster than any written guide can teach.
Conclusion
Sewing a button is one of those skills that looks trivial until you need it, and then it saves a garment, a morning, and a bit of money. The method is simple: thread the needle, anchor the button, make four to six passes, build a shank on thick fabrics, and finish with a knot underneath. Avoid the common traps of sewing too tight and finishing too weakly. Practice on an old shirt first, and soon a loose button will be a two-minute annoyance rather than a reason to retire a favorite piece of clothing.
FAQ
How long does it take to sew a button?
A single button takes about three to ten minutes depending on your experience and the button type. A four-hole button with a shank takes longer than a simple two-hole shirt button. With practice, most people finish in under five minutes.
Do I need a special needle to sew a button?
No special needle is required. A standard hand-sewing needle with an eye large enough for your thread works fine. A sharp needle is best for woven fabrics, while a slightly blunt needle suits knits. A thimble helps on thick fabric but is optional.
What is a thread shank and do I always need one?
A thread shank is a small gap of thread between the button and the fabric, made by sewing over a spacer like a toothpick and then wrapping the thread underneath. You need one on thick fabrics such as coats and denim, but it is optional on thin shirt fabric.
Can I use any thread to sew on a button?
Polyester or polyester-cotton thread is the usual recommendation because it is strong and holds color. Cotton thread works for lightweight fabrics but breaks more easily. Match the thread to the button or garment for a tidy result.
Why do my buttons keep falling off after I sew them?
The most common causes are too few passes, sewing the button too tight against the fabric, and finishing with a weak knot on the surface. Use four to six passes, leave slight slack, and lock the thread underneath with a few small stitches.
How do I find the right spot for a missing button?
Button the garment and locate the empty spot opposite the matching buttonhole. Push a pin through the buttonhole to mark the exact position on the fabric. If the fabric is stretched or the hole is worn, shift the mark slightly so the button fastens comfortably.
Is it safe to sew buttons on children’s clothing myself?
Yes, but sew with extra care. Small buttons are a choking hazard for young children, so use extra passes, finish firmly, and check the buttons regularly. Replace any button that is damaged or loosely attached rather than waiting for it to come off.