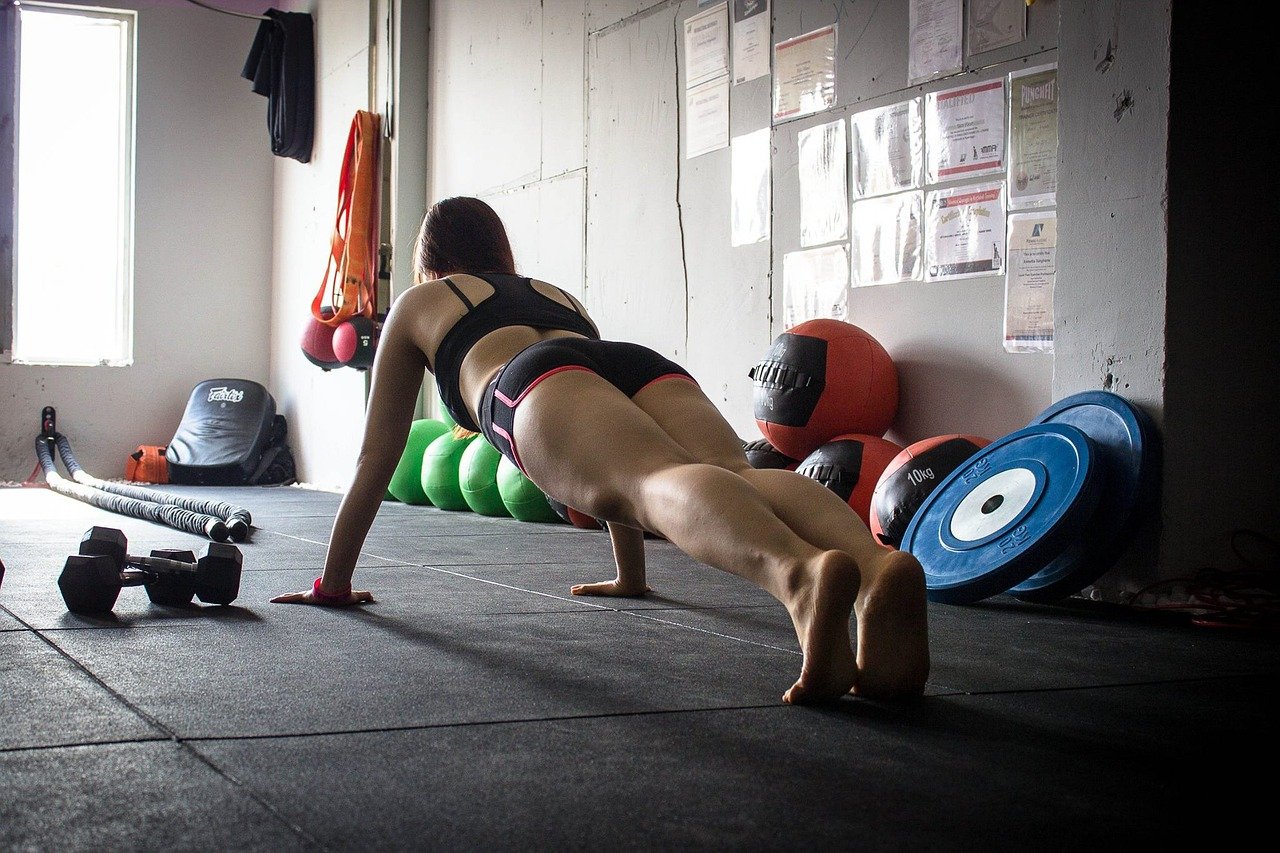
Can you hold a plank for two minutes? Plenty of people say yes. Now ask a harder question: does your lower back ache afterward, or does your hip sag toward the floor at the thirty-second mark? If so, the clock is lying to you. A plank is not a competition to see who can suffer longest. It is a test of whether your body can hold one straight, braced line under load. Get that line right and the exercise becomes one of the most efficient core movements you can do with zero equipment. Get it wrong and you are mostly training your spine to sag. (Plank (exercise)))
This guide walks through the setup, the cues that actually work, the errors that show up again and again, and how to program planks so they keep paying off instead of just burning time.
What the Plank Actually Trains
The plank is an isometric exercise, meaning the muscles generate force without changing length. You are not moving; you are resisting. That makes it a different animal from a crunch or a sit-up, which move the spine through a range of motion.
The muscles doing the work include the rectus abdominis (the front wall), the transverse abdominis (a deep layer that acts like a corset), the obliques (your sides and rotation control), and a surprising amount of the glutes and quadriceps, which keep the hips from dropping. The shoulders and upper back also hold their share in a forearm plank.
Because the load runs through the whole body, the plank is often described as an anti-extension exercise: you are teaching your trunk to resist the pull of gravity that wants to arch your lower back. That is why it carries over to lifting, running, and simply picking up a heavy box without wincing.
The Setup: Getting Into Position
Before any timing starts, the body has to be stacked correctly. Here is the sequence that works for most people.
- Start face down on a mat, forearms on the floor, elbows directly under the shoulders. Forearms should point straight ahead, roughly parallel.
- Tuck the toes under and lift the knees off the floor.
- Squeeze the glutes as if holding a coin between them. This is the single most useful cue for most beginners, because it stops the hips from sagging.
- Pull the belly button gently toward the spine, but keep breathing.
- Look at a spot on the floor about a foot ahead of your hands. Do not crane the neck up.
- Push the floor away with the forearms so the upper back does not collapse between the shoulder blades.
The result should be a straight line from the crown of the head through the hips to the heels. If someone filmed you from the side, a ruler laid along your back should touch your head, upper back, and tailbone at once.
If the full version feels impossible, drop the knees to the floor. A knee plank with perfect alignment beats a full plank with a collapsed lower back every time.
Forearm Plank vs. High Plank
Both versions train the trunk, but they load the shoulders differently. The high plank, with arms straight and hands under the shoulders, demands more from the wrists and shoulder stabilizers. The forearm version is usually kinder to the wrists and easier to hold for longer.
| Feature | Forearm Plank | High Plank |
|---|---|---|
| Hand position | Forearms down, elbows under shoulders | Palms down, arms straight |
| Wrist demand | Low | Higher |
| Shoulder demand | Moderate | Higher |
| Best for | Longer holds, beginners | Shoulder strength, push-up prep |
| Common fault | Elbows drifting forward of shoulders | Hips piking upward |
A practical approach is to alternate. Use the forearm version for timed holds and the high plank when you want to build toward push-ups.
The Cues That Fix Most Problems
Coaching language matters more than people expect. Vague instructions like “engage your core” land poorly because most people do not know what that feels like. Concrete cues work better.
- Squeeze the glutes. This single instruction fixes hip sag in the majority of cases.
- Pull the elbows toward the toes. You will not actually move them, but the intent switches on the lats and makes the shoulders more stable.
- Tuck the ribs down. Imagine shortening the distance between the bottom of your ribcage and the top of your pelvis. This reduces the arch in the lower back.
- Push the floor away. Prevents the “sinking between the shoulder blades” look.
- Breathe through the nose into the ribs. Holding your breath raises pressure and makes the hold feel harder than it needs to.
A quick self-check: if you cannot say a short sentence out loud while holding the plank, you are bracing too hard or holding your breath. Both are signs to back off slightly.
Common Mistakes and How to Fix Them
Most plank breakdowns fall into a handful of recognizable patterns. Naming them makes them easier to catch.
Hips sagging toward the floor. The most common fault, and the one most likely to produce lower back discomfort. Fix it by squeezing the glutes and shortening the hold until you can maintain the line.
Hips piking up like a tent. Usually a sign that the shoulders are tired or the core is fatigued and the body is cheating by stacking the skeleton. Lower the hips until the line is straight.
Head dropping or craning up. Both strain the neck. Pick a fixed spot on the floor and keep the chin slightly tucked.
Elbows in front of the shoulders. This shifts load onto the shoulder joint and makes the position unstable. Line the elbows up directly beneath the shoulders.
Holding the breath. Common in people who treat the plank as a maximum-effort event. Breathe steadily.
Chasing time over quality. A shaky ninety-second hold with a sagging back teaches your body a bad pattern. Three clean twenty-second holds are worth more.
There is a broader lesson here that applies to most technical setup work: a written, step-by-step plan beats improvisation. The same principle shows up in technical projects like a set up network segmentation practical step by step plan, where sequence and checkpoints matter more than raw effort. (Get started quickbooks alternatives practical switching plan)
How Long Should You Hold a Plank?
This is where most advice online gets vague, and for good reason: there is no single correct number. Hold time depends on your training age, body weight, and what you are training for.
A reasonable progression for a healthy beginner looks like this:
- Weeks one and two: three sets of 15 to 20 seconds with a knee plank if needed.
- Weeks three and four: three sets of 20 to 30 seconds in a full forearm plank.
- Weeks five and beyond: three sets of 30 to 45 seconds, adding five seconds per week while form holds.
Once you can hold a clean 60-second plank, adding more time stops being productive. At that point, increase difficulty instead: lift one foot, lift one arm, add a slow shoulder tap, or move to a weighted plank. Long, grinding holds mostly train endurance in a narrow range and tempt you into bad positions.
A useful rule of thumb: end each set when you feel the line starting to break, not when the timer says so. That is your true current capacity.
Breathing and Bracing
The plank is often taught as “brace hard and hold,” which leads people to clench everything, including the jaw, and stop breathing. That is not what good bracing looks like.
Think of the trunk as a cylinder. The diaphragm is the top, the pelvic floor is the bottom, and the deep abdominal and back muscles form the walls. Effective bracing means creating tension in that cylinder while still allowing air to move. In practice, take a breath in through the nose, feel the ribs expand sideways rather than only upward, and exhale slowly while keeping the belly firm.
If your plank sets leave you dizzy or with a headache, breathing is almost always the culprit.
Plank Variations Worth Adding
Once the basic hold is solid, variations add stimulus without adding time.
| Variation | What it adds | Who it suits |
|---|---|---|
| Knee plank | Reduced load | Beginners, return from injury |
| Shoulder taps | Anti-rotation demand | Intermediate |
| Leg lift plank | Glute and hip challenge | Intermediate |
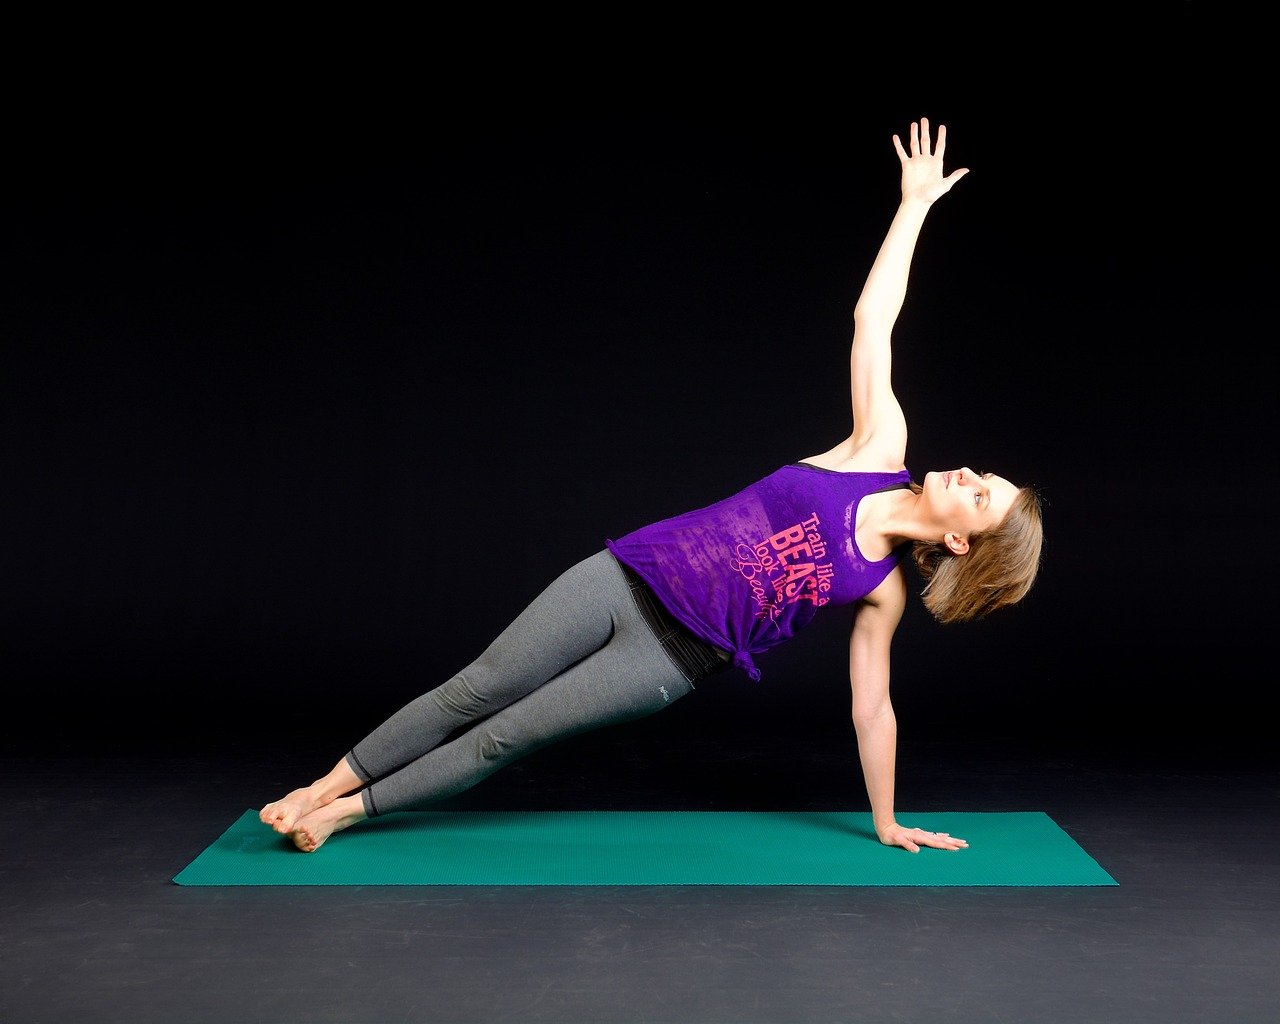
| Side plank | Obliques, lateral hip | Intermediate |
| Weighted plank | Progressive overload | Advanced |
| Long-lever plank (elbows far forward) | Higher difficulty | Advanced |
The side plank deserves its own mention. Lying on one forearm with feet stacked and hips lifted trains the obliques and the lateral hip in a way the front plank cannot. Start with the bottom knee down and progress to stacked feet.
Fitting Planks Into a Weekly Routine
Planks are a supporting movement, not a whole program. Two to four sessions per week is plenty. A simple structure:
- Place planks after your main strength work, not before, so fatigue does not wreck your form.
- Pair them with a pulling movement to balance the shoulder work.
- Keep total plank volume to around three to five sets per session.
If you are building a broader training or technical plan and want a model for sequencing steps, the same discipline behind a distributed cloud roadmap plan 2026 applies: define the endpoint, break it into stages, and check alignment at each one.
When to Stop and Seek Advice
Stop the exercise and get professional input if you feel sharp lower back pain, numbness or tingling down a leg, or pain in the shoulder joint itself. A dull muscular burn is normal. Nerve symptoms are not.
People with uncontrolled high blood pressure, recent abdominal surgery, or pregnancy should get individual guidance rather than following a generic program. A physiotherapist or qualified coach can adjust the position, the load, and the breathing pattern to suit the situation.
Conclusion
The plank rewards precision far more than endurance. A clean twenty-second hold with squeezed glutes, tucked ribs, and steady breathing does more for your trunk than a two-minute grind with a sagging back. Start with the setup, use the cues that give you something concrete to feel, and stop each set when the line breaks rather than when the clock runs out. Once a minute feels comfortable, add difficulty rather than duration. That progression keeps the exercise useful for years instead of turning it into a daily test of willpower.
Frequently Asked Questions
How long should a beginner hold a plank?
Most beginners should start with three sets of 15 to 20 seconds, using a knee plank if the full version breaks form. Add about five seconds per week as long as the straight line holds. Quality comes before duration.
Is it better to do a plank on forearms or with straight arms?
Neither is universally better. The forearm version is easier on the wrists and suits longer holds, while the high plank loads the shoulders more and builds toward push-ups. Alternating between them gives a more complete training effect.
Why does my lower back hurt during a plank?
A sagging hip position is the usual cause, because it arches the lower back and shifts load onto the spine. Squeeze the glutes, tuck the ribs down toward the pelvis, and shorten the hold until you can keep a straight line for the full set.
Should I squeeze my glutes during a plank?
Yes. Squeezing the glutes is one of the most effective cues because it stops the hips from dropping and links the lower body into the brace. It also reduces the tendency to hang on the lower back.
Can planks replace sit-ups?
For most people, planks are a better default because they train the trunk to resist movement rather than repeatedly flex the spine. That said, they are not a complete core program on their own. Adding side planks and a rotation-based movement covers the gaps.
How often should I do planks?
Two to four sessions per week is enough for most people. More frequent work rarely adds benefit once form is solid, and it increases the risk of practicing sloppy positions. Place planks after your main lifts so fatigue does not compromise alignment.