
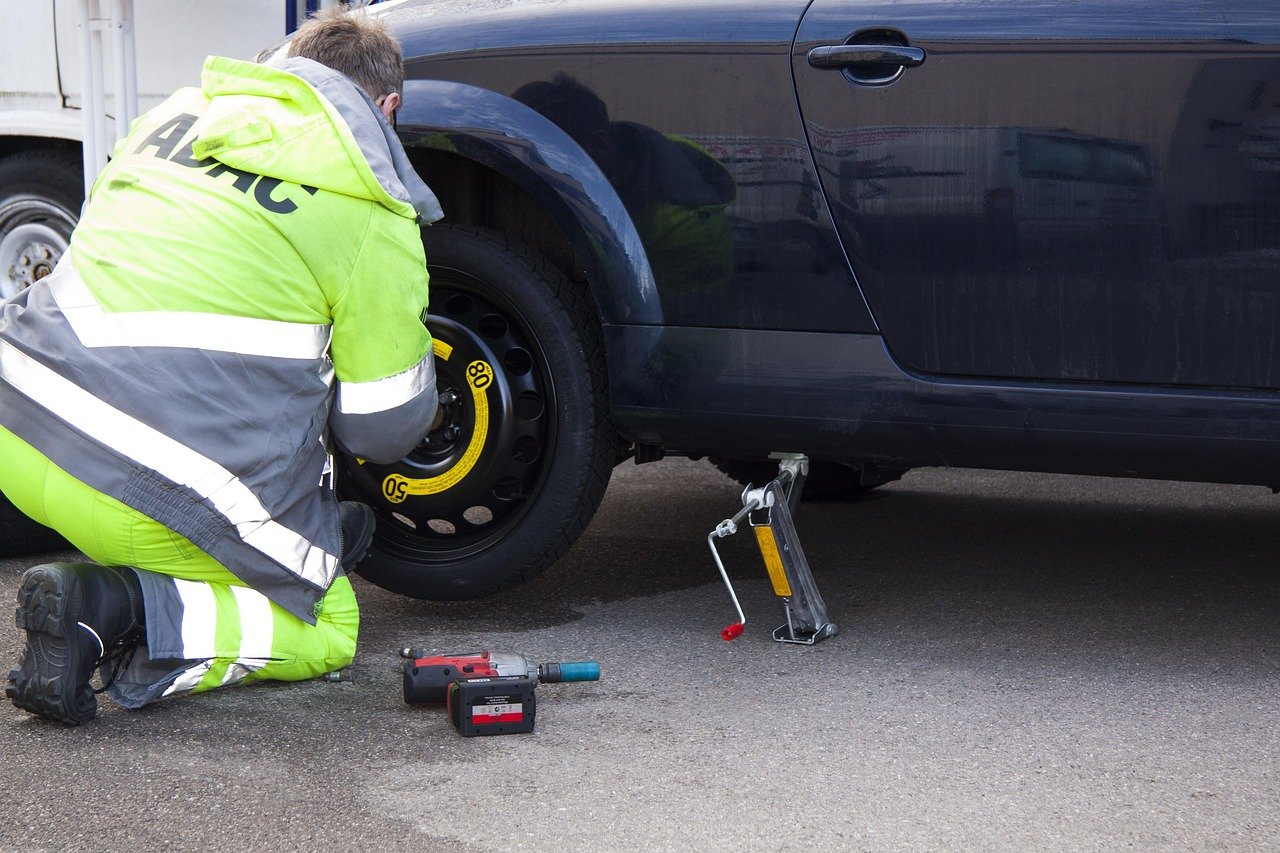
What would you do if a tire went flat on a busy highway shoulder with traffic thundering past a few feet away? Most drivers have never changed a tire. They know the spare is somewhere under the trunk floor, but the jack, the wrench, and the whole procedure feel like a mystery. That gap in knowledge is exactly when a bad situation gets worse. (Tire)
The good news: changing a tire is a skill almost anyone can learn in about twenty minutes. It does not require strength or special talent. It requires the right order of steps, a safe place to work, and a healthy respect for what can go wrong. This guide walks through the whole job, from pulling over safely to the torque check you should do a few days later.
Before You Touch Anything: Find a Safe Spot
The tire change itself is the easy part. The setup is where people get hurt.
Pull as far off the road as possible, ideally onto a shoulder, a parking lot, or a flat, firm surface. Loose gravel, soft dirt, and slopes are all bad choices. A jack can sink into soft ground or slip on an incline, and a car that falls off a jack can crush a hand or worse.
Once stopped, do these things in order:
- Turn on the hazard lights.
- Apply the parking brake firmly.
- Put an automatic in Park, or a manual in first or reverse.
- If you have one, set out a warning triangle or cones behind the car.
- Have passengers step out and stand well away from traffic, behind a barrier if possible.
If the car is stuck in a live traffic lane, do not attempt a change there. Call for roadside help. No spare tire is worth standing in moving traffic. Roadside safety guidance consistently treats the shoulder next to fast traffic as one of the most dangerous places a driver can be.
Get to Know Your Spare Before You Need It

Here is the mistake almost every first-timer makes: they discover at the roadside that the spare is flat, missing, or that the lug wrench does not fit. Check your kit at home, in daylight, with no pressure.
Open the trunk floor and confirm four things:
| Item | What to check |
|---|---|
| Spare tire | Inflated, no cracks, correct size |
| Jack | Present, moves freely, handle included |
| Lug wrench | Correct size for your lug nuts |
| Wheel chock | Or a sturdy substitute like a block of wood |
Two spare types behave very differently. A full-size spare matches your road wheels and can be driven normally. A compact or temporary spare, often called a donut, is narrower, lighter, and limited. Most are rated for roughly 50 mph (80 km/h) and a short distance, often around 50 miles (80 km), though the exact numbers vary by manufacturer and are printed on the spare’s sidewall. Never treat those figures as universal. Read your own sidewall.
Also check whether your car uses wheel locks, which need a special keyed socket. If the key is missing, the wheel is not coming off without help.
Step 1: Loosen the Lug Nuts While the Tire Is on the Ground
This is the step people skip, and it is the one that ruins the whole job. Lug nuts are tightened to high torque. If you jack the car up first, the wheel will simply spin when you try to turn them.
With the tire still firmly on the ground, fit the lug wrench onto each nut and turn counter-clockwise about a half turn. You are breaking the tension, not removing the nuts. If a nut will not budge, try a longer wrench or stand on the handle carefully with steady pressure, not a sudden stomp.
On most cars, the lug nuts loosen counter-clockwise. Some older or unusual vehicles use reverse threads on one side, so if a nut tightens instead of loosening, stop and check the manual.
Step 2: Chock the Diagonally Opposite Wheel
Before the car leaves the ground, block the wheel diagonally across from the one you are removing. Changing a front-left tire? Chock the rear-right wheel. This stops the car from rolling when it is lifted.
A proper wheel chock is best, but a solid piece of wood, a brick, or a large rock wedged against the tire works in a pinch. This takes ten seconds and is one of the cheapest safety measures in motoring.
Step 3: Lift the Car Only at the Marked Jack Point
Every vehicle has reinforced jack points, usually a seam or notch just behind the front wheel or ahead of the rear wheel. Your owner’s manual shows exactly where they are. Put the jack anywhere else and you risk crushing a brake line, denting the floor pan, or having the car slip off.
Raise the car slowly and steadily until the flat tire clears the ground by an inch or two. Keep the jack vertical and on firm ground. If it starts to lean, lower the car and reposition.
One rule has no exceptions: never put any part of your body under a car held up only by a jack. A jack is a lifting tool, not a support. If you need to do anything beyond swapping a wheel, use jack stands.
Step 4: Remove the Wheel
Now that the tire is off the ground, finish removing the loosened lug nuts and set them somewhere you will not lose them, like a cup or a pocket. Keep them away from drains.
Grip the tire with both hands and pull it straight toward you. Tires are heavier than they look, especially larger ones. Lift with your legs, not your back. Set the flat tire aside, ideally flat on the ground so it cannot roll away.
Step 5: Mount the Spare
Lift the spare into place and line up the holes with the wheel studs. This is the fiddliest part of the job, and it helps to brace the tire with your knees or feet while you thread the first nut by hand.
Start all the lug nuts by hand before tightening any of them. Snug them down in a star or criss-cross pattern, not in a circle. The star pattern pulls the wheel on evenly and prevents it from seating crooked.
Step 6: Lower the Car and Torque the Nuts
Lower the jack until the tire touches the ground and the car takes its weight. Now tighten the lug nuts fully, again in a star pattern, working around the wheel in short passes.
The correct tightness is the torque listed in your owner’s manual, measured with a torque wrench in foot-pounds or newton-meters. Most passenger cars land somewhere in the 80 to 100 ft-lb range, but this varies widely. Too loose and the wheel can work free. Too tight and you can stretch the studs or warp a brake rotor. A torque wrench is a small investment that pays for itself the first time you use it.
Step 7: Deal With the Tire Pressure Light
Since model year 2008, new light vehicles sold in the United States have been required to carry a tire-pressure monitoring system, or TPMS, under Federal Motor Vehicle Safety Standard 138. If you want the regulatory detail, the full text of FMVSS 138 on tire pressure monitoring systems is published in the electronic Code of Federal Regulations.
Here is what that means at the roadside. A full-size spare often carries its own sensor, so the light may go out once you drive a bit. A compact donut usually has no sensor at all, so the warning light will likely stay on until your original tire is repaired or replaced. That light is not a sign you did something wrong.
Step 8: Check the Pressure and Re-Torque Later
Inflate the spare to the pressure on the tire information placard, usually stuck in the driver’s door jamb. Do not use the maximum pressure molded on the tire sidewall. That number is a ceiling, not a recommendation.
Then, after roughly 50 miles (about 80 km) of driving, re-check the lug nut torque. This is a widely repeated rule of thumb rather than a codified standard, but it costs nothing and catches the rare case of a nut that has started to loosen. Get the damaged tire repaired or replaced as soon as you can, especially if you are running a temporary spare.
Mistakes That Turn a Simple Job Into a Bad Day
A few habits cause most tire-change problems:
- Jacking before loosening the nuts. The wheel spins and nothing comes off.
- Using the wrong jack point. Bent bodywork or a slipped jack.
- Working on a slope or soft ground. The most common cause of jack failure.
- Tightening in a circle. The wheel can seat unevenly.
- Driving far on a donut at highway speed. Temporary spares are not built for it.
- Ignoring the spare until you need it. A flat spare is worse than no plan.
If you want to build the broader habit of being ready for the unexpected, the same logic that applies to security awareness training examples that actually change behavior applies here: practice the drill before the emergency, not during it. A dry run in your driveway on a sunny afternoon teaches more than any article. The same goes for small tech habits, like knowing how to change default apps on Android without breaking your phone, which is far easier to sort out calmly than in a panic. (Change your gmail display name so recipients see right you)
When to Skip the DIY and Call for Help
Changing a tire is not always the right call. Call roadside assistance if:
- The car is in a live lane or on a narrow shoulder with fast traffic.
- Visibility is poor: heavy rain, fog, darkness, or blowing snow.
- You lack the tools, the spare is flat, or the lug nuts will not move.
- You have a physical limitation that makes lifting a wheel unsafe.
- The damage is more than a flat, such as a bent wheel or a blown-out sidewall.
There is no shame in calling for help. A professional with a truck, lights, and cones is the safer option in bad conditions.
A Quick Word on Tread Depth
A spare gets you home, but it does not fix the underlying problem. Tires wear out, and worn tires flat more often and stop worse in rain. Legal minimum tread depth varies by jurisdiction. In the United Kingdom, the legal minimum for cars is 1.6 mm across the central three-quarters of the tread, as set out in the government’s guidance on tyre tread depth and condition. In the United States, many states use 2/32 inch (about 1.6 mm), but rules differ, so check your local law. (Tires)
A simple home check: insert a coin into a tread groove. If the tread does not reach a known reference point on the coin, the tire is close to its limit.
Conclusion
Changing a tire comes down to sequence and respect. Park somewhere safe, chock the opposite wheel, loosen the nuts while the tire is still down, lift only at the marked jack point, and tighten in a star pattern to the torque in your manual. Then check the pressure, watch the TPMS light, and re-torque after about 50 miles.
None of that is hard. The whole job is maybe twenty minutes of deliberate work. What separates a smooth roadside fix from a dangerous mess is preparation: a spare that holds air, a wrench that fits, and a driver who has walked through the steps once before the emergency. Do that dry run this weekend. Your future self, standing on a rainy shoulder, will thank you.
Frequently Asked Questions
How long does it take to change a tire?
For most drivers, a first attempt takes 20 to 30 minutes. With practice, it drops to 10 or 15. The lifting and tightening are quick. Finding the jack point and lining up the spare take the most time for beginners.
Can I drive on a compact spare tire on the highway?
Usually only briefly and slowly. Most temporary spares are rated around 50 mph (80 km/h) for a short distance, but the exact limits are printed on the spare’s sidewall and vary by manufacturer. Check yours and keep the trip short.
Do I need to loosen the lug nuts before jacking the car up?
Yes. Loosen them about a half turn while the tire is still on the ground. If you jack the car first, the wheel spins freely and the nuts will not break loose.
Why is my tire pressure light still on after changing the tire?
A compact spare often has no pressure sensor, so the system cannot read it. The light usually stays on until your original tire is repaired or refitted. A full-size spare with its own sensor may clear the light after a short drive.
What torque should I tighten the lug nuts to?
Use the figure in your owner’s manual, measured with a torque wrench. Most passenger cars fall between roughly 80 and 100 ft-lb, but the correct value is vehicle-specific. Tighten in a star pattern and re-check after about 50 miles.
Is it safe to change a tire on the side of a highway?
Only if you can pull well off the roadway onto firm, level ground and traffic is not passing close by. If you are in a live lane, in poor visibility, or on a narrow shoulder, call roadside assistance instead.



