

Ever watched a barista spoon a cloud of cold foam over iced coffee and wondered why yours collapses into sad, watery bubbles? The good news: cold foam is one of the few café tricks that genuinely works at home, with tools you probably already own. The catch is that most people fail at the milk, not the technique. Get the milk right, aerate it properly, and you will get thick, glossy foam that sits on top of a drink for several minutes.
What Cold Foam Actually Is
Cold foam is unheated milk that has been frothed until it thickens into a pourable, meringue-like layer. It is not whipped cream, and it is not steamed microfoam. Steamed foam depends on heat to build structure; cold foam depends on protein and air alone.
That distinction matters because it explains almost every failure. Without heat, the milk has to be coaxed into holding bubbles. Fat, protein level, and how aggressively you introduce air all decide whether you get a dense cloud or a thin slick of bubbles that vanishes before you reach the table.
Why Nonfat Milk Foams Best
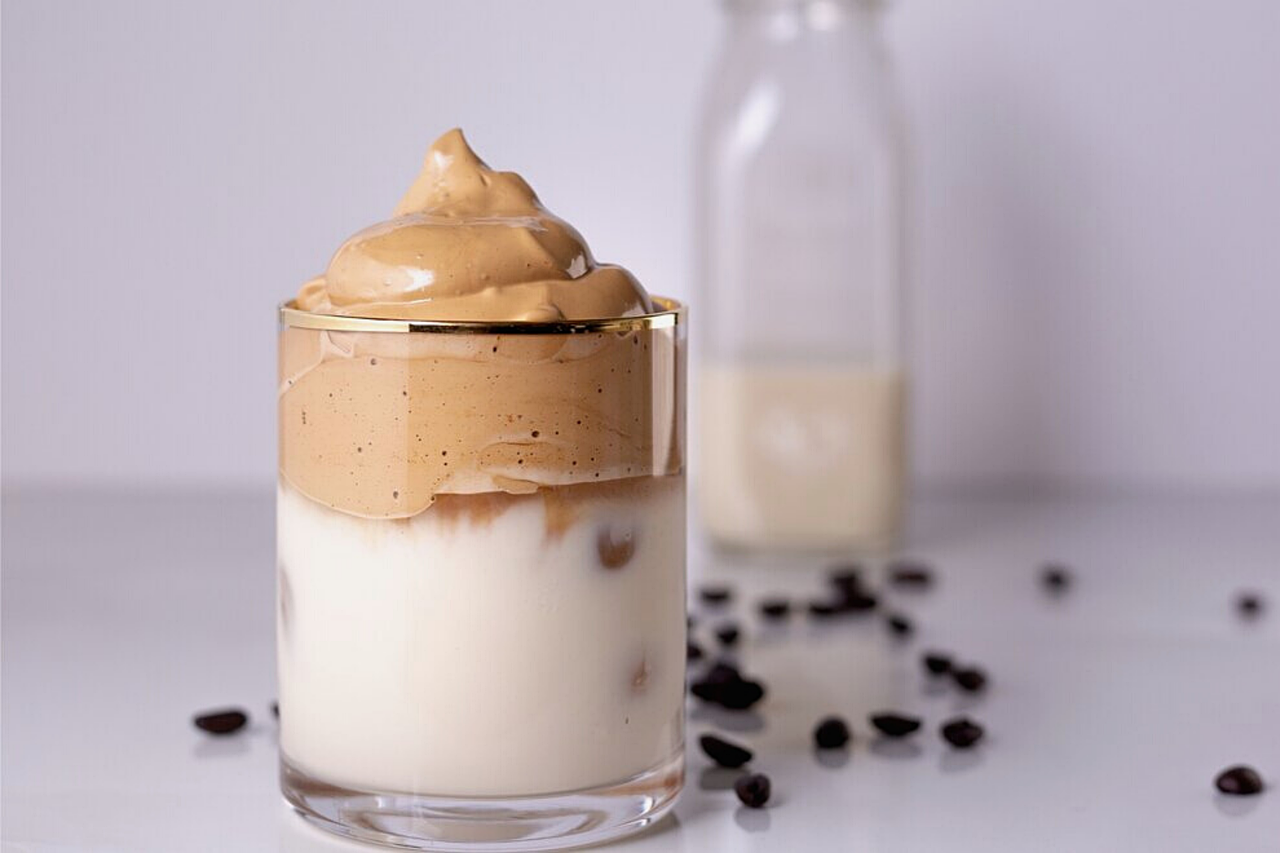
Here is the counterintuitive part: the milk with the least fat usually makes the best cold foam. Fat globules interfere with the thin protein film that wraps around each air bubble. Fewer fat globules mean a more stable bubble wall, so nonfat milk whips up faster and holds a stiffer peak.
Whole milk gives you a creamier, softer foam that tastes richer but slumps faster. That is a trade-off, not a defect. If you want the foam to sit proudly on a drink for a photo, reach for nonfat. If you want dessert in a glass, whole milk is lovely and you should just drink it faster.
Milk proteins, especially casein, are the real structural players. They gather at the air–water boundary and form a stabilizing film around each bubble. More protein per gram of liquid generally means a stronger foam, which is why high-protein dairy and barista-style plant milks outperform watery alternatives.
| Milk type | Foam speed | Texture | Stability |
|---|---|---|---|
| Nonfat dairy | Fast | Stiff, dry, glossy | High |
| 2% dairy | Moderate | Balanced | Moderate |
| Whole dairy | Moderate | Creamy, soft | Lower |
| Oat (barista) | Fast | Velvety, slightly sweet | High |
| Soy | Moderate | Dense, neutral | High |
| Almond | Slow | Thin, fragile | Low |
The almond milk result surprises people. Most almond milk is low in protein and high in water, so there is little to build a bubble wall from. Oat and soy milks with added stabilizers foam far more reliably. If you want a deeper comparison of dairy versus plant options and how temperature changes texture, the breakdown of milk frother hot vs cold foam texture milk choice technique covers the variables in detail. (Milk)
The Tools That Actually Work
You do not need a café setup. Four options cover almost every home kitchen, and each has a real personality.
French press
The classic. Add cold milk, put the lid on, and plunge vigorously for 30 to 60 seconds. The mesh filter forces milk through small holes, dragging air into the liquid. The result is coarse at first, then tightens as you keep plunging. It takes more effort than a gadget, but it produces surprisingly thick foam and costs nothing extra if you already own a press.
Handheld battery frother
A small whisk on a stick. Fifteen to thirty seconds of buzzing in a tall glass gets you usable foam. The trick is angle: tilt the whisk slightly off vertical and keep the head near the surface so it pulls air down instead of just spinning the milk. Results vary a lot by device, so treat manufacturer time claims as optimistic.
Dedicated cold foam pitcher
These electric pitchers are designed for the job, often with a max-fill line and a magnetic whisk. They are the most consistent option and the closest to café texture. They are also the most expensive, and they take up counter space for a single task.
Mason jar
The no-equipment option. Fill a jar one-third full, screw the lid on tight, and shake hard for 45 to 60 seconds. Your arm will complain. The foam will be uneven but real. This is the method to use when you are making one drink and do not want to wash anything with a motor.
If your frother is producing nothing but warm milk and disappointment, the usual culprits are overfilling, using milk that is too cold to aerate, or a dying battery. The diagnostic walkthrough for a milk frother not making foam fix real cause fast narrows it down quickly.
Step-by-Step: The Basic Method
This is the workhorse recipe. It makes enough foam for one large iced coffee.
- Chill your milk thoroughly. Cold milk holds air better and gives you more working time before the foam breaks down.
- Pour 3 to 4 ounces (about 90 to 120 ml) of nonfat or barista-style milk into your vessel. Do not fill past one-third, or you will have no headspace for air.
- Aerate for 30 to 60 seconds with a French press, or 15 to 30 seconds with a handheld frother. Move the tool up and down through the surface rather than swirling in place.
- Let the foam rest for 15 to 20 seconds. Large bubbles pop and the texture tightens. This rest is the step most people skip.
- Spoon or pour gently over your drink. Pouring from a height knocks the air out; pour low and slow.
That is it. No heating, no thermometer, no steaming wand. The full walkthrough for the French press and jar methods, including how long to plunge and how to pour a clean layer, lives in the guide to how to make cold foam at home.
Sweet Cream Cold Foam
The version that made cold foam famous is sweet cream: milk plus a splash of heavy cream and a little sugar or syrup, frothed together. The cream adds body and richness; the sugar adds flavor and slightly improves stability by thickening the liquid.
A reliable ratio is 3 parts nonfat milk to 1 part heavy cream, plus 1 to 2 teaspoons of simple syrup or vanilla syrup per serving. Froth it the same way. The result is thicker and sweeter than plain foam, closer to melted ice cream sitting on top of your coffee.
Two warnings. First, more cream is not better. Push past a 1:1 ratio and you get something that behaves like thin whipped cream and sinks in a lump. Second, sweet cream foam is heavy, so a little goes a long way on an already milky drink.
Common Mistakes and How to Fix Them
Most cold foam problems trace back to a handful of habits.
Using milk straight from a warm fridge door. Cold matters. If your milk has been sitting out, the foam will be loose.
Overfilling the vessel. Air needs room. If the milk starts at the top, there is nowhere for the bubbles to go.
Frothing for two seconds and calling it done. Under-aeration is the single most common error. Keep going until the volume visibly increases and the surface looks glossy.
Skipping the rest. Freshly frothed milk is full of large, unstable bubbles. Twenty seconds of resting lets them pop and leaves a finer texture.
Letting it sit. Cold foam is a make-it-now topping. It begins to separate within a few minutes and is usually best poured within five. Make it last, not first.
Using the wrong plant milk. Almond milk is the usual offender. Look for cartons labeled barista style, which are formulated with extra protein and stabilizers for foaming.
There is a related texture lesson worth borrowing from other foam projects: the same variables that decide whether a keyboard foam mod changes sound or whether a serverless function stays cold determine how much air a material holds. Structure is structure. If you enjoy that kind of cross-domain nerdery, the notes on keyboard foam mod sound differences actually changes make the point about density and air trapping in a completely different context.
Food Safety: The Part Nobody Mentions
Cold foam is unheated, which means it is a raw dairy product sitting on your counter. Treat it like one. Keep the milk refrigerated until the moment you froth it, make only what you plan to drink, and discard leftovers rather than saving foam in the fridge for later. If you would not leave a glass of milk out, do not leave a glass of foam out.
Plant-based foams carry the same practical rule for a different reason: they separate and grow unpleasant quickly at room temperature.
Making It Work With Your Routine
The honest truth about cold foam is that consistency beats equipment. A person with a mason jar and good milk will out-foam someone with a fancy pitcher and skim milk that has been open for two weeks. (Refrigeration and Food Safety)
Start with nonfat milk and a French press. Nail the 45-second plunge and the 20-second rest. Once the texture is reliable, experiment with sweet cream ratios, oat milk brands, and flavor syrups. Change one variable at a time so you know what worked.
And keep expectations calibrated. Homemade cold foam rarely matches a café’s texture exactly, because cafés use purpose-built pitchers and often milk formulated for foaming. What you can match is the pleasure of a thick, cold, slightly sweet layer floating on your iced coffee on a hot afternoon. That is the whole point.
Conclusion
Cold foam is a small skill with a short learning curve and a big payoff. Choose nonfat or barista-style milk, chill it well, leave room for air, aerate longer than feels necessary, and let the foam rest before you pour. Skip the cream unless you are making sweet cream on purpose, and never let foam sit around waiting for you. Master those five habits and the café version stops feeling like magic. It is just milk, air, and a little patience, and you can make it in under a minute.
Frequently Asked Questions
What is the best milk for cold foam?
Nonfat dairy milk is the most reliable choice because it lacks the fat that destabilizes bubbles, so it whips up fast and holds a stiff texture. Barista-style oat and soy milks are the best plant options. Almond milk is usually the weakest because it is low in protein.
Can you make cold foam without a frother?
Yes. A French press plunged vigorously for 30 to 60 seconds works well, and a lidded mason jar shaken hard for about a minute is the zero-equipment option. Both rely on forcing air into cold milk rather than heating it.
Why does my cold foam disappear so fast?
Foam collapses when the bubbles are too large or the milk lacks enough protein to hold them. Common causes are under-aerating, using low-protein milk like almond, skipping the short rest that pops big bubbles, or letting the finished foam sit too long before pouring.
How long does cold foam last?
It is best within a few minutes of making it. The foam starts to separate and deflate after roughly five minutes, which is why cafés make it to order. Make only what you plan to drink right away rather than whipping up a batch in advance.
Is cold foam the same as whipped cream?
No. Cold foam is frothed milk with a light, pourable texture, while whipped cream is cream whipped to stiff peaks with sugar and often stabilizers. Sweet cream cold foam sits between the two, adding heavy cream and syrup to milk for extra body.
Can you make cold foam with sweetened or flavored milk?
Yes, and it works reasonably well. Sugar slightly thickens the liquid and can improve stability, and flavored milks add taste without extra steps. Watch the sweetness though, since flavored milk plus syrup can quickly overpower a delicate cold brew.



