Why do thick-cut pork chops so often come off the pan gray, tough, and disappointing? The answer is simple and a little unfair: most people cook them the way their parents did, aiming for a chalky white center that was declared unnecessary more than a decade ago. A thick chop is a different animal from a thin one. It needs a different plan, a different heat strategy, and a little patience. Get those three things right and you end up with a juicy, browned, slightly blush center that tastes nothing like the shoe leather of memory.
This guide walks through what “thick-cut” actually means, why the old rules were wrong, how to brine and sear, and the mistakes that quietly ruin a good piece of meat.
What “Thick-Cut” Actually Means
Here is a fact that surprises a lot of home cooks: “thick-cut” is not an official grade or regulated cut term. It is a retail and marketing descriptor. The USDA’s cut terminology describes loin chops by their location along the loin (rib, loin, sirloin), but thickness is a choice the retailer makes.
In practice, most butchers and cookbooks treat a thick-cut chop as roughly 1½ inches (about 3.8 cm) or more. Anything around an inch sits in a middle zone. Under three-quarters of an inch and you are dealing with a fast-cooking cut that behaves completely differently.
That matters because the whole cooking strategy hinges on thickness. A one-inch chop cooks in roughly 8 to 12 minutes total on the stovetop or in the oven. A 1½ to 2-inch chop needs considerably longer, and often benefits from a reverse sear or an oven finish. Those times are rules of thumb, not standards, and they vary by source, pan, and oven. Treat them as starting points and use a thermometer to confirm.
Bone-In Versus Boneless
Bone conducts heat differently and can slow cooking near the bone. Many chefs prefer bone-in thick chops for flavor and moisture, though that is culinary opinion rather than a measured standard. Boneless chops cook more evenly and are easier to slice for sandwiches. Neither is “better” in an absolute sense; they are different tools.
Watch for Enhanced Pork
Some retail pork is enhanced, meaning it has been injected with a salt-and-water mixture. Labels are required to state this. This is a practical trap: if you buy enhanced chops and then wet-brine them, you are double-salting. Read the label before you plan your seasoning. If it says “enhanced,” “basted,” or lists a saltwater mixture, skip the brine and season lightly.
The Temperature Rule That Changed Everything
For decades, home cooks were told to cook pork until it was white all the way through. That advice is obsolete. In May 2011, the minimum safe internal temperature for fresh pork, including chops, was lowered to 145 °F (63 °C) followed by a three-minute rest. Before that, it was 160 °F.
The change was based on a risk assessment on Trichinella and Salmonella in pork, with the rest time substituting for the former margin of safety. The reason it was safe to make the change is that commercial pork in the United States has had very low Trichinella prevalence for decades. Modern trichinosis cases are mostly attributed to wild game rather than commercial pork, though exact surveillance figures vary by source and year.
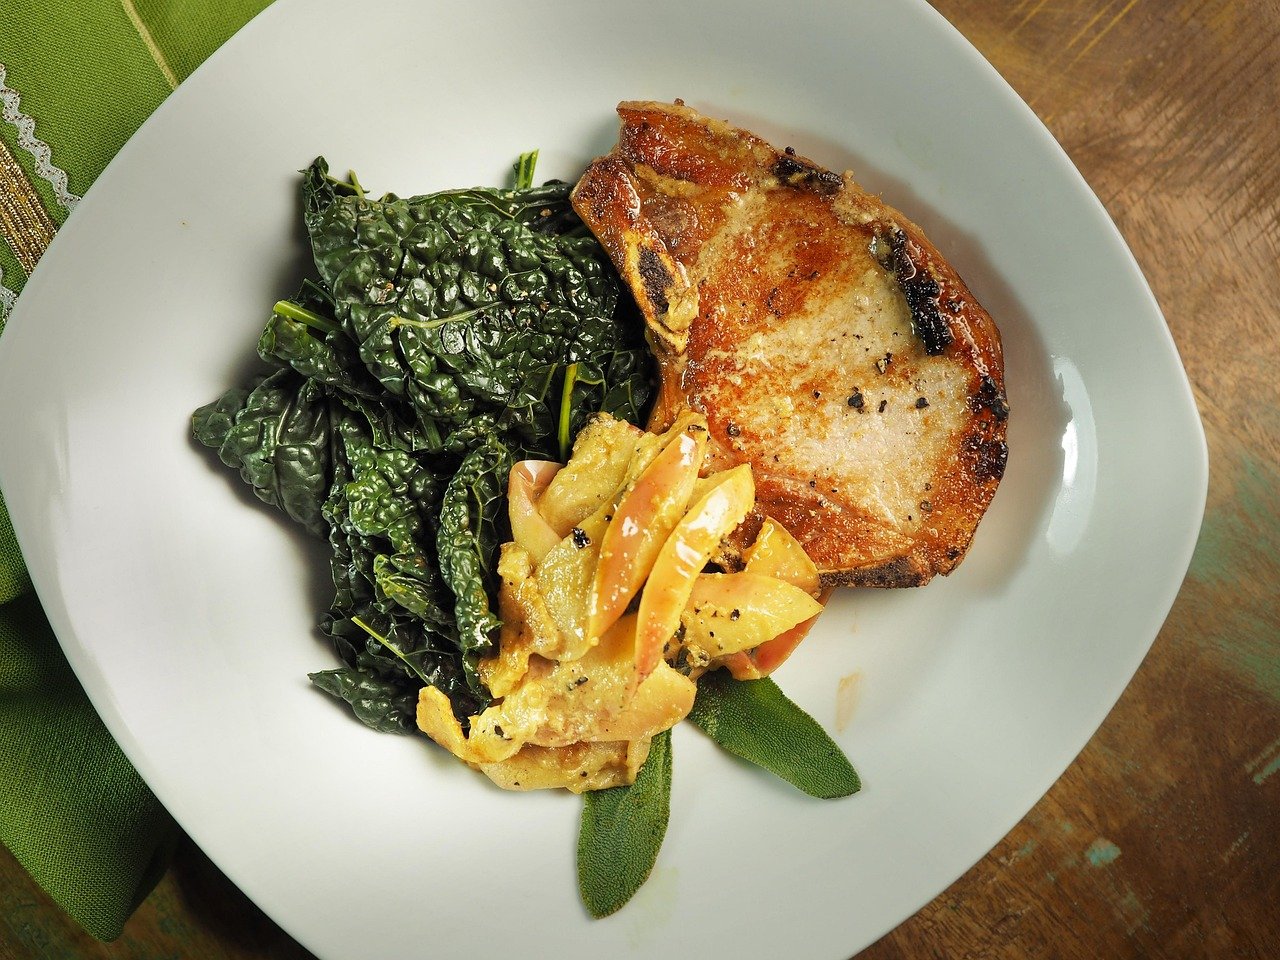
So what does 145 °F look like? Slightly pink. A modern lean pork chop can be safely pink at the center. If you are still cooking to 160 °F, you are not being safe; you are being dry. That single number is the biggest upgrade most people can make to their pork chops.
One caveat worth stating plainly: the 145 °F figure is a minimum with a rest, not a target for perfection. Many cooks pull thick chops at 135 to 140 °F and let carryover cooking bring them up during the rest. That is a texture preference, not a safety shortcut, and it depends on accurate thermometer readings.
Why Thick Chops Need a Different Method
A thin chop is basically a race against time. High heat, quick flip, done. A thick chop has a geometry problem: the outside can be deeply browned while the center is still cold, or the center can be perfect while the crust is pale and sad.
The fix is to separate the two jobs. Get the interior to temperature gently, then build crust fast, or build crust first and finish gently in the oven. This is the same logic that drives good migration planning in other technical fields: you do not try to solve every problem simultaneously, you sequence them. If you have ever read about how teams reduce risk by staging a move rather than doing everything at once, the parallel with cloud replatforming best practices that cut migration risk is genuinely apt. Sequence beats brute force.
The Reverse Sear for Thick Chops
The reverse sear is the most reliable method for a 1½-inch or thicker chop:
- Set the oven low, around 250 to 275 °F.
- Season the chop and place it on a wire rack over a sheet pan.
- Cook until the center reads about 115 to 125 °F, checking with an instant-read thermometer.
- Rest it briefly while you heat a skillet until it is genuinely hot.
- Sear one to two minutes per side to build color.
- Rest again, loosely tented, for 5 to 10 minutes.
The result is an even interior edge to edge and a crust that does not require the center to survive a long, hot pan. It takes longer in clock time but far less attention.
The Sear-and-Oven Method
If you want dinner faster, sear first in a hot skillet, then transfer the whole pan to a 400 °F oven until the center hits your target. This is the classic restaurant approach and works well for chops in the 1 to 1½-inch range. The risk is overshooting, so start checking early.
Brining: The Step Most People Skip
Brining works, and the mechanism is well understood. Salt denatures proteins and increases their water-holding capacity, which means the chop loses less moisture as it cooks. This is described in Harold McGee’s On Food and Cooking and in Kenji López-Alt’s The Food Lab testing.
Two routes:
- Wet brine. Submerge the chops in a saltwater mixture, typically 30 minutes to a couple of hours depending on thickness and salt concentration. Longer is not automatically better; overshooting gives you ham.
- Dry brine. Salt the chops and leave them uncovered in the fridge, ideally a few hours or overnight. This concentrates flavor, improves browning by drying the surface, and is far less messy.
For thick chops, dry brining is usually the better default. It is forgiving, it improves the crust, and it does not require a bucket in your fridge. The one exception is enhanced pork, which is already salted.
Common Mistakes That Ruin Thick Chops
These are the errors that show up again and again, and each one has a straightforward fix.
| Mistake | What Happens | Fix |
|---|---|---|
| Cooking to 160 °F or beyond | Dry, gray, chalky center | Pull at 135–145 °F and rest |
| Starting from a cold chop | Uneven cooking, gray band | Let it sit out 20–30 minutes |
| Wet surface going into the pan | Steaming instead of searing | Pat thoroughly dry |
| Crowding the pan | No crust, uneven browning | Cook one or two at a time |
| Skipping the rest | Juices run out on the board | Rest 5–10 minutes, tented |
| Brining enhanced pork | Aggressively salty result | Read the label first |
| Guessing doneness by touch or time | Inconsistent results | Use an instant-read thermometer |
The thermometer point deserves emphasis. Touch tests and time charts are unreliable across pan types, burner strengths, and chop shapes. A cheap instant-read thermometer is the single highest-return purchase for anyone cooking thick chops regularly. It removes the guesswork entirely.
There is a nice analogy here to network tuning. People chase latency problems by upgrading hardware when the real issue is a buffer that fills and stalls under load, which is exactly what a router bufferbloat test and fix for latency under load addresses. In both cases, measurement beats intuition. You cannot fix what you are not measuring, whether that is internal temperature or packet delay.
Resting and Carryover Cooking
Resting a thick chop for 5 to 10 minutes lets carryover cooking finish the center and lets juices redistribute. This is standard culinary practice rather than a regulatory rule, but it is consistent and observable. A chop pulled at 140 °F and rested will typically climb a few degrees and end up juicier than one sliced immediately.
Tent loosely with foil. Do not wrap tightly, or you trap steam and soften the crust you just worked for. And rest on a board, not in a cold pan.
Seasoning and Searing Details That Matter
A few small habits separate a good chop from a great one:
- Salt early, pepper late. Pepper burns at high sear temperatures. Add it after searing or at the end of the oven phase.
- Use a high-smoke-point fat. Neutral oils handle searing heat better than butter, which you can add at the end for flavor.
- Do not move the chop. Place it, press gently for full contact, and leave it alone for the first minute or two.
- Consider a baste. For very thick chops, spooning foaming butter and aromatics over the surface in the final minute adds richness without overcooking.
- Slice against the grain. It shortens the muscle fibers and makes the meat feel more tender.
If you enjoy the technical side of cooking, you may find the same satisfaction in tuning systems that quietly waste money, as covered in cloud cost management tools that actually cut your bill. Both are about removing hidden waste you did not know was there: overcooked pork and idle cloud spend have more in common than either deserves.
Choosing a Good Chop at the Counter
Look for meat that is firm to the touch and pinkish-red with good marbling. Fat cap matters for flavor and basting, so do not trim it all away before cooking. Ask the butcher for the actual thickness rather than trusting the label, since “thick-cut” has no fixed definition.
If you are feeding a crowd, buy a whole loin and cut your own chops to a consistent thickness. Uniformity is what makes timing predictable, and predictable timing is what makes a thermometer target achievable.
Conclusion
Thick-cut pork chops are not difficult. They are just unforgiving of the old rules. The path to a good one runs through three decisions: buy a consistent thickness, salt ahead, and cook to temperature rather than to a color. Pull the chop at 135 to 145 °F, rest it for five to ten minutes, and accept that a blush of pink at the center is correct rather than dangerous. The 145 °F guideline has been the standard since 2011, and the pork available today is lean enough that overcooking it is the bigger risk by far.
Start with the reverse sear on your next thick chop. It is slower, but it is nearly foolproof, and it teaches you what properly cooked pork actually feels and tastes like. Once you have that reference point, every other method gets easier.
FAQ
What temperature should thick-cut pork chops be cooked to?
The minimum safe internal temperature for fresh pork is 145 °F (63 °C), followed by a three-minute rest. Many cooks pull thick chops slightly earlier, around 135 to 140 °F, and let carryover cooking finish the job during the rest. Use an instant-read thermometer rather than time or touch.
Is it safe to eat pork that is slightly pink in the middle?
Yes, modern lean pork can be safely pink at 145 °F. The advice to cook pork until it is white predates the 2011 change in the safe temperature guideline and is now considered overcooking. Color alone is not a reliable safety indicator; temperature is.
How long do thick-cut pork chops take to cook?
It depends heavily on thickness and method. A one-inch chop typically takes about 8 to 12 minutes total on the stovetop or in the oven, while a 1½ to 2-inch chop needs longer, often with a reverse sear or an oven finish. These are rules of thumb, not standards, so confirm with a thermometer.
Should I brine thick-cut pork chops?
Brining helps thick chops retain moisture because salt increases the proteins’ water-holding capacity. Dry brining in the fridge is usually the better default for thick cuts since it also improves browning. Skip the brine if the label says the pork is enhanced, since it is already injected with a salt solution.
What is the best way to cook a very thick pork chop?
For chops 1½ inches or thicker, a reverse sear is the most reliable approach. Cook gently in a low oven until the center reaches about 115 to 125 °F, rest briefly, then sear in a hot skillet for one to two minutes per side. This gives an even interior and a proper crust without overcooking the middle.
Does “thick-cut” mean anything official?
No. “Thick-cut” is a retail and marketing descriptor, not a regulated grade or cut term. Cut terminology describes loin chops by location along the loin, but thickness is a choice the retailer makes. In practice, most sources treat 1½ inches or more as thick-cut.