
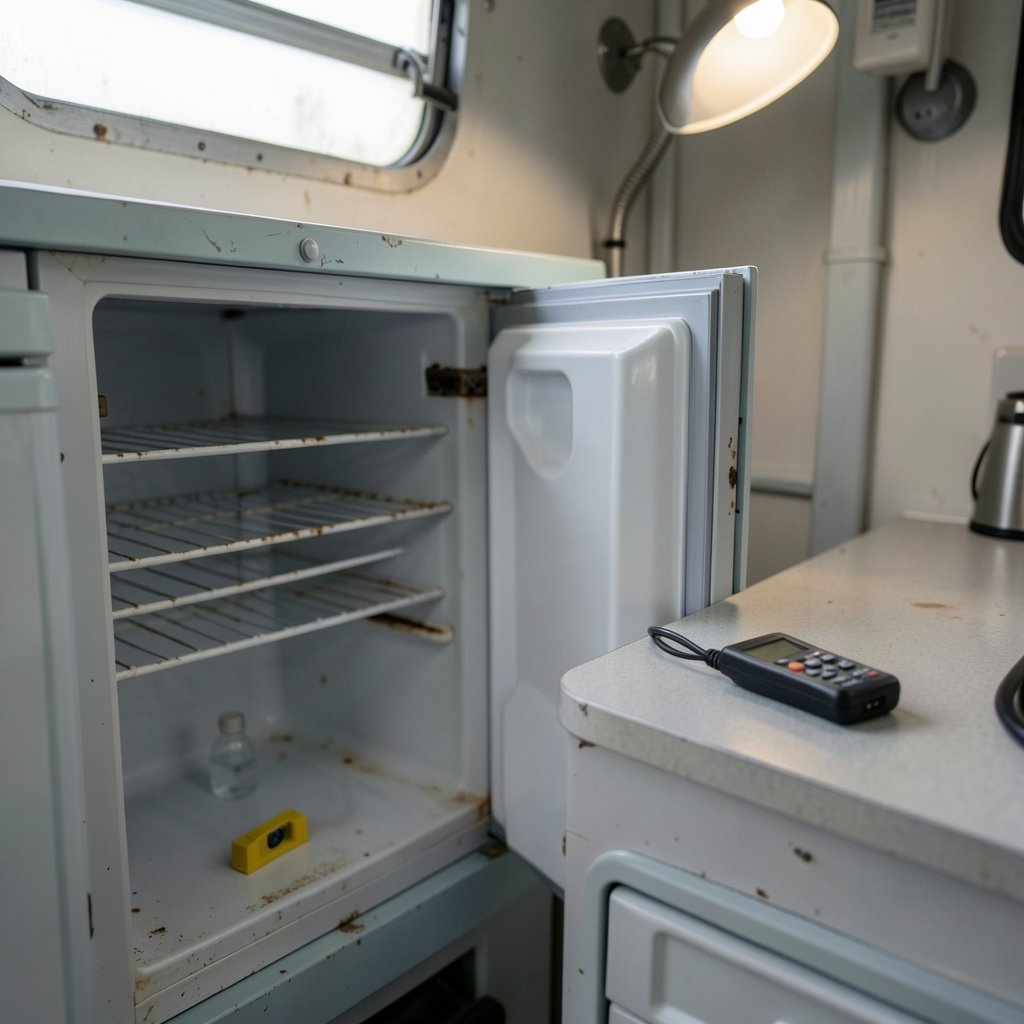
Is your travel trailer fridge running but not getting cold, and you’re staring at a week of warm beer and spoiled food? You’re not alone. RV refrigeration is one of the most common repair headaches on the road, and the fix depends entirely on which type of fridge you own. This guide walks through how to diagnose the problem yourself, what repairs actually work in practice, and when it’s time to call a professional.
First, Know Which Fridge You Have
Before you touch a single screw, identify your cooling system. Travel trailers carry one of two types, and they fail for completely different reasons.
Absorption fridges (often called gas/electric or 2-way/3-way units) run on propane, 120V shore power, or both. They have no compressor and no moving parts. Instead, they use a heat source plus an ammonia-water-hydrogen cycle to create cold. They’re silent, they sip fuel, and they’re the traditional RV standard.
Compressor fridges (usually 12V) work exactly like the fridge in your house. A compressor circulates refrigerant, and the whole thing depends on a steady 12V supply from your battery bank.
Why does this matter? Because “fridge won’t cool” means something totally different in each case. An absorption unit that won’t cool might have a blocked vent, a dirty burner, or a leveling problem. A 12V compressor unit that won’t cool usually has a power problem. Diagnosing the wrong system wastes hours.
The Absorption Fridge Checklist
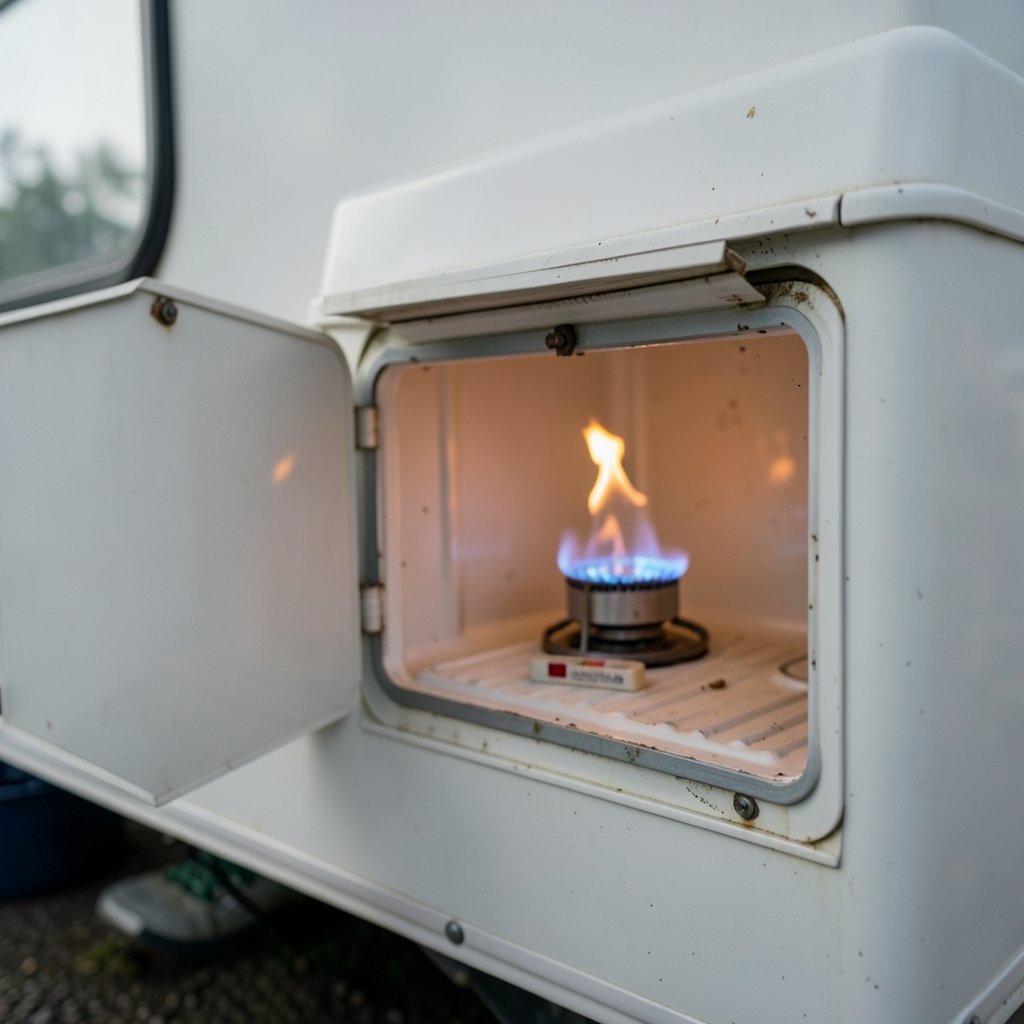
Absorption fridges are fussy. They need three things to work: a heat source, airflow, and level ground. Work through these in order.
Step 1: Check level
Parking off-level is the number one mistake people make. The weak ammonia mixture has to drain back to the boiler by gravity. If the trailer is parked on a slope, the mixture pools and cooling stops. The long-standing guidance is to park within roughly 3° side-to-side and 6° front-to-back, though exact figures vary by manufacturer, so check your manual. A cheap bubble level on the freezer floor gives the reading you need. In severe cases, running off-level for hours can permanently damage the cooling unit.
Step 2: Confirm the heat source is actually working
On propane, light the burner and look at the flame. It should be a steady blue with a hint of yellow at the tip. A lazy yellow flame, a flame that won’t stay lit, or no flame at all points to a dirty burner orifice, a spider web in the flue, or a failing thermocouple. Spider webs and mud dauber nests in the burner tube are shockingly common and cause more “dead fridge” calls than any electrical fault.
On electric, confirm the heating element is getting power and actually warming up. A multimeter and the model-specific service manual are your friends here. Resistance readings vary by model, so don’t guess at a generic number.
Step 3: Inspect the ventilation
Absorption fridges dump heat out the back through roof and side vents. If the baffles are missing or misplaced, if the vent is blocked by a wasp nest, or if the seal around the fridge is broken, heat builds up and cooling collapses. Pull the outside access panel and look for debris, damaged insulation, and gaps. This is a five-minute check that solves a surprising number of cases.
Step 4: Test on both power sources
If the fridge cools on propane but not electric (or vice versa), you’ve isolated the fault to one heating path. That narrows things fast and saves you from replacing parts you don’t need.
The 12V Compressor Fridge Checklist
Compressor fridges are simpler to diagnose because they behave like home appliances. The failure is almost always power-related.
- Check battery voltage at the fridge terminals. A compressor fridge may draw roughly 3–6 amps while running, and low voltage causes it to cut out or fail to start.
- Inspect the fuse and the wiring run for corrosion or loose connections.
- Listen for the compressor. A click but no hum often means a start problem or a dying compressor.
- Confirm the thermostat and door seal. A torn seal lets warm air in and makes a healthy fridge look broken.
If you’re chasing electrical gremlins elsewhere in your setup, some of the same troubleshooting logic applies to other gear. For instance, if your two-factor codes keep failing, there’s a known TOTP clock drift fix that explains the underlying timing issue. The mindset is the same: isolate the variable before replacing hardware.
What Actually Works in Practice
Here’s where experience beats theory. A few habits separate people who fix their fridge in an afternoon from people who pay a mobile tech $200 to tighten a wire.
Clean the burner and flue every season. A soft brush, compressed air, and five minutes prevent most propane cooling failures. Do it before your first trip, not after your food spoils.
Carry a spare thermocouple. They’re cheap, they fail, and swapping one takes minutes. It’s the single best insurance item for an absorption fridge.
Never open the sealed cooling unit yourself. The ammonia circuit is pressurized and hazardous. Beyond the safety risk, DIY work on the sealed system can void a multi-year cooling-unit warranty. Check your owner’s manual and warranty terms first.
Do a propane leak check with soapy water, never a flame. Standard practice, non-negotiable. Bubbles mean a leak; fix it before you light anything.
Photograph your vent setup before you disassemble it. Baffle placement matters, and reassembling it wrong is a classic self-inflicted cooling problem.
Check for recalls. RV refrigerators have been subject to safety recalls over the years, including past cooling-unit fire issues on certain absorption models. Look up your exact model in the official recall database before assuming a fault is your fault.
If your trailer needs work beyond the fridge and you’re deciding whether to fix or replace a failed component, the same cost-benefit logic applies to electronics. A dead board raises the question of whether a motherboard repair is worth it when the board is dead, and RV appliances follow similar math: repair wins when the part is serviceable and the unit is otherwise sound.
When to Call a Professional
Some jobs are DIY-friendly. Others aren’t. Use this rough guide.
| Symptom | Likely Cause | DIY or Pro |
|---|---|---|
| No cooling, trailer off-level | Ammonia mixture pooling | DIY: level it |
| Weak yellow flame | Dirty burner or flue | DIY: clean it |
| Cools on propane, not electric | Bad heating element | DIY if comfortable with a multimeter |
| Fridge won’t stay lit | Thermocouple or gas supply | DIY: swap thermocouple |
| Ammonia smell or yellow residue | Cooling unit failure | Pro: sealed system |
| 12V fridge cuts out under load | Wiring, battery, or compressor | Pro if wiring checks out |
| Repeated burner soot | Gas pressure or orifice issue | Pro: gas system |
The yellow residue and ammonia smell are the big red flags. Those mean the sealed cooling unit has failed, and no amount of cleaning will bring it back. That’s a replacement job, and it’s worth getting quotes before you commit.
The Money Side: Repair or Replace?
Absorption cooling units are expensive, often several hundred dollars or more for the part alone, plus labor. Before you spend that, weigh it against the age of the fridge and the value of the trailer. A 15-year-old fridge with a failed cooling unit is usually a replacement candidate. A three-year-old unit under warranty is a warranty claim, not a repair bill.
For compressor fridges, repairs are usually cheaper because the parts are common and the systems are simple. A failed thermostat or a corroded connection is a modest fix. A dead compressor on an older unit often tips toward replacement.
It also pays to think about how you travel. If you boondock and rely on 12V, a compressor fridge’s power draw shapes your battery and solar planning. If you mostly stay at hookups, absorption still makes sense despite its fussiness. And if you’re crossing borders with the trailer, connectivity and planning tools matter as much as fridge parts; a reliable travel VPN that actually works across borders keeps your reservations and banking working when you’re parked in a foreign campground.
Preventive Maintenance That Pays Off
The best repair is the one you never need. A simple seasonal routine keeps most fridges alive.
- Level the trailer before you run the fridge, every time.
- Clean the burner and flue at the start of each season.
- Inspect vents and baffles for nests and debris before every trip.
- Check door seals with the dollar-bill test: close the door on a bill and tug. If it slides out easily, the seal is failing.
- Keep the fridge coils and back area clear of stored gear.
- Run the fridge on both power sources once a month to confirm both paths work.
None of this takes long, and it heads off the majority of failures. The people who complain that RV fridges are junk are often the ones who never cleaned a burner or parked on a slope for a week.
Conclusion
Travel trailer fridge repair comes down to knowing your system and working through the basics in order. Absorption fridges fail from leveling, airflow, and dirty burners far more often than from catastrophic part failure. Compressor fridges fail from power problems. Check the simple things first, respect the sealed cooling unit, and know the red flags that mean it’s time for a pro. Do that, and you’ll spend your camping budget on trips instead of service calls.
Frequently Asked Questions
Why is my RV fridge running but not getting cold?
The most common causes are an off-level trailer, a blocked or missing vent baffle, a dirty burner, or a failed heating element. Work through leveling, ventilation, and the heat source in that order before assuming the cooling unit is dead.
How level does a travel trailer fridge need to be?
The common guidance is within about 3° side-to-side and 6° front-to-back, but exact figures vary by manufacturer. Check your manual. A bubble level on the freezer floor is a quick way to confirm you’re close enough.
Can I repair an absorption fridge’s cooling unit myself?
No. The cooling unit is a sealed, pressurized ammonia system. It’s hazardous to open, and DIY work can void the warranty. If you smell ammonia or see yellow residue, that’s a professional replacement job.
How do I know if my RV fridge is under recall?
Look up your exact make and model in the official recall database. RV refrigerators have had past recalls involving cooling-unit fire risk on certain absorption models, so it’s worth checking before you pay for repairs.
What draws power on a 12V compressor fridge?
A typical 12V compressor fridge may draw roughly 3–6 amps while running, with the duty cycle depending on ambient temperature. That matters when you’re sizing batteries and solar for boondocking.
Is it cheaper to repair or replace an RV fridge?
It depends on age and type. A failed cooling unit on an older absorption fridge usually tips toward replacement. A thermostat or wiring fault on a compressor fridge is usually a modest repair. Get quotes before deciding.
What spare parts should I carry for a travel trailer fridge?
For an absorption fridge, carry a spare thermocouple, a small multimeter, and a soft brush for burner cleaning. These cover the most common failures and cost very little. For a compressor fridge, spare fuses and a length of properly rated wire handle most roadside fixes.
How often should I clean the burner and flue?
Once at the start of each season, and again before any long trip. If you camp in dusty areas or near fields, check more often. Five minutes with a brush and compressed air prevents the weak yellow flame that kills cooling performance.
Can I run my RV fridge while driving?
Absorption fridges can run on propane while moving, but many owners switch to 12V or shut it down for safety and legal reasons depending on local rules. Compressor fridges run fine on 12V while driving. Check your manual and local regulations before deciding.



