Quick Answer: What are the best streaming software for new streamers?
OBS Studio is the best starting point for most new streamers because it is free, has no watermark, and works with Twitch, YouTube, and most other platforms. Streamlabs Desktop is the strongest alternative if you want alerts, chat, and themes bundled into one download, while XSplit suits people who prefer a more guided, paid setup.
The main distinction is between open-source tools you configure yourself and all-in-one apps that trade money for convenience. Platform-native options like streaming straight from a browser also exist for very simple broadcasts.
Before committing, compare cost, watermark and feature limits, hardware demands on your PC, platform support, audio controls, and how much setup time you can tolerate.
Why the Software Choice Matters More Than Beginners Think
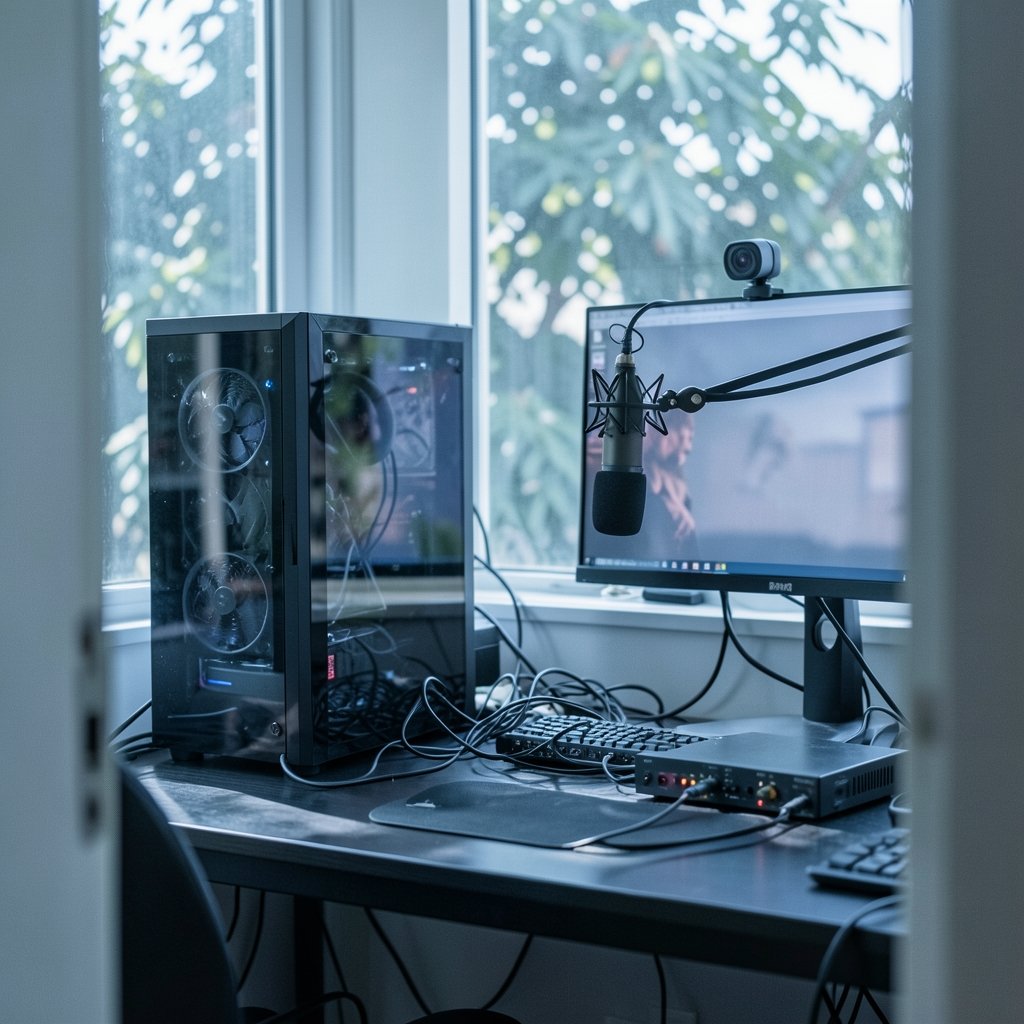
Ever watched a stream where the game audio drowned out the mic, the webcam looked like a potato, and the whole thing froze every four minutes? Almost none of that is the streamer’s personality. It is the software and settings underneath.
The tool a new streamer picks shapes three things: how hard the first week feels, how good the broadcast looks and sounds, and whether upgrading later means starting over. Pick something too basic and you hit a wall fast. Pick something too complicated and you quit before your tenth viewer shows up. The sweet spot is software that is simple on day one but still has room to grow.
There is also a practical angle people underestimate. Streaming software competes for CPU and GPU resources with the game itself. A tool that looks lovely in screenshots but drags your frame rate down is a bad trade. That is why free, efficient options dominate beginner recommendations.
The Main Contenders at a Glance
Here is how the most commonly recommended tools stack up for someone streaming their first few months.
| Software | Cost | Watermark | Best For | Main Trade-off |
|---|---|---|---|---|
| OBS Studio | Free, open source | None | Most beginners on any platform | Manual setup, plain interface |
| Streamlabs Desktop | Free tier, paid upgrades | None on free tier | Beginners who want alerts and chat built in | Some features locked behind subscription |
| XSplit | Free and paid editions | Free editions have limits | Users who want a guided, polished app | Paid tiers for full features |
| Platform-native tools | Free | Varies | Very simple single-camera streams | Few scenes, little customization |
The honest summary: OBS Studio wins on value and flexibility, Streamlabs wins on convenience, and XSplit wins on hand-holding. Nobody loses badly here. The worst outcome is picking nothing and never going live.
OBS Studio: The Default Answer, and Why It Sticks
OBS Studio is free, open source, and runs on Windows, macOS, and Linux. It has no watermark, no time limit, and no account requirement. For a new streamer on a budget, that combination is hard to beat.
Under the hood, OBS works on scenes and sources. A scene is a layout, such as “Gameplay” or “Starting Soon.” A source is anything inside it: a game capture, a webcam, an image, a text overlay, an alert box. Once that mental model clicks, the whole app makes sense. Most beginners take an evening to get comfortable and a week to feel fluent.
The trade-off is that OBS hands you a blank canvas. There are no built-in alerts, no chat dock out of the box, and no theme store. You add those through plugins and browser sources, which is more work but also means you only carry what you need. The software is also light on system resources compared with some all-in-one alternatives, which matters on a single-PC setup.
Practical tip: before going live, record a five-minute test locally instead of streaming it. Watching that recording back catches the mistakes streaming hides, like a mic that peaks or a game capture that shows a black screen. If you also plan to edit clips afterward, the same test footage is handy for learning a beginner-friendly editor, and a guide to best video editing software beginners actually works covers that next step well. (Galaxy z fold 8 vs pixel 10 pro fold design cameras software)
Streamlabs Desktop: Convenience With a Catch
Streamlabs Desktop is built on OBS’s codebase, so the core streaming engine is familiar. What it adds is the stuff beginners usually have to assemble themselves: alert boxes, a chat panel, themes, and widgets, all inside the app.
That bundling genuinely saves time. A new streamer can install one program, pick a theme, and have a working overlay in under an hour. For someone whose friends are already waiting in Discord to watch, that speed matters.
The catch is the business model. Streamlabs has a free tier and paid plans, and some features sit behind the subscription. Pricing and feature tiers change often, so check the current terms rather than trusting an old video. The other thing to know is that running the full Streamlabs suite can be heavier on your system than bare OBS. On a modest PC, that difference shows up as dropped frames.
A reasonable path: start with Streamlabs if you want the all-in-one experience, and switch to OBS later if you want finer control. Your scenes and settings transfer more easily than you would expect because the foundations are shared.
XSplit: The Polished, Paid-Leaning Option
XSplit comes in Broadcaster and Gamecaster editions, and its free versions have historically carried watermarks or feature limits. It is the most “app-like” of the three: cleaner menus, more guided setup, less digging through settings panels.
For a streamer who finds OBS intimidating, that polish has real value. XSplit also handles some capture scenarios smoothly, and its interface is friendly to people who would rather not learn what a color space setting does.
The honest caveat is cost. Free editions have limits, and the full experience means paying. If budget is tight, that money is better spent on a decent microphone first. Audio quality moves viewer retention more than any overlay ever will.
Platform-Native Tools and When They Make Sense
Twitch and YouTube both offer simpler paths for basic broadcasts. YouTube Live can stream directly from a browser for straightforward single-camera setups. Twitch has offered its own beginner-oriented app, though its long-term status is uncertain, so check the platform’s current help pages before relying on it.
These tools are fine for a first stream of a talking-head show or a simple screen share. They fall apart the moment you want multiple scenes, a proper overlay, or separate audio tracks. Treat them as a stepping stone, not a destination.
The Settings That Actually Decide Whether Your Stream Looks Good
Software choice gets the headlines, but settings decide the outcome. Three areas matter most.
Hardware encoding. Modern GPUs from NVIDIA, AMD, and Intel can encode video in dedicated hardware, offloading the work from your CPU. For single-PC streaming, turning on hardware encoding is usually the single biggest performance win available. It keeps your game smooth while the stream runs.
Bitrate. Twitch’s published guidance has long suggested roughly 6,000 kbps as a ceiling for 1080p at 60 frames per second, with lower bitrates for 720p. YouTube recommends higher bitrates for the same resolution. These are recommendations, not hard walls, and they change, so check the platform’s current encoder page. The practical rule for beginners: if your upload speed cannot comfortably sustain your target bitrate, drop to 720p rather than letting the stream stutter.
Audio. This is where most first streams fail. Use the software’s audio mixer to balance game sound against your voice, and add a noise suppression filter if your room is not treated. A cheap dynamic mic in a quiet room beats an expensive condenser mic next to a humming PC fan. If you stream from a shared space, headphones are non-negotiable to prevent echo.
One more habit worth building early: keep your desktop clean and your passwords managed. Streamers share screens for hours, and a stray notification or open window can leak more than you intend. Basic security hygiene, the same discipline covered in guides to antivirus best software, protects the machine you are broadcasting from.
Common Mistakes New Streamers Make With Their First Setup
The same handful of problems show up again and again in beginner streams.
- Overbuilding the overlay. Ten animated widgets covering the gameplay looks busy, not professional. Start with a webcam frame, a chat box, and one alert.
- Skipping the test recording. Live-streaming a setup you have never recorded means your viewers are the beta testers.
- Ignoring upload speed. Download speed sells internet plans; upload speed decides whether you can stream at all.
- Running too many background apps. Browsers with dozens of tabs eat the same resources your encoder needs.
- Never checking the stream health panel. OBS and most alternatives show dropped frames in real time. Glancing at it mid-stream catches problems before chat complains.
- Chasing every plugin. Each addition is another thing that can break after an update. Add tools when a specific need appears.
There is a quieter mistake too: treating software as the hobby instead of streaming. Tinkering with scenes feels productive and carries zero risk of an awkward first broadcast. At some point the settings are good enough, and the only way to improve is to hit start.
How to Choose Without Overthinking It
A simple decision path works for almost everyone.
- Confirm your platform and upload speed. No software fixes a connection that cannot sustain your target bitrate.
- Start with OBS Studio if you are comfortable following a setup guide and want zero cost. It is the safest long-term choice.
- Choose Streamlabs Desktop if you want alerts, chat, and themes in one install and do not mind a subscription tier existing.
- Choose XSplit if guided setup matters more to you than money, and you accept the free-edition limits.
- Use a platform-native tool only for a first test broadcast, then move on.
- Spend your remaining budget on audio before overlays, lighting, or a second monitor.
Whichever you pick, the setup routine is the same: install, add a game capture and a mic, set your bitrate below your upload ceiling, enable hardware encoding, record a test, fix what the test reveals, then go live. That loop beats any comparison table.
Conclusion
The best streaming software for new streamers is the one that gets them live this week without fighting their own computer. For most people that means OBS Studio, because free, watermark-free, and endlessly flexible is a combination nothing else quite matches. Streamlabs Desktop is the right call for anyone who values a bundled, guided experience over manual control, and XSplit earns its place for streamers who want polish and will pay for it.
The software matters less than the habits around it: test recordings, honest bitrate settings, hardware encoding, and audio that does not make viewers wince. Get those right on a basic setup and the stream already looks better than most first attempts. The tool is just the vehicle. The broadcast is the point.
Frequently Asked Questions
Is OBS Studio really free, or is there a hidden catch?
OBS Studio is genuinely free and open source, with no watermark, no time limit, and no account required. It is funded by donations and sponsorships rather than subscriptions. The “catch” is that you configure it yourself, including overlays, alerts, and chat, which other apps bundle for you.
Can my laptop run streaming software, or do I need a desktop?
Many modern laptops can stream, especially those with a dedicated GPU that supports hardware encoding. The limits show up in thermals and CPU headroom: a thin laptop running a game and an encoder at once may throttle. Streaming lighter content, or using a capture card with a second device, is often the workaround.
Do I need a second PC to stream?
No. Single-PC streaming is standard for beginners and works well when hardware encoding is enabled. A second PC helps mainly at high resolutions and frame rates, or when a game is extremely CPU-hungry. Start with one machine and upgrade only if the stream health panel shows persistent problems.
What internet upload speed do I need to stream?
As a rough guide, plan for your target bitrate plus a healthy margin, since other devices share the connection. If you intend to stream 1080p at 60 frames per second near the common 6,000 kbps ceiling, you want upload speed comfortably above that. If your upload is limited, streaming at 720p is the better choice.
Which software is easiest for someone with no technical background?
Streamlabs Desktop and XSplit are generally easier first experiences because they bundle alerts, themes, and guided setup. OBS Studio is not hard, but it expects you to understand scenes and sources. A single evening with a good tutorial closes that gap for most people.
Can I switch streaming software later without losing my setup?
Yes, and it is common. Because Streamlabs Desktop is built on OBS’s codebase, scenes and sources often transfer with modest effort. Overlays built as browser sources work across most tools. The main thing you rebuild is alert and chat configuration, so keep notes on your settings before switching.