
Your mix sounds fine, then a burst of static rips through the speakers. You check the cables, restart the DAW, and the crackling returns the moment you arm a track. Is the interface dying, or is the USB connection quietly sabotaging every session?
The good news is that most crackling traced to USB is fixable without buying new gear. The bad news is that people usually attack the wrong cause first. This guide walks through the fixes that actually work, in the order a technician would try them, and explains why each one matters.
First, Separate Analog Noise From Digital Dropouts
Before touching a single setting, identify what kind of crackling you have. The two problems sound similar but have completely different cures. (Sound card)
Analog noise is continuous. You hear hum, hiss, or a scratchy texture even when the DAW is closed. It often changes when you touch a cable or move a monitor. This points to ground loops, bad cables, or gain staging.
Digital dropouts are intermittent. Audio cuts out for a few milliseconds, pops, or stutters under load. The interface may click when you open a browser or scroll a page. This points to USB bandwidth, buffer size, drivers, or power management.
A quick test separates them. Play a track with the DAW closed and nothing else running. If the noise persists, treat it as analog. If it only appears under load, treat it as digital. Most “USB crackling” complaints land in the second bucket, which is why the fixes below focus there.
Move the Interface to a Rear USB Port
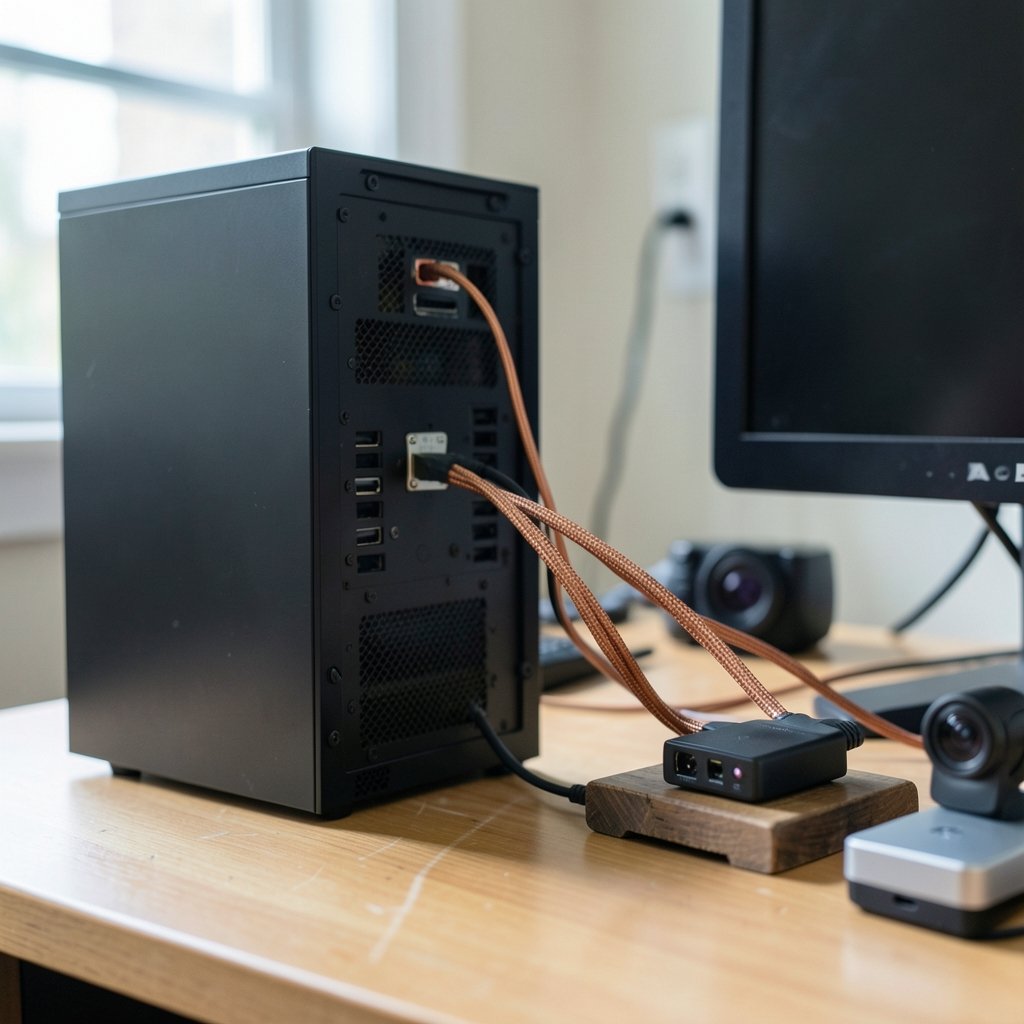
This is the single most effective fix, and it costs nothing. Front-panel USB ports on desktops often share internal headers and power delivery with card readers, front audio jacks, and RGB controllers. That shared power rail introduces electrical noise and occasional dropouts.
Rear ports sit directly on the motherboard and usually have cleaner power delivery. Plug the interface in there, then test again. On laptops, try every port you have, because some are wired to different internal controllers. Thunderbolt ports and USB-C ports sometimes behave differently from legacy USB-A ports, even on the same machine.
One caveat: not all rear ports are equal. Ports labeled for BIOS flashing or keyboard use sometimes run at reduced speed. Stick to standard ports and avoid any port sharing a hub with a webcam or external drive.
Use a Powered Hub, Not a Passive One
If you must run the interface through a hub, make it a powered hub with its own adapter. Passive hubs split whatever power the host provides, and audio interfaces are sensitive to voltage sag. A powered hub gives the interface a stable supply independent of your keyboard, mouse, and phone charger.
Better yet, give the interface its own dedicated port and move everything else to the hub. Audio devices deserve priority. If you are already shopping for a hub, guides on the best USB-C hub explain which models deliver consistent power to bus-powered devices, and the best USB-C hub for MacBook Pro covers the Thunderbolt-specific quirks that trip up audio gear on Apple laptops.
Try a USB 2.0 Port for USB 2.0 Interfaces
Here is a counterintuitive one. Many audio interfaces still run on USB 2.0 internally. Some manufacturers explicitly recommend plugging those devices into USB 2.0 ports rather than USB 3.0 ports, because USB 3.0 signaling can radiate interference in the 2.4 GHz range that leaks into sensitive analog circuitry.
If your interface is USB 2.0 and you have a blue USB 3.0 port next to a black USB 2.0 port, try the black one. This is device-specific, so treat it as an experiment rather than a rule. Some interfaces are immune, and some actually perform better on USB 3.0. Test both and trust your ears.
Raise the Buffer Size and Match Sample Rates
Buffer size is the classic dropout fix, and it still works. A buffer that is too small forces the CPU to fill audio buffers faster than it can, producing clicks. Increase it in your interface’s control panel or your DAW’s audio settings. Latency rises, but stability improves. For tracking, use a small buffer. For mixing, use a large one.
Sample rate mismatches cause a subtler problem. If Windows or macOS is set to 48 kHz while your DAW project runs at 44.1 kHz, the driver resamples on the fly, and some drivers handle that poorly. Set the operating system’s audio device and the DAW project to the same rate. On Windows, check Sound settings. On macOS, check Audio MIDI Setup. Then restart the DAW so it picks up the change.
Disable USB Selective Suspend and Aggressive Power Saving
Operating systems love to save power, and audio interfaces hate it. USB selective suspend lets the system cut power to idle USB devices. When the interface wakes up, you get a pop. Microsoft documents this feature as a power-saving measure, and it is a well-known culprit for audio glitches.
On Windows, open Power Options, find USB settings, and disable selective suspend. Also set the power plan to High Performance and disable “Allow the computer to turn off this device to save power” in Device Manager under each USB Root Hub. On macOS, prevent the system from sleeping drives and disable App Nap for your DAW.
Laptop users should also plug in. Battery saver modes throttle the CPU and can starve the audio thread, which produces crackling that vanishes the moment you connect the charger.
Update or Roll Back the Driver
Drivers are the most overlooked variable. A class-compliant driver built into the OS is convenient but sometimes less stable than the vendor’s own driver. Conversely, a freshly updated vendor driver can introduce regressions.
The practical approach: note your current driver version, install the latest vendor driver, and test. If the crackling gets worse, roll back. Keep a copy of the installer that worked. Also update your motherboard chipset drivers, because USB controller bugs are often fixed at the chipset level rather than the audio level.
If you have already spent an evening chasing driver ghosts, the troubleshooting habits in this guide to how to fix a website that will not load apply surprisingly well to audio: isolate variables, change one thing at a time, and confirm each fix before moving on.
Swap the Cable and Shorten the Run
A damaged or overly long USB cable causes dropouts that look exactly like driver problems. Swap in a known-good cable, ideally one under two meters, and test. Avoid cables with built-in hubs, LED displays, or braided sleeves that hide thin conductors.
Also check the connector. A loose USB-C plug that wiggles will interrupt data mid-stream. If the port feels loose, try a different port before blaming the interface.
Hunt Down Ground Loops
If the noise is analog rather than digital, suspect a ground loop. This happens when gear plugged into different wall circuits shares a ground path through audio cables. The result is a 50 or 60 Hz hum with harmonics that sound like buzz.
Fixes include plugging all audio gear into the same power strip, using balanced cables where possible, and inserting a ground-loop isolator between the interface and monitors. Never lift the ground pin on a power cable. That is dangerous and illegal in most countries.
Check for USB 3.0 Interference From Nearby Gear
External SSDs, wireless dongles, and even some monitors emit radio-frequency noise that couples into audio cables. Move drives away from the interface, keep unbalanced cables short, and route audio cables away from power supplies. If the crackling appears only when an external drive is connected, you have found your culprit.
Build a Stable Baseline Before You Blame the Hardware
Professionals solve this by eliminating variables. Set up a clean test project with one track and one plugin. If that runs cleanly, add plugins one at a time until the crackling returns. The offender is usually a plugin with poor buffer handling, not the interface.
Task Manager and Activity Monitor help here. Watch CPU usage during a dropout. If the audio thread spikes while overall CPU sits at 20 percent, the problem is scheduling, not raw power. That points back to power management, buffer settings, or a misbehaving driver.
When to Stop Troubleshooting and Replace Hardware
Some crackling is genuinely a failing interface. Warning signs include crackling that persists across multiple computers, noise that appears with no USB connection at all, and physical symptoms like a scratchy gain knob. In those cases, no amount of port swapping will help.
Before you buy, borrow a friend’s interface and test it in your setup. If the borrowed unit is clean, the problem is your device. If it crackles too, the problem is your computer, your power, or your room wiring.
A sensible upgrade path also matters. If you are rebuilding a mobile rig, pairing the right interface with a reliable dock makes a real difference, and the best USB-C hubs for MacBook laptops covers which docks keep audio devices stable under load.
A Quick Reference Table
| Symptom | Likely Cause | First Fix |
|---|---|---|
| Clicks under load only | Buffer too small | Raise buffer size |
| Pop when system idles | USB selective suspend | Disable in power settings |
| Constant hum with harmonics | Ground loop | Common power strip or isolator |
| Crackle on USB 3.0 port only | RF interference | Try a USB 2.0 port |
| Noise with DAW closed | Analog or cable fault | Swap cables, check gain |
| Dropouts with external drive | Bandwidth or interference | Move drive to another port |
What Actually Works in Practice
Technicians rarely find one magic setting. They find a stack of small fixes. The pattern that resolves most cases looks like this: move to a rear port, use a powered hub, raise the buffer, match sample rates, disable USB suspend, and update drivers. Do them in that order and test after each step. Skipping the testing phase is the most common mistake, because it leaves you unsure which change actually helped.
The second most common mistake is assuming a new interface will fix a computer problem. It rarely does. Diagnose first, spend second.
Conclusion
Crackling from a USB audio interface is almost always a system problem wearing a hardware disguise. Start by sorting analog noise from digital dropouts, then work through ports, power, buffers, drivers, and cables in a logical order. Change one variable at a time and confirm each result. Most rigs settle down after a rear port, a powered hub, and a buffer adjustment. The rest is patience and a willingness to test rather than guess.
Frequently Asked Questions
Why does my audio interface crackle only when I open other apps?
This usually points to buffer size, power management, or driver scheduling. Other apps compete for CPU time, and a small buffer leaves no headroom. Raise the buffer, disable USB selective suspend, and set your DAW process priority to high. If the crackle appears only when a browser is open, check for hardware acceleration settings that spike the GPU and interrupt audio threads.
Is a USB 3.0 port worse than USB 2.0 for audio interfaces?
Sometimes, but not always. Some USB 2.0 interfaces are documented as sensitive to USB 3.0 signaling interference. Others run perfectly on USB 3.0. Test both ports with the same project and compare. If you hear no difference, keep the faster port.
Can a bad USB cable cause crackling?
Yes. Damaged shielding, worn connectors, or excessive length all cause intermittent dropouts that sound like crackling. Swap in a short, known-good cable before you touch any software setting. It is the cheapest test you can run.
Should I use a powered USB hub with my audio interface?
A powered hub is safer than a passive one because it supplies stable voltage. The ideal setup is a dedicated port for the interface, with everything else on the hub. If you must share, choose a powered hub and avoid daisy-chaining.
Why does the crackling stop when I unplug my laptop charger?
That is a classic ground loop or power supply noise symptom. The charger introduces a ground path that interacts with your audio gear. Try a different outlet, a ground-loop isolator, or a charger with better isolation. Never remove the ground pin from a power cable.
How do I know if my interface is broken or if it is my computer?
Test the interface on a second computer. If it crackles there too, the interface is likely faulty. If it runs cleanly, the problem is in your original machine, its ports, drivers, or power. This single test saves people from buying hardware they do not need.



