

A single failed hard drive can erase a decade of family photos in an afternoon. According to industry estimates, roughly one in every hundred drives fails each year, and the odds climb sharply once a disk passes its fourth birthday. That math is exactly why more households are moving their data off laptops and phones and onto a network-attached storage (NAS) device sitting quietly next to the router.
A NAS is simpler than it sounds. It is a small computer full of hard drives that shares files across your home network, backs up every device automatically, and gives you a private cloud you actually control. This guide walks through the whole process, from picking hardware to locking down remote access, and flags the mistakes that trip up most first-timers.
What a Home NAS Actually Does
Think of a NAS as a shared folder that never sleeps. Instead of emailing files to yourself or juggling USB sticks, every phone, laptop, and smart TV on the network reads and writes to the same storage pool. Most people use one for four jobs: (Network-attached storage)
- Automatic backups of computers and phones
- A media library that streams to TVs and tablets
- File sharing between family members with separate accounts
- A private cloud for photos and documents, replacing subscription storage
The appeal is control. You own the drives, you own the data, and nobody can change the terms of service on you. The trade-off is that you are now the administrator, which means setup and maintenance land on your desk.
Step 1: Choose Your Hardware
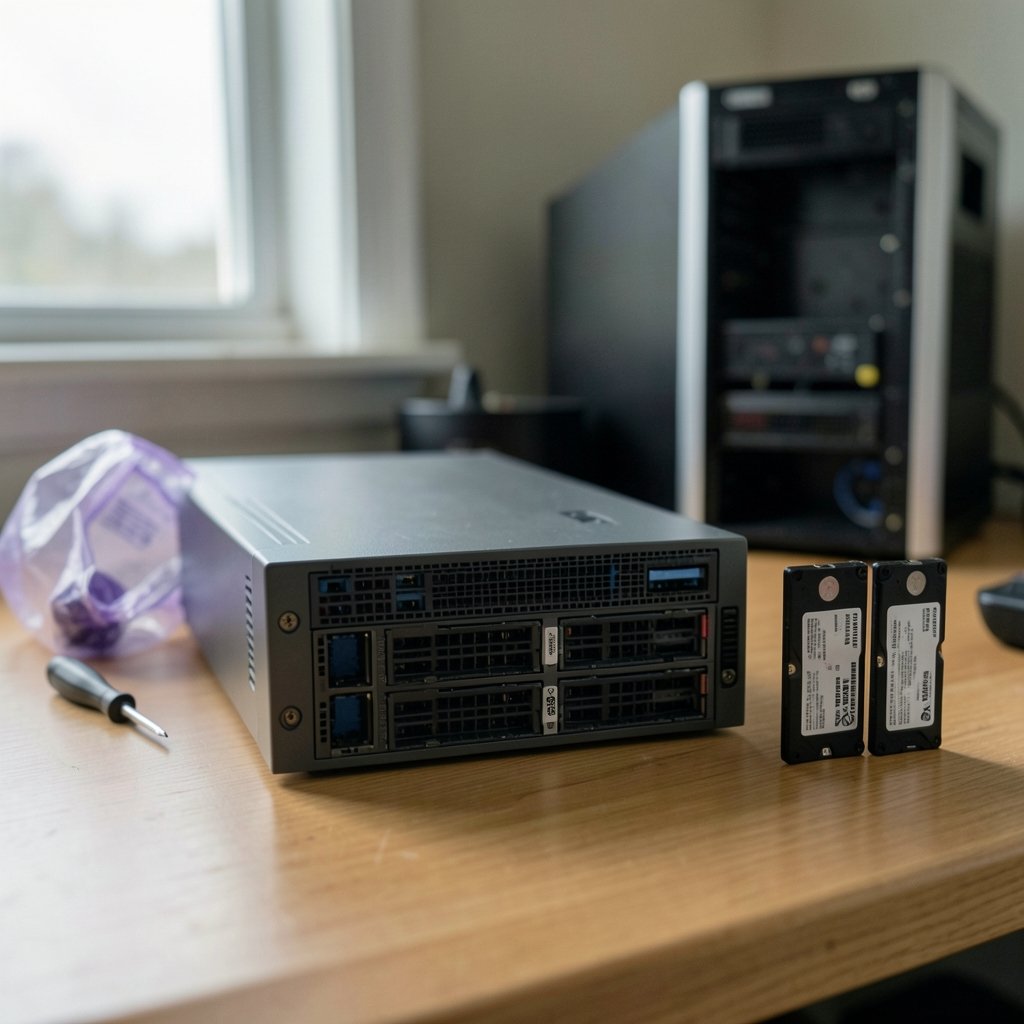
There are two paths, and the right one depends on patience and budget.
| Option | Best for | Pros | Cons |
|---|---|---|---|
| Prebuilt NAS (Synology, QNAP, Asustor) | Most households | Easy setup, polished apps, low power draw | Higher cost per bay, limited upgrades |
| DIY build (TrueNAS, Unraid, OpenMediaVault) | Tinkerers | Cheaper per terabyte, fully customizable | Steeper learning curve, you troubleshoot everything |
A two-bay prebuilt unit is the sweet spot for beginners. It is quiet, uses less electricity than a light bulb, and the software walks you through drive setup. If you already enjoy building PCs, a DIY box with a used office desktop and a couple of large drives can deliver more storage for less money.
One hardware detail matters more than any other: buy CMR drives, not SMR drives. Shingled magnetic recording drives are cheaper but crawl during RAID rebuilds, which turns a two-hour recovery into a two-day ordeal. Check the spec sheet before buying, because some vendors bury this detail.
Step 2: Pick the Right Drives and RAID Level
Drive count drives your redundancy strategy.
- Two drives: Mirror them (RAID 1). Each disk holds an identical copy, so one can die without data loss.
- Four or more drives: Use RAID 5, RAID 6, or ZFS mirrors. Single-parity RAID 5 on very large drives is increasingly frowned upon because rebuild times stretch into days, leaving you unprotected the whole time. Mirrors cost more capacity but rebuild far faster.
Buy drives in matched pairs from the same batch when possible, and never buy all your drives from a single shipment if you can avoid it, since drives manufactured together tend to fail together. A common approach is to start with two drives and add more as the budget allows.
Step 3: Physical Setup and Network Connection
Plug the NAS into your router with an Ethernet cable. This is not optional advice. Wi-Fi transfers crawl at a fraction of wired speed, and a large backup over wireless can take days instead of hours. If your router only offers Gigabit ports, expect roughly 110 MB/s in real-world transfers; a 2.5GbE setup roughly doubles that.
Place the unit somewhere with airflow and away from carpet, and put it on a UPS (uninterruptible power supply). Sudden power loss during a write operation is one of the few things that can genuinely corrupt a storage pool. A modest UPS costs less than a single replacement drive and pays for itself the first time the power flickers.
Step 4: Install the Operating System and Create the Storage Pool
Power on the device and follow the vendor’s setup wizard. For prebuilt units, you will create an admin account, install the latest firmware, and let the system format the drives. For DIY builds, install the OS to a small separate SSD or USB stick, then build the pool from the data drives.
A few settings deserve attention right away:
- Set a strong admin password and enable two-factor authentication if offered.
- Create the storage pool using your chosen RAID level, then create a shared folder on top of it.
- Enable scheduled snapshots (daily is fine for most homes). Snapshots are point-in-time copies that let you roll back accidental deletions or ransomware damage.
- Set the device to a DHCP reservation so its address never changes, which keeps mapped drives working.
The formatting and pool creation step can take hours on large drives. Start it before bed and let it run.
Step 5: Create Users, Shares, and Permissions
Resist the urge to run everything as the admin account. Create a separate user for each family member, plus a dedicated account for backups. Then set permissions per shared folder: the photo archive might be read-only for the kids, while a shared documents folder stays open to everyone.
Enable SMB for Windows and macOS file sharing, and turn on Time Machine support if you use Macs. For phones, install the vendor’s photo backup app so pictures upload automatically when the device is on home Wi-Fi. This single feature replaces paid cloud photo storage for most families, and it is usually the moment a NAS converts a skeptic.
If you also want to automate the rest of the house while you are at it, the same network that serves your NAS is the foundation for other connected devices, much like the setups covered in this guide to best smart speakers for home automation. A reliable wired backbone helps everything from streaming sticks to security cameras. (How to Stop Snoring at Night Home Remedies: 8 Easy Fixes)
Step 6: Set Up Backups the Right Way
Here is the hard truth that catches almost every beginner: RAID is not a backup. RAID protects against a dead drive. It does nothing against accidental deletion, ransomware, fire, or a spilled coffee. Follow the 3-2-1 rule: three copies of your data, on two different types of media, with one copy offsite.
In practice, that means the NAS holds the working copy, an external USB drive takes a periodic copy, and a cloud backup service or a second NAS at a relative’s house holds the offsite copy. Schedule the USB backup weekly and check the logs monthly. An unverified backup is a hope, not a plan.
Step 7: Secure Remote Access
The convenience of reaching your files from anywhere is real, but so is the risk. The safest approach is a VPN back into your home network, which most NAS brands now offer as a built-in app. Avoid exposing the NAS admin interface directly to the internet through router port forwarding, since automated attacks against internet-facing storage devices are constant.
Security researchers and government guidance consistently recommend changing default credentials, keeping firmware current, and disabling services you do not use. A NAS that only accepts connections from inside your network, plus a VPN for outside access, closes the most common attack paths.
Common Mistakes Beginners Make
Even careful planners stumble on the same handful of issues. Watch for these:
- Buying drives one at a time from different batches and mixing sizes in a parity array, which wastes capacity.
- Skipping the UPS, then learning about power-loss corruption the hard way.
- Using Wi-Fi for the initial sync, which turns a three-hour job into a three-day one.
- Forgetting the offsite copy, which leaves the whole system vulnerable to theft or fire.
- Never testing a restore. The only backup that counts is one you have successfully restored from.
Budget a little time each month for maintenance: check drive health, review backup logs, and install firmware updates. Fifteen minutes of housekeeping prevents most disasters. (NIST Cybersecurity Framework)
How Much Does a Home NAS Cost?
A realistic entry point is a two-bay enclosure plus two drives. Enclosures start around the price of a mid-range router, and NAS-grade drives run higher than desktop drives because they are built for 24/7 operation. A four-bay setup with redundancy typically costs roughly double the entry configuration. Compared with years of cloud subscription fees for a family, the break-even point often arrives within two to three years, and the hardware keeps working long after.
If the upfront cost feels steep, remember that the storage also serves as the backup destination for every computer in the house, which quietly replaces several paid services at once. Households juggling other big purchases sometimes weigh financing options, and the same logic used when comparing a home equity loan vs line of credit applies here: match the tool to the job and avoid paying interest on a depreciating gadget.
Conclusion
Setting up a home NAS is a weekend project with a decade-long payoff. Pick a two-bay unit or a DIY build, buy CMR drives in pairs, wire it to the router, create a mirrored pool, set up user accounts, and then do the part almost everyone skips: build a real 3-2-1 backup plan with an offsite copy. Add a UPS, keep the firmware current, and reach your files through a VPN rather than an open port. Do those things and your photos, documents, and media stay yours, safe from dead drives and shifting subscription terms alike. The setup takes a few hours; the peace of mind lasts for years.
Frequently Asked Questions
How much storage do I actually need for a home NAS?
Most families start comfortably with 8 to 12 TB of usable space, which covers years of photos, documents, and a media library. Buy drives larger than you think you need, since pools are easier to expand than to rebuild, and remember that mirroring halves your raw capacity.
Can I use old desktop hard drives in a NAS?
You can, but it is a gamble. Desktop drives are not rated for 24/7 operation, and used drives carry unknown wear. Use them for scratch space or a secondary backup, never as the primary copy of irreplaceable data.
Is a NAS better than a cloud subscription?
It depends on your priorities. A NAS wins on long-term cost, privacy, and capacity, and it backs up every device in the house. Cloud services win on simplicity and automatic offsite protection with zero maintenance. Many households use both: a NAS for daily storage and a cloud service for the offsite copy.
Do I need a UPS for my NAS?
Strongly recommended. A brief power cut during a write can corrupt the storage pool, and recovery may require reformatting. A small UPS provides ten to twenty minutes of runtime, enough to ride out short outages and shut down cleanly.
How do I access my NAS when I am away from home?
Use the built-in VPN server on your NAS or router. It creates an encrypted tunnel into your home network without exposing the device to the open internet. Avoid port forwarding the admin interface, which invites automated attacks.
How often should I replace NAS drives?
There is no fixed expiry date, but most people replace drives after four to six years of service or at the first sign of reallocated sectors in the health report. Because the array is redundant, you can swap one drive at a time without downtime.



