

What if the fix for your Steam Deck’s storage anxiety costs less than three new AAA games and takes about an hour on a Saturday morning? That’s the reality for most owners. The M.2 2230 NVMe SSD inside the Deck is one of the few genuinely user-serviceable parts on the device, and swapping it remains the single most cost-effective upgrade you can make in 2026.
This guide walks through what actually works, what trips people up, and how to avoid the mistakes that turn a 45-minute job into a two-day troubleshooting saga.
Why the SSD Swap Still Makes Sense in 2026
Modern games are enormous. A single blockbuster can swallow 100GB or more, and a 64GB or 256GB Deck fills up fast once you add a few indie darlings and emulation libraries. Cloud streaming and SD cards help, but neither matches the speed and convenience of internal NVMe storage.
Valve’s own documentation describes the SSD as replaceable, and the company has historically permitted self-repair while noting that damage caused during the process isn’t covered. That distinction matters: you’re allowed to open the device, but you own the risk.
The economics are simple. A 1TB or 2TB 2230 drive costs a fraction of what a new console or handheld would set you back. If you’re weighing whether to upgrade versus replace, comparisons like Legion Go S vs Steam Deck and ROG Ally X vs Steam Deck OLED are worth reading before you spend. Often the smarter move is keeping the Deck and giving it more room to breathe. (Steam Deck)
What You Actually Need Before You Start
Gathering parts in advance is where most people lose time. Here’s the practical checklist.
| Item | Why You Need It | Notes |
|---|---|---|
| M.2 2230 NVMe SSD | The replacement drive | Single-sided modules are safest for clearance |
| Precision screwdriver set | Opening the shell | Phillips PH0 and PH1 bits cover most screws |
| Plastic pry tool or guitar pick | Separating the back shell | Metal tools scratch and crack plastic |
| USB drive (8GB+) | SteamOS recovery image | Written with a tool like Balena Etcher or Rufus |
| Anti-static wrist strap | Protecting components | Cheap insurance |
| Thermal pad (optional) | Some drives benefit | Only if the original shim doesn’t transfer |
A word on drive choice: the 2230 form factor is short, and clearance inside the Deck is tight. Community reports consistently favor single-sided drives. Double-sided 2230 modules may physically fit in some units but risk pressure on the shell or poor heat transfer. When in doubt, buy single-sided.
Capacity-wise, 1TB and 2TB drives have become far more available since 2023, though prices fluctuate. Don’t lock in a budget based on last year’s numbers.
Step-by-Step: The Actual Swap
Step 1: Back Up Everything That Matters
A fresh reimage wipes the drive. SteamOS keeps a read-only root filesystem with a separate home partition, so your saves, non-Steam games, and desktop files live in your home directory. Copy them to an SD card or external drive first.
Cloud saves cover many Steam titles, but not all. Emulation ROMs, save states, and anything installed through desktop mode won’t sync automatically. This is the step people skip, and it’s the one they regret.
Step 2: Power Down and Discharge
Shut the Deck down completely, not sleep mode. Unplug the charger. Hold the power button for a few seconds to drain residual charge.
Valve’s teardown guidance is explicit that the battery must be disconnected before you work inside the device. Skipping this is the most common cause of short circuits and dead boards. It’s not optional.
Step 3: Open the Shell Carefully
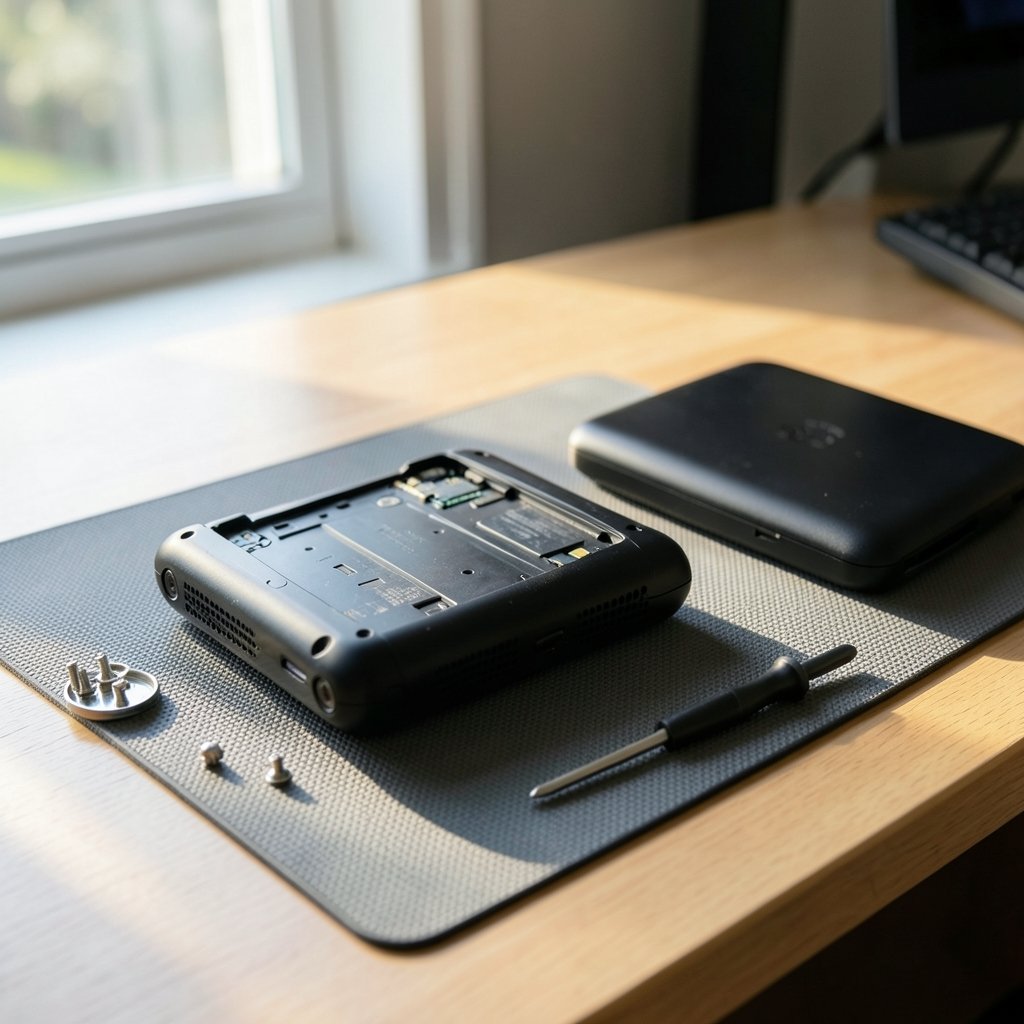
Remove the eight screws on the back. Note that the two outermost screws on some models are slightly longer, so keep track of where each goes. Use a plastic pry tool to work around the seam, starting near a corner and moving slowly.
The clips are plastic and they will snap if you rush. Take your time. A cracked shell is cosmetic, but a damaged clip can leave the case loose forever.
Step 4: Disconnect the Battery and Remove the Shield
Once inside, disconnect the battery connector first. Then remove the metal shield covering the SSD, which is held by a few small screws. Keep these screws organized, because they’re tiny and easy to lose.
Step 5: Swap the Drive
The SSD sits in an M.2 slot secured by a single screw. Remove it, slide the old drive out at a slight angle, and insert the new one the same way. Don’t force it. The connector is keyed, so it only fits one orientation.
Replace the retaining screw, but don’t overtighten. Snug is enough.
Step 6: Reassemble and Reimage
Reconnect the battery, replace the shield, and snap the shell back together. Then boot from your SteamOS recovery USB.
If you’ve never written a recovery image before, the process is straightforward: flash the image to the USB drive, hold Volume Down and press Power to enter the boot menu, and select the USB device. From there, choose the reimage option and follow the prompts. The whole reimage takes roughly 15 to 30 minutes depending on drive speed.
Common Mistakes and How to Dodge Them
Forgetting the battery disconnect. This is the big one. It causes more damage than any other single error.
Buying the wrong form factor. A standard 2280 drive will not fit. It’s too long. Check the listing twice before you buy.
Skipping the backup. SteamOS recovery wipes the drive clean. There is no undo button.
Using metal tools to pry. You’ll scratch the shell and possibly nick a component. Plastic only.
Rushing the reimage. Interrupting the process mid-write can leave the drive in an unbootable state. Let it finish, even if it looks stuck.
Ignoring thermal considerations. Some high-capacity drives run warmer. If you notice throttling after the swap, a thin thermal pad between the drive and shield can help, but don’t stack pads thick enough to bow the shield.
If you later run into software issues after the swap, troubleshooting guides like the Decky Loader not working Steam Deck fix 2026 walk through the plugin-related snags that sometimes appear after a fresh install.
Dual-Boot and Windows Considerations
Some owners want Windows alongside SteamOS. Valve and community guides document this, but it adds complexity. Windows on Deck has driver caveats, particularly around audio and some input features. If dual-booting is your plan, partition carefully during the reimage and allocate space deliberately rather than shrinking partitions later.
For most people, though, the simpler path is better: keep SteamOS as the primary system, use SD cards for overflow, and reserve the internal drive for the games you actually play.
Is It Worth Doing Yourself?
The honest answer depends on your comfort with small screws and static-sensitive parts. The swap is genuinely approachable, but it isn’t foolproof. If opening electronics makes you nervous, a repair shop can do it, though you’ll pay for the labor.
For the DIY crowd, the satisfaction of a 2TB Deck running everything you own is hard to beat. And once you’ve done it, other upgrades feel less intimidating. The same skills transfer to swapping storage in a laptop, which is why guides like clone hard drive to SSD 2026 are a natural next read.
There’s also a broader context here. Valve’s hardware roadmap keeps evolving, and if you’re curious about what’s coming, the Steam Machine release date 2026 coverage is worth a look. It helps you decide whether to invest in the Deck you own or wait for something new. Similarly, if stock issues have you shopping around, Steam Deck out of stock alternatives 2026 lays out the landscape. (Steam Deck Official Site)
What About the Switch 2 Comparison?
Plenty of buyers are weighing the Deck against Nintendo’s latest. If that’s your situation, Switch 2 vs Steam Deck breaks down the tradeoffs. The short version: the Deck wins on flexibility and repairability, which is exactly why an SSD upgrade is even possible. A closed platform doesn’t offer that option.
Conclusion
Upgrading the Steam Deck’s SSD in 2026 remains one of the best value moves in handheld gaming. The recipe is unglamorous but reliable: buy a single-sided M.2 2230 NVMe drive, back up your home directory, disconnect the battery, work slowly with plastic tools, and reimage with Valve’s recovery software.
The mistakes are predictable, which means they’re avoidable. Disconnect the battery. Don’t overtighten screws. Don’t skip the backup. Let the reimage finish. Do those four things and you’ll have a Deck with room to spare and a skill you can reuse.
Frequently Asked Questions
What size SSD can the Steam Deck take?
The Deck uses an M.2 2230 NVMe slot. Capacities of 1TB and 2TB are the practical sweet spot, with 2TB availability improving steadily since 2023. Larger capacities exist in the 2230 form factor but are less common and often pricier per gigabyte.
Does upgrading the SSD void the warranty?
Valve has historically permitted self-repair, but damage caused during the process isn’t covered. That means you’re allowed to open the device, but if you crack the shell or short the board, the repair is on you. Check Valve’s current support language before starting, since policies can change.
Can I just clone my old drive instead of imaging it again?
Cloning is possible but fiddly on the Deck because of the read-only root filesystem and partition layout. Most people find a clean reimage faster and more reliable. If you do clone, make sure the target drive is at least as large as the source.
Do I need a special screwdriver?
Yes. A precision set with Phillips PH0 and PH1 bits covers the shell and shield screws. Some models use slightly different screw lengths, so keep them organized as you remove them.
Will a double-sided 2230 drive fit?
It might physically fit, but clearance is tight and heat transfer can suffer. Single-sided drives are the safer choice and are what most community reports recommend.
How long does the whole process take?
For a first-timer, budget 60 to 90 minutes including the backup and reimage. Experienced hands can finish in about 30 to 45 minutes. The reimage itself typically takes 15 to 30 minutes depending on drive speed.
A note on tools and torque. Precision matters more than force. A PH0 bit that fits snugly will undo every screw in the Deck without stripping heads, and a light touch on the retaining screw prevents thread damage in the M.2 post. If a screw resists, stop and check the bit size rather than leaning into it.
On static and workspace. Work on a hard, non-carpeted surface. Touch a grounded metal object before handling the drive, or wear the wrist strap clipped to a bare metal part of the frame. Keep screws in a shallow dish or taped to labeled paper so the longer pair doesn’t end up in the wrong hole.
After the swap, verify before you celebrate. Boot into SteamOS, check that the drive shows the full capacity in desktop mode’s disk utility, and run a game from the internal drive to confirm read speeds are healthy. If capacity looks wrong, the reimage may have used a smaller partition table—rerun it rather than patching partitions by hand.
Final thought. The Deck’s repairability is the point. Every screw you turn teaches you something about the machine, and the storage you install today will outlast several software updates. Take the hour, follow the order of operations, and the result is a handheld that fits your library instead of the other way around.



