Roughly seven in ten first-time PC builders say the hardest part wasn’t plugging in cables. It was figuring out what to buy before anything arrived. That single insight explains why so many builds stall: the assembly is a two-hour job, but the planning is where most mistakes get baked in. This guide walks through the whole process in order, from picking parts to that first successful boot, with the practical details that generic instructions tend to skip.
Step 1: Set Your Budget and Target Resolution First
Before a single part goes in a cart, decide two things: total budget and target resolution. A 1080p build and a 1440p build share a lot of DNA, but the graphics card and power supply diverge fast. A sensible split for a mid-range gaming machine puts roughly 40 to 50 percent of the money into the GPU, since that component drives frame rates more than anything else.
Leave a buffer of 10 to 15 percent for the parts people forget: case fans, thermal paste, a Windows license, and shipping. If the budget is tight, the best gaming pc under 1000 is a useful reference point for what a realistic entry build looks like.
Step 2: Choose the CPU and Motherboard Together
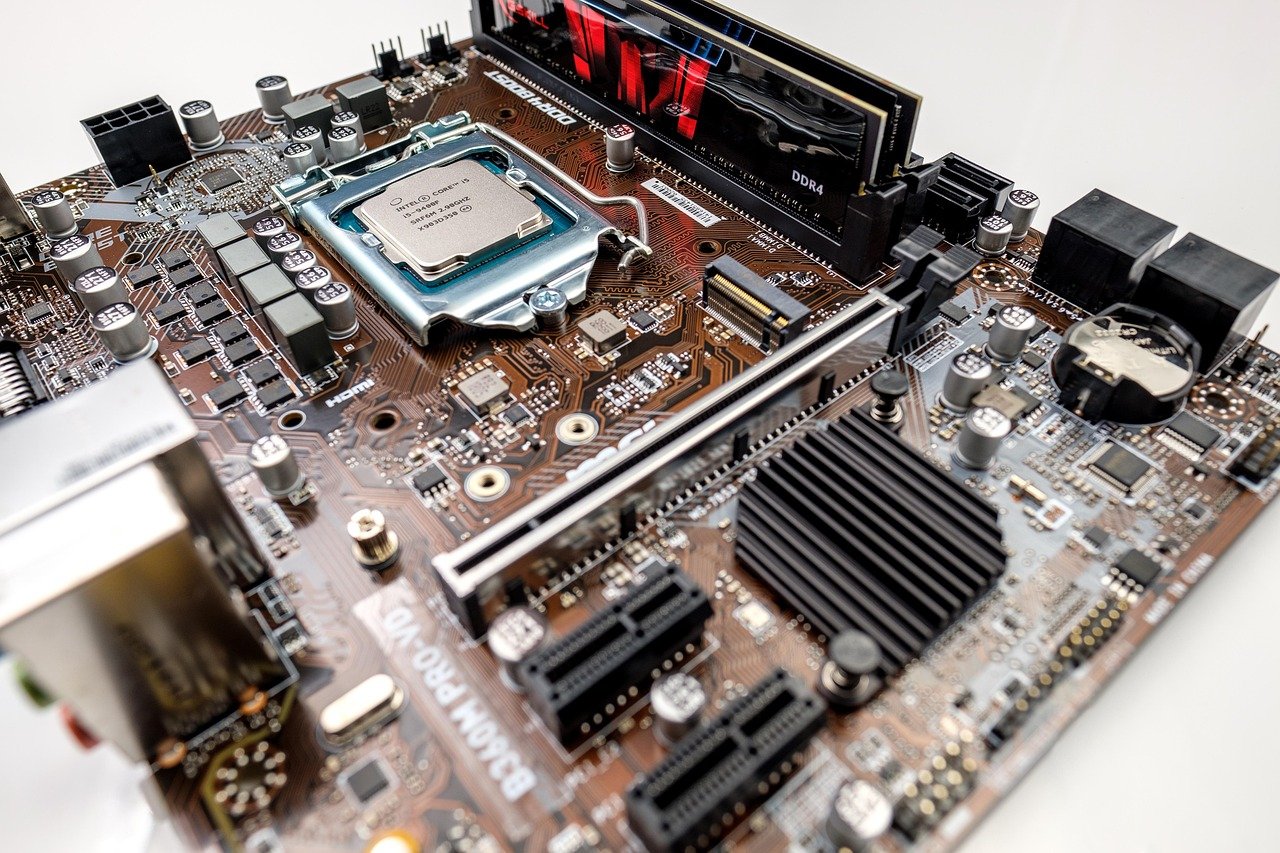
This is the compatibility trap that catches beginners most often. The CPU socket on the motherboard must match the processor exactly. An AMD chip won’t drop into an Intel board, and even within one brand, generations differ. Buy these two as a pair, never separately.
| Decision | What to check | Common mistake |
|---|---|---|
| Socket | CPU and board share the same socket name | Buying last-gen CPU with current-gen board |
| Chipset | Board chipset supports overclocking if wanted | Paying for OC features on a locked CPU |
| Form factor | ATX, micro-ATX, or mini-ITX fits the case | Mini-ITX board in an ATX case with no standoff alignment |
| BIOS support | Board ships with BIOS for the chosen CPU | New CPU on an old board that needs a BIOS flash |
If gaming performance is the priority and budget is generous, the best motherboard for gaming narrows the field to boards with strong power delivery and good rear I/O.
Step 3: Pick Memory and Storage
For gaming, 16GB of RAM is the floor and 32GB is comfortable headroom. Two sticks always beat one stick of the same total capacity, because dual-channel memory roughly doubles the bandwidth the CPU can use. Buy a matched kit rather than mixing brands.
Storage has a simple rule: a NVMe M.2 SSD for the operating system and games, and optionally a larger SATA SSD or hard drive for a media library. PCIe generation matters less than people assume. A PCIe 3.0 drive and a PCIe 5.0 drive feel nearly identical in game load times, so spending extra on the fastest drive rarely pays off for gaming.
Step 4: Choose the Graphics Card and Power Supply as a Pair
The GPU determines how much power the system needs, and modern cards have brief transient spikes that exceed their rated draw. A common rule of thumb is to pick a power supply rated at roughly 1.3 to 1.5 times the estimated total system draw. That headroom isn’t wasted; it keeps the unit running in its efficient range and protects against shutdowns under load.
Check that the PSU has the right connectors for the card. High-end GPUs may need two or three dedicated 8-pin cables, and daisy-chaining a single cable across two connectors is a genuine fire risk. Also confirm the card physically fits the case; measure length, width, and slot thickness before buying.
Step 5: Pick a Case and Cooling That Actually Fit
Case choice is mostly about airflow and clearance. Look for a mesh front panel, at least two included fans, and stated clearance figures for GPU length and CPU cooler height. A tower cooler that’s 5mm too tall is a return shipment waiting to happen.
For cooling, air towers are reliable and quiet; all-in-one liquid coolers look cleaner and handle high-end CPUs well but add a pump as a failure point. Whichever route you take, plan the fan layout so intake exceeds exhaust slightly, which keeps positive pressure and reduces dust buildup.
Step 6: Gather Tools and Prep the Workspace
The build itself needs very little: a Phillips-head screwdriver, ideally magnetic, and a clean, hard, well-lit surface. Avoid carpet, which builds static. Touch an unpainted metal part of the case before handling components to discharge static electricity.
Anti-static wrist straps are cheap insurance but not mandatory if you work on a hard floor and avoid shuffling around. Keep the motherboard in its anti-static bag until the moment you’re ready to install the CPU. (Personal computer)
Step 7: Assemble Outside the Case First
Building the core on the motherboard box before it goes into the case saves a lot of frustration. The order that works:
- Seat the CPU in the socket, aligning the triangle marker, and close the retention arm.
- Install the M.2 SSD into its slot and secure the screw.
- Install the RAM, pressing firmly until both clips click.
- Mount the CPU cooler, applying a pea-sized dot of thermal paste unless it’s pre-applied.
- Attach the motherboard’s rear I/O shield if it isn’t integrated.
That click on the RAM is important. Half-seated memory is the single most common cause of a build that powers on but shows no display. Push until it’s uncomfortable, then push a little more.
Step 8: Move Everything Into the Case
Install the power supply first, fan orientation depending on whether the case has a bottom intake vent. Then fit the standoffs for your board’s form factor; a missing standoff can short the board, and an extra one under the wrong hole can do the same. Lower the motherboard in and start all screws loosely before tightening any of them.
Next comes the GPU, which goes into the top PCIe x16 slot and clicks into place. Support brackets are worth using on long, heavy cards to prevent sag.
Step 9: Cable Management and Front Panel Wiring
Connect the 24-pin motherboard cable, the 8-pin CPU power at the top of the board, and the PCIe cables to the GPU. Then handle the front panel headers: power switch, reset, USB, and audio. These tiny pins are fiddly, so check the motherboard manual rather than guessing.
Route cables behind the motherboard tray where possible. Good cable management isn’t cosmetic; it improves airflow and makes future upgrades far easier. If the machine will sit on a desk and stream, the best wireless gaming headsets 2026 pairs well with a tidy build, and a stable connection matters as much as the hardware inside the case, which is why the best internet for gaming deserves a look before blaming the PC for lag.
Step 10: First Boot, BIOS, and Windows
Power on with the monitor connected to the GPU, not the motherboard. If nothing appears, check in this order: RAM seating, the CPU power cable, and GPU seating. Those three account for the vast majority of no-POST situations.
Once in the BIOS, confirm the CPU and RAM are detected at correct capacities, then enable the memory profile (AMD EXPO or Intel XMP) so the RAM runs at its rated speed rather than the slow default. Set the boot order, then install Windows from a USB drive created with Microsoft’s media tool. Install chipset and GPU drivers afterward, and verify temperatures under load with a monitoring tool.
Common Mistakes That Cost Real Money
The pattern across failed first builds is remarkably consistent. Buying a CPU and motherboard without checking the socket. Forgetting that a high-end GPU needs a beefier PSU. Skipping the memory profile and wondering why benchmarks look low. Mounting the CPU cooler without removing the plastic film on the cold plate. Forgetting the standoffs. (How to Choose a Desktop Processor)
None of these are exotic. They’re just easy to miss when excitement takes over. Reading the motherboard manual once, cover to cover, prevents most of them.
Where the Build Goes Next
A finished PC is rarely finished. The next upgrades tend to be more storage, better cooling, or a monitor that matches the GPU’s output. For anyone who enjoys the tinkering side, the skills transfer: the same planning mindset behind how to build a home climbing wall diy applies to any project where measuring twice saves a rebuild. And if the interest drifts toward software, how to build an ai app is a natural next rabbit hole.
Conclusion
Building a gaming PC is less about technical wizardry and more about sequencing. Pick the CPU and motherboard as a matched pair, buy RAM in dual-channel kits, size the power supply with headroom, and assemble the core outside the case before committing to the enclosure. The two hours of assembly are the easy part; the careful part is the shopping list. Get that right, follow the manual, and the first boot is far more likely to be uneventful than dramatic. Most builders find the second build takes half the time of the first, and the knowledge sticks for decades.
Frequently Asked Questions
How long does it take to build a gaming PC?
For a first-timer, plan three to four hours including unboxing, assembly, cable management, and Windows installation. Experienced builders often finish in 90 minutes. Rushing the CPU cooler mount or front panel wiring is where time gets lost.
Do I need an anti-static wrist strap?
It helps but isn’t strictly required. Working on a hard floor, avoiding carpet, and touching unpainted metal on the case before handling parts reduces risk substantially. If the room is dry and carpeted, a strap is worth the small cost.
What is the most common first-build mistake?
Mismatching the CPU socket and motherboard, or failing to seat RAM fully. Both produce a machine that powers on with no display, which sends beginners hunting for complex causes when the fix is usually a firm push or a different board.
Can I build a gaming PC without a graphics card?
Only if the CPU has integrated graphics, and even then performance is limited to older or low-demand titles at reduced settings. For modern games at 1080p or above, a dedicated GPU is effectively mandatory.
Is it cheaper to build or buy a prebuilt PC?
Building usually wins on value at the mid and high end, where prebuilt markup is largest. At the very low end, prebuilt systems sometimes undercut DIY pricing because of bulk part deals. Compare total cost including the Windows license before deciding.
What should I do if the PC turns on but shows no display?
Check the monitor cable is plugged into the GPU, reseat the RAM until both clips click, confirm the 8-pin CPU power cable is connected, and reseat the GPU. If those fail, clear the CMOS and try booting with a single RAM stick.
Final Thoughts on the Shopping List
Before you click buy, run one last compatibility pass: CPU socket against motherboard, RAM type (DDR4 versus DDR5) against the board, GPU length against case clearance, and PSU wattage against the card’s recommendation. Builders who write the list down and check it twice consistently avoid the returns and rebuilds that sour a first project. Keep the boxes and receipts for at least thirty days, photograph the serial numbers, and register warranties where offered. When the parts arrive, sort them by build order rather than opening everything at once. That small discipline keeps the workspace clear and turns an intimidating pile of components into a sequence of simple, satisfying steps.